
Developing legible and fluent handwriting is a fundamental skill for children. While digital tools are prevalent, clear handwriting remains crucial for schoolwork, note-taking, and personal expression. Many parents and educators wonder how to best support kids struggling with their penmanship. It’s not just about neatness; good handwriting also impacts confidence, speed, and even academic performance.
This comprehensive guide offers practical, step-by-step methods and strategies to help improve a child’s handwriting, addressing everything from foundational skills to consistent practice.
Understanding the Foundations of Good Handwriting
Before diving into specific writing drills, it’s important to understand that good handwriting relies on several underlying skills:
- Fine Motor Skills: The ability to make small, precise movements with fingers and hands.
- Hand-Eye Coordination: The ability to process visual information and use it to guide hand movements.
- Core Strength and Posture: A strong core provides stability, allowing for better control of the arms and hands.
- Pencil Grasp: How a child holds the writing tool.
- Letter Formation: Knowing the correct strokes and sequences for each letter.
- Spacing and Alignment: Placing letters and words correctly on the line.
Addressing these foundational areas can significantly impact a child’s handwriting journey.
How to Improve Handwriting for Kids: Step-by-Step Guide
Here are practical steps to help your child develop clear and consistent handwriting.
Step 1: Strengthen Fine Motor Skills
Strong fine motor skills are the building blocks of good handwriting. Engage your child in activities that promote dexterity and hand strength.
- Play with Dough/Clay: Kneading, rolling, and shaping clay strengthens hand muscles.
- Building Blocks & LEGOs: Manipulating small pieces improves finger control.
- Puzzles: Grasping and placing puzzle pieces refines pincer grasp.
- Tearing Paper: Tearing paper into strips or shapes works finger muscles.
- Using Tongs or Tweezers: Picking up small objects with tweezers (e.g., beads, cotton balls) enhances precision.
- Cutting with Scissors: Practicing cutting along lines and shapes develops hand control.
- Lacing Beads or Threading Pasta: This activity improves hand-eye coordination and fine motor control.
Step 2: Ensure Proper Posture and Seating
A stable foundation is key. Poor posture can lead to fatigue and awkward writing positions.
- Feet Flat on the Floor: Ensure your child’s feet are flat on the floor or a footrest.
- Table Height: The table should be about elbow height when your child is seated. Forearms should rest comfortably on the table.
- Chair Support: A chair with good back support helps maintain an upright position.
- Relaxed Shoulders: Remind your child to keep their shoulders relaxed, not hunched up.
- Proper Paper Placement: The paper should be slightly slanted (angled towards the writing hand) to allow for a natural arm movement. For right-handers, slant the paper to the left; for left-handers, slant it to the right.
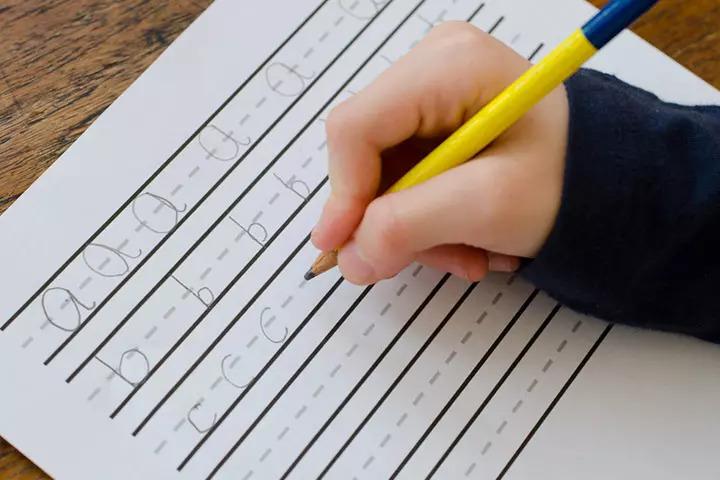
Step 3: Master the Pencil Grasp
The way a child holds a pencil significantly impacts comfort, control, and legibility. The tripod grasp (where the pencil is held by the thumb, index finger, and resting on the middle finger) is generally recommended.
- Observe the Grasp: Watch how your child naturally holds the pencil.
- Correcting the Grasp:
- Pencil Grips: Use ergonomic pencil grips that guide fingers into the correct position. These are widely available.
- Short Pencils: Sometimes, a shorter pencil can encourage a better grasp as it’s harder to hold too far up.
- “Flip Trick”: Place the pencil on the table with the tip pointing towards your child. Have them pick it up with their writing fingers, then “flip” it into position.
- Tissue Trick: Have the child hold a small tissue or cotton ball in their palm with their ring and pinky fingers. This encourages the other fingers to form the tripod grasp.
- Avoid the “Fist” or “Hook” Grasp: These grasps limit finger movement and can cause hand fatigue.
Step 4: Focus on Letter Formation
Correct letter formation is fundamental for legibility and speed.
- Model Correct Strokes: Demonstrate how to form each letter step-by-step. Use a top-to-bottom, left-to-right approach for most letters.
- Use Lined Paper: Start with wide-ruled paper that has a baseline, midline, and sometimes a top line. This helps children understand letter height and placement.
- Verbal Cues: Use consistent verbal cues as you demonstrate (e.g., “Start at the top, straight line down,” “Big curve to the left”).
- Tracing: Begin with tracing activities for individual letters and then words.
- Dot-to-Dot Letters: Provide outlines of letters with dots for children to connect.
- Air Tracing: Have children “write” letters in the air, focusing on the correct movement.
- Letter Families: Group letters with similar starting strokes (e.g., c, a, d, g, q; l, i, t, u, j).
- Practice Uppercase First: For younger children, start with uppercase letters as they generally involve simpler, straighter lines. Then move to lowercase.
Step 5: Practice Spacing and Alignment
Poor spacing and letters floating above or sinking below the line are common issues.
- Finger Spaces: Teach your child to use a “finger space” (the width of their index finger) between words.
- Visual Cues: Draw a small dot or a light vertical line to indicate where the next word should start.
- Maintain Baseline: Emphasize that letters should “sit” on the baseline. Use fun analogies like “letters shouldn’t float like balloons or sink like anchors.”
- Consistent Height: Work on keeping uppercase letters and tall lowercase letters (b, d, f, h, k, l, t) consistent in height, and smaller lowercase letters (a, c, e, i, m, n, o, r, s, u, v, w, x, z) consistent with each other.
- Descenders: Teach about descenders (g, j, p, q, y) that go below the baseline.
Step 6: Engage in Regular, Short Practice Sessions
Consistency is more important than long, tedious sessions.
- Short Bursts: Aim for 10-15 minute daily practice sessions rather than one long, overwhelming session once a week.
- Make it Fun: Incorporate games, colorful pens, or writing about topics your child enjoys.
- Variety of Tools: Don’t just stick to pencils. Let them write with crayons, markers, chalk, or even paint. This can make practice feel less like a chore.
- Handwriting Workbooks: Invest in age-appropriate handwriting workbooks that provide structured practice.
- Daily Writing: Encourage daily writing, whether it’s a journal, a short story, a letter to a friend, or even a grocery list.
- Positive Reinforcement: Focus on progress, not perfection. Praise effort and improvement. Highlight specific letters or words that look great.
Step 7: Address Common Handwriting Challenges
Some specific issues require targeted approaches.
- Speed vs. Neatness: If your child rushes, emphasize slowing down. If they are too slow, gently encourage them to find a comfortable pace while maintaining legibility.
- Reversals (b/d, p/q): Continue practicing letter formation, use multi-sensory approaches (tracing in sand, forming with playdough), and provide visual reminders. This is common in early stages and often resolves with practice.
- Uneven Pressure: If your child presses too hard (hand cramps, rips paper) or too lightly (faint letters), experiment with different pencil types (e.g., softer lead pencils for light pressure, firmer lead for heavy pressure) or pencil grips that encourage a lighter touch.
Step 8: Seek Professional Guidance if Needed
While these steps can significantly help, some children may have underlying issues.
- Occupational Therapy (OT): If your child consistently struggles with fine motor skills, hand strength, or coordination despite consistent effort, an occupational therapist can provide specialized assessments and interventions.
- Learning Specialists: If handwriting difficulties are part of a broader learning challenge, a learning specialist or educational psychologist might be able to offer additional support.
Improving handwriting is a journey, not a race. With consistent practice, patience, and a positive approach, you can significantly help your child develop clear, confident, and functional handwriting skills.