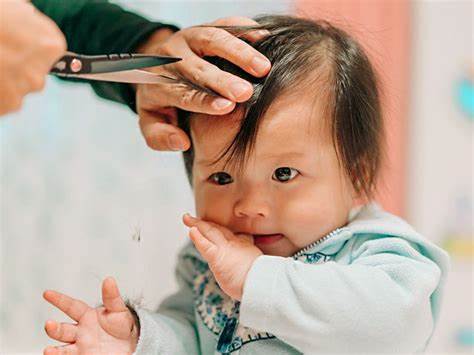
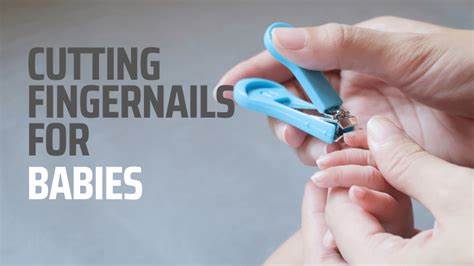
Trimming a baby’s tiny, sharp nails can feel like a daunting task for new parents. Those little talons can cause scratches on their delicate skin or even on yours. The good news is, with the right tools, technique, and a bit of patience, it’s a perfectly manageable chore that becomes easier with practice. This guide will walk you through various methods to ensure a safe and tear-free nail trimming experience.
Why Trimming Baby Nails is Important
Baby nails grow surprisingly fast and can be incredibly sharp. Because babies lack fine motor control, they often scratch their faces, eyes, and even other people. Keeping their nails short and smooth prevents these accidental injuries and helps maintain good hygiene.
Essential Tools for Trimming Baby Nails
Choosing the right tool is the first step to a successful trim. There are several options, each with its pros and cons.
- Baby Nail Clippers:
- Description: These are smaller versions of adult clippers, often with a curved cutting edge and a safety guard to prevent cutting too deeply.
- Pros: Quick and efficient once you get the hang of them.
- Cons: Can be intimidating due to their sharpness; requires steady hands.
- Best for: Slightly older babies or when you need a quick trim.
- Baby Nail Scissors:
- Description: Small scissors with rounded, blunt tips designed specifically for babies.
- Pros: Offer more control and visibility than clippers; less intimidating for some parents.
- Cons: Can still be tricky if the baby wiggles a lot; takes more time per nail.
- Best for: Newborns and young infants with very soft nails.
- Baby Nail File (Emery Board or Electric Nail File):
- Description: Fine-grit emery boards or battery-operated electric nail files (often with multiple filing pads of varying grits).
- Pros: The safest option for newborns as there’s no risk of cutting skin; smooths sharp edges effectively. Electric files are particularly gentle and quiet.
- Cons: Can be time-consuming; may not be sufficient for significantly long nails; emery boards wear out quickly.
- Best for: Newborns, very young infants, or for smoothing rough edges after clipping/cutting.
When to Trim Baby Nails: Timing is Everything
Choosing the right moment can significantly reduce stress for both you and your baby.
- During Sleep: This is often the preferred method for many parents. When your baby is in a deep sleep, their hands are relaxed, and they are less likely to wiggle. This provides a calm and still environment for trimming.
- After a Bath: Baby’s nails are softer and more pliable after a warm bath, making them easier to trim and less likely to split.
- During Feeding: If your baby is calm and content while feeding (especially bottle-feeding), you might find them distracted enough to get a few nails done. Be mindful of their position to avoid accidents.
- When Distracted: For older, more active babies, a favorite show, toy, or even a different caregiver distracting them can help.
Step-by-Step Guide: How to Trim Baby Finger Nails
Finger nails tend to grow faster and are sharper than toenails, requiring more frequent attention. Aim to trim them about once a week.
- Gather Your Supplies: Have your chosen tool (clippers, scissors, or file), a bright light, and optionally a mild antiseptic wipe or cotton ball handy in case of a tiny nick (though with proper technique, this is rare).
- Choose Your Moment: Select a time when your baby is calm, sleepy, or otherwise distracted.
- Position Your Baby:
- Sleeping Baby: Gently hold their hand.
- Awake Baby: You might need a second person to help gently hold their hand still. If alone, try the “hug hold” where you tuck your baby’s arm under your armpit while you hold their hand, or cradle them in your arm.
- Isolate the Finger: Gently hold the baby’s finger you are about to trim.
- Press Down the Finger Pad: This is the most crucial step! Using your thumb and forefinger, gently push the fleshy part of the fingertip down and away from the nail. This creates a clear separation between the nail and the skin underneath, significantly reducing the risk of a nick.
- Trim the Nail (Method specific):
- With Clippers: Place the clippers directly over the nail, avoiding the quick (the pink part underneath the nail). Make a single, quick snip straight across, following the natural curve of the nail. Avoid cutting them too short.
- With Scissors: Position the rounded tips of the scissors under the nail, again, pushing the finger pad down. Make small, controlled snips, following the curve.
- With a File (Emery Board or Electric): Gently file the nail in one direction or small, smooth motions, shaping it. For electric files, use the appropriate grit and apply light pressure until the nail is smooth and short enough. This method is excellent for rounding off any sharp corners left by clippers or scissors.
- Smooth Rough Edges: Regardless of the method used, always finish by gently filing any sharp or jagged edges with a baby nail file. This prevents new scratches.
- Repeat for Each Finger: Take your time, and move to the next finger when both you and the baby are ready. Don’t feel pressured to do all nails in one sitting.
Step-by-Step Guide: How to Trim Baby Toe Nails
Baby toenails grow slower and are less sharp than fingernails, so they generally require less frequent trimming (perhaps once or twice a month).
- Prepare as for Finger Nails: Gather tools and choose a calm moment.
- Position the Foot: Gently hold your baby’s foot.
- Press Down the Toe Pad: Similar to fingernails, gently push the fleshy part of the toe pad down and away from the nail.
- Trim Straight Across: For toenails, it’s generally recommended to trim straight across rather than curving the nail. This helps prevent ingrown toenails. Be careful not to cut too short.
- Smooth Edges: Use a file to smooth any sharp edges.
What to Do If You Accidentally Nick Your Baby
Despite all precautions, sometimes a tiny nick can happen. Don’t panic; it’s a common occurrence for parents.
- Apply Gentle Pressure: Immediately apply gentle, clean pressure to the wound with a clean cloth or sterile gauze for a few minutes until the bleeding stops.
- Cleanse: Once bleeding stops, gently clean the area with mild soap and water or a mild antiseptic wipe.
- Do NOT Use Bandages: Avoid using bandages or plasters on baby fingers or toes, as they pose a choking hazard if they come loose.
- Observe: Keep an eye on the area for any signs of redness, swelling, or pus, which could indicate infection. If you notice these, or if the bleeding doesn’t stop, contact your pediatrician.
Pro Tips from Experienced Parents
- Warmth and Comfort: Ensure your baby is warm and comfortable before you start. A fussy baby will make the task much harder.
- Good Lighting: Always trim in a well-lit area so you can clearly see the nail and the quick.
- One Nail at a Time: If your baby is particularly squirmy, try trimming just one or two nails at a time over several sessions. Slow and steady wins the race.
- Make it a Routine: Incorporate nail trimming into your baby’s regular routine, perhaps after bath time, so they become accustomed to it.
- Praise and Comfort: Talk to your baby gently throughout the process. Offer praise, cuddles, or a pacifier afterward.
- Consider Teamwork: If you have a partner or another caregiver, one person can gently hold and distract the baby while the other trims the nails. This makes the process much easier.
- Electric File for Beginners: If you’re particularly nervous, start with an electric baby nail file. They are virtually impossible to cause injury with and are excellent for building confidence.
Trimming baby nails is a rite of passage for parents. While it might seem intimidating at first, with the right approach and a little practice, you’ll become a pro at keeping those tiny nails neat and tidy, ensuring your baby stays safe and scratch-free.