Category: EDITORIAL

  • How to Handle Baby Vomiting After Feeding

    How to Handle Baby Vomiting After Feeding

    Witnessing your baby vomit after feeding can be an alarming experience for any parent. Is it just a little spit-up, or something more serious? Understanding the difference and knowing the right steps to take can alleviate anxiety and ensure your little one receives the appropriate care. Most instances of babies spitting up or even vomiting after feeding are harmless, but some situations warrant immediate medical attention.

    This guide will walk you through the essential steps for handling baby vomiting after feeding, from identifying the type of vomit to knowing when it’s time to call the doctor.

    Spit-Up vs. Vomiting: Knowing the Difference

    It’s crucial to distinguish between spit-up (also known as reflux or regurgitation) and actual vomiting. While both involve contents coming up from the stomach, their characteristics differ significantly.

    • Spit-Up (Gastroesophageal Reflux – GER): This is a very common occurrence in infants, especially newborns. It’s the easy, effortless flow of milk or formula from the baby’s stomach back through the mouth, often accompanied by a burp. It typically looks like the milk or formula the baby just consumed and usually doesn’t cause distress. The lower esophageal sphincter (LES), a ring of muscle between the esophagus and stomach, is still developing in infants, allowing stomach contents to easily flow back up. This often decreases as the baby gets older, usually by 10-12 months.
    • Vomiting: This is a more forceful ejection of stomach contents, involving muscle contractions of the diaphragm and abdominal wall. It’s often projectile (shooting out with force) and can be distressing for the baby. Vomiting typically indicates an underlying issue, even if minor.

    Immediate Steps When Your Baby Vomits

    When your baby vomits after feeding, your first reaction might be panic. Remain calm and follow these immediate steps:

    1. Clear the Airway:
      • Immediately turn your baby to their side or belly, or hold them upright to prevent choking or aspiration (inhaling vomit into the lungs).
      • Gently clear their mouth and nose with a soft cloth or bulb syringe if necessary. Ensure there’s nothing obstructing their breathing.
    2. Assess the Vomit:
      • Amount: Was it a small amount, or did it seem like the entire feeding?
      • Force: Was it just a gentle flow (spit-up) or forceful/projectile?
      • Color and Consistency:
        • Milk/Formula: Normal for spit-up, common for vomiting.
        • Clear liquid: Often seen after multiple episodes of vomiting when the stomach is empty.
        • Yellow or Green (Bile): This is a significant concern and usually indicates a blockage in the intestines. Seek immediate medical attention.
        • Red (Blood) or Coffee Grounds-like: This also requires immediate medical attention, as it indicates bleeding in the upper digestive tract.
        • Mucus: Can be a sign of irritation or illness.
    3. Observe Your Baby’s Demeanor:
      • Is your baby distressed, crying inconsolably, or in pain?
      • Are they unusually sleepy, lethargic, or unresponsive?
      • Are they still alert, playful, and otherwise acting normal?
    4. Clean Up:
      • Gently clean your baby’s face, mouth, and clothes. Change soiled clothing to keep them comfortable.
      • Clean the surrounding area to prevent the spread of germs, especially if the vomiting is due to an infection.

    After the Vomiting Episode: Next Steps

    Once the immediate crisis passes, your focus shifts to preventing dehydration and determining the cause.

    1. Preventing Dehydration

    Dehydration is the most significant concern with vomiting, especially in infants who can lose fluids rapidly.

    • For Breastfed Babies: Continue breastfeeding frequently. Breast milk is easily digestible and helps keep your baby hydrated. Offer shorter, more frequent feeds if your baby is tolerating them.
    • For Formula-Fed Babies:
      • Wait about 30 to 60 minutes after the last vomit before offering any fluids. This allows the stomach to rest.
      • Start with small, frequent sips of oral rehydration solution (ORS) like Pedialyte. Do not dilute formula or give plain water to infants, as they need electrolytes. Your pediatrician can advise on the appropriate ORS.
      • For babies under 1 year, offer 1-2 teaspoons (5-10 mL) of ORS every few minutes using a spoon or syringe.
      • If they tolerate ORS, gradually reintroduce formula. Start with smaller amounts than usual.
    • For Babies on Solids: If your baby is older and on solids, avoid solid foods for a few hours. Once they haven’t vomited for 6-8 hours, introduce bland, starchy foods like rice cereal, crackers, or toast, if age-appropriate. Avoid sugary or greasy foods.

    Signs of Dehydration in Babies:

    • Fewer wet diapers (less than 6 wet diapers in 24 hours for newborns, less than 3 for older babies).
    • Dry mouth and tongue.
    • No tears when crying.
    • Sunken soft spot (fontanelle) on top of the head.
    • Sunken eyes.
    • Lethargy, unusual drowsiness, or extreme irritability.
    • Cool, pale, or mottled skin.

    If you observe any signs of dehydration, contact your doctor immediately.

    1. Monitor and Observe
    • Frequency of Vomiting: Keep track of how often your baby is vomiting and the general amount.
    • Feeds Tolerated: Note if your baby is able to keep down any fluids or milk.
    • Other Symptoms: Are there any other symptoms present, such as fever, diarrhea, rash, cough, or changes in stool?
    • Activity Level: Is your baby still playful and engaged between vomiting episodes, or are they unusually quiet and sleepy?
    1. Keep Baby Upright

    After feeding, hold your baby upright for 20-30 minutes. This helps gravity keep the milk down and can reduce reflux. Avoid vigorous play or tummy time immediately after a feed.

    1. Burp Frequently

    Burping your baby frequently during and after feeds can help release trapped air, which can contribute to spit-up and vomiting.

    1. Don’t Overfeed

    Sometimes, babies vomit because they’ve consumed too much. Try offering smaller, more frequent feeds.

    When to Seek Medical Attention

    While most vomiting episodes resolve on their own, certain signs indicate a need for immediate medical evaluation. Call your pediatrician or seek emergency medical care if your baby:

    • Shows signs of dehydration. This is the most critical concern.
    • Has projectile vomiting that is consistently forceful after every feeding, especially in infants 3-6 weeks old. This could indicate pyloric stenosis, a condition where the muscle at the stomach exit thickens, blocking food from passing into the intestines. It requires surgical correction.
    • Vomits green or yellow fluid (bile) or vomit that looks like coffee grounds or contains blood. These are signs of serious gastrointestinal issues or bleeding.
    • Refuses to feed or is unable to keep down any fluids for several hours.
    • Has persistent vomiting (more than 24-48 hours, or 6-8 episodes in 24 hours), especially if accompanied by diarrhea.
    • Develops a high fever (especially in infants under 3 months) along with vomiting.
    • Is unusually lethargic, drowsy, or unresponsive.
    • Has a sunken soft spot (fontanelle) on their head.
    • Has a swollen or tender abdomen.
    • Experiences pain or extreme irritability (e.g., arching back, inconsolable crying) during or after feeding.
    • Develops vomiting after a head injury.
    • Vomiting begins after 6 months of age if it’s a sudden, new symptom not attributed to a common illness.

    Common Causes of Vomiting in Babies (Beyond Normal Spit-Up)

    Beyond the normal infant reflux, vomiting can be caused by various factors, some of which require medical attention:

    • Infections:
      • Gastroenteritis (“stomach flu”): Viral or bacterial infections are a common cause of vomiting and diarrhea.
      • Other infections: Ear infections, urinary tract infections, or respiratory infections can sometimes cause vomiting as a secondary symptom.
    • Food Allergies or Intolerances:
      • Cow’s Milk Protein Allergy (CMPA): A common allergy in infants where the immune system reacts to proteins in cow’s milk (either from formula or transferred via breast milk from the mother’s diet). Symptoms can include vomiting, diarrhea (sometimes with blood), skin rashes, and poor weight gain.
      • Other food allergies (e.g., soy, wheat) can also cause vomiting.
    • Overfeeding: Giving too much milk or formula at once can overwhelm a baby’s digestive system.
    • Swallowing Air: Excessive air swallowed during feeding can lead to gas and spit-up/vomiting.
    • Improper Feeding Technique: A bottle nipple with too large a hole can cause milk to flow too fast, leading to gulping and vomiting.
    • Gastroesophageal Reflux Disease (GERD): This is a more severe form of GER where reflux causes troublesome symptoms or complications like poor weight gain, feeding difficulties, or respiratory issues.
    • Pyloric Stenosis: As mentioned, this is a serious condition characterized by forceful, projectile vomiting, typically starting between 3-6 weeks of age, due to a narrowed stomach outlet.
    • Intestinal Blockage: Rare but serious conditions like intestinal malrotation or intussusception can cause sudden, severe vomiting (often bile-stained), abdominal pain, and lethargy.

    Prevention Tips (for Spitting Up and Mild Vomiting)

    While not all vomiting can be prevented, you can reduce instances of spit-up and mild vomiting by:

    • Keeping feeds calm: Avoid feeding when your baby is overly distressed.
    • Burping frequently: Burp your baby several times during and after feeds.
    • Avoiding overfeeding: Offer smaller, more frequent feeds.
    • Holding upright after feeding: Keep your baby in an upright position for 20-30 minutes after each feed.
    • Checking bottle nipple size: Ensure the hole in the bottle nipple is not too large, causing milk to flow too quickly.
    • Minimizing activity after feeds: Avoid vigorous play or jostling your baby immediately after they eat.
    • Elevating the head of the crib/bassinet slightly: For babies with frequent reflux, your pediatrician might suggest slightly elevating the head of their sleeping surface. Always place babies to sleep on their backs.

    Learning to differentiate between normal baby spit-up and true vomiting, and understanding when to seek professional help, is an invaluable skill for any parent. When in doubt, always err on the side of caution and consult your pediatrician. Your baby’s health and well-being are paramount.

    FAQ (Frequently Asked Questions)

    Q1: What’s the difference between a baby spitting up and actually vomiting?

    Spitting up (reflux) is the effortless, easy flow of milk or formula out of the baby’s mouth, often with a burp. It’s usually small in volume and doesn’t bother the baby. Vomiting, on the other hand, is a forceful ejection of stomach contents, often projectile, and indicates that the baby’s stomach muscles are contracting. It often causes distress.

    Q2: How can I tell if my baby is becoming dehydrated after vomiting?

    Key signs of dehydration in babies include:

    • Fewer wet diapers than usual (e.g., less than 6 in 24 hours for newborns, less than 3 for older infants).
    • Dry mouth and tongue.
    • No tears when crying.
    • Sunken soft spot (fontanelle) on the head.
    • Sunken eyes.
    • Unusual lethargy or irritability. If you notice any of these signs, contact your pediatrician immediately.

    Q3: Should I continue feeding my baby if they’ve been vomiting?

    If your baby has just vomited, it’s best to wait 30-60 minutes to allow their stomach to settle. For breastfed babies, continue to offer frequent, shorter feeds. For formula-fed babies, reintroduce fluids slowly with small sips of an oral rehydration solution (ORS) first, before attempting formula again in smaller amounts. Do not force feeds.

    Q4: What does green or yellow vomit mean in a baby?

    Green or yellow vomit (bile) in a baby is a serious sign and requires immediate medical attention. It can indicate a blockage in the intestines, which needs urgent diagnosis and treatment.

    Q5: Can baby vomiting be a sign of a food allergy?

    Yes, recurrent vomiting can be a symptom of a food allergy or intolerance, such as Cow’s Milk Protein Allergy (CMPA). Other symptoms might include diarrhea (sometimes with blood in stool), skin rashes like eczema or hives, excessive fussiness, or poor weight gain. If you suspect a food allergy, consult your pediatrician.

    Q6: What is pyloric stenosis and why is it important to know about it?

    Pyloric stenosis is a condition where the muscle at the outlet of the stomach (the pylorus) thickens, blocking food from entering the small intestine. It’s important because it causes forceful, projectile vomiting after almost every feed, typically starting between 3 to 6 weeks of age. Babies with pyloric stenosis are constantly hungry but cannot keep food down, leading to weight loss and dehydration. It requires prompt surgical intervention.

    Q7: When should I take my baby to the emergency room for vomiting?

    Go to the emergency room if your baby:

    • Shows significant signs of dehydration.
    • Has projectile vomiting consistently after every feed (especially 3-6 weeks old).
    • Vomits green or yellow fluid, blood, or something resembling coffee grounds.
    • Is extremely lethargic, unresponsive, or unusually irritable.
    • Has a swollen or tender abdomen.
    • Develops vomiting after a head injury.

    Q8: How can I prevent my baby from spitting up so much?

    You can try to reduce spit-up by:

    • Burping your baby frequently during and after feeds.
    • Avoiding overfeeding; try smaller, more frequent feeds.
    • Keeping your baby upright for 20-30 minutes after feeding.
    • Ensuring the bottle nipple flow is appropriate (not too fast).
    • Avoiding vigorous play or jostling right after a meal.
  • How to Feed Baby for Healthy Weight Gain

    How to Feed Baby for Healthy Weight Gain

    Ensuring your baby achieves healthy weight gain is a top concern for most new parents. Those early months are full of rapid changes—babies typically double their birth weight by around 4 to 6 months and triple it by their first birthday. But it’s not just about watching the numbers go up. This growth is one of the clearest signs that your baby is getting the right nutrition and developing as they should. Pediatricians track this closely using growth charts to help make sure everything is on track.

    Whether you’re breastfeeding, using formula, or starting on solids, understanding how to navigate each stage of feeding is key. Here’s a detailed, practical guide to support your baby’s healthy weight gain.

    Section 1: Feeding Your Newborn (0-6 Months)

    In these early months, breast milk or infant formula is your baby’s sole source of nutrition. Focus on frequent, quality feeds.

    If Breastfeeding:

    Breast milk offers an ideal mix of nutrients. It’s tailored to your baby’s needs and is easy to digest.

    1. Feed on Demand: Watch for hunger cues like rooting, lip-smacking, or bringing hands to their mouth. Try not to follow a rigid schedule—babies usually need 8-12 feeds in 24 hours.
    2. Ensure Effective Latch: A good latch allows your baby to draw enough milk. You should hear swallowing, not just sucking. Pain during feeding might signal a latch issue. Don’t hesitate to get help from a lactation consultant.
    3. Let Baby Finish One Breast: Encourage your baby to finish one side before switching. This way, they get both the foremilk (more watery) and the hindmilk (richer in fat and calories).
    4. Monitor Diapers: Plenty of wet (6-8 daily) and dirty diapers (3-4 mustard-colored stools) suggest good intake.
    5. Block Feeding (When Advised): If your baby seems to take in too much foremilk—resulting in green stools or gassiness—a lactation consultant might recommend offering one breast per feeding block. But definitely don’t try this without professional input.

    If Formula Feeding:

    Formula is a reliable alternative to breast milk when used properly.

    1. Mix Correctly: Follow instructions exactly. Too much water dilutes nutrients, while too little can stress your baby’s kidneys.
    2. Feed Responsively: Watch your baby, not the clock. Hunger cues matter more than a strict schedule.
    3. Check Volumes: On average, your baby might need around 2.5 oz of formula per pound of body weight per day. Your pediatrician can guide you based on individual needs.
    4. Don’t Over-Pace: While paced feeding helps prevent overfeeding, be cautious not to underfeed. Pay attention to your baby’s cues.
    5. Skip Cereal in Bottles (Unless Directed): Adding cereal to bottles isn’t recommended unless advised by a doctor. It can be a choking risk and may lead to excess weight gain.

    Section 2: Introducing Solid Foods (6-12 Months)

    Once your baby hits about 6 months, they may start showing signs they’re ready for solids. Solids won’t replace milk or formula right away, but they start to play an important complementary role.

    1. Watch for Readiness: Signs include sitting up with little help, good head control, and interest in your food.
    2. Start with Iron-Rich Foods: Iron needs increase around this time. Go for iron-fortified cereals or pureed meats like chicken or beef.
    3. Choose Nutrient-Dense Foods: Prioritize foods with real nutritional punch:
      • Avocado: Creamy, full of healthy fats.
      • Bananas: Calorie-dense and sweet.
      • Sweet Potatoes: Nutrient-packed and easy to mash.
      • Full-Fat Yogurt (8+ months): Great source of calcium and fat.
      • Eggs (8+ months): Rich in protein and fats.
      • Lentils/Dals: High in fiber, protein, and iron.
      • Healthy Fats: A teaspoon of ghee or olive oil in purees boosts calories.
      • Whole Grains: Oatmeal or ragi for sustained energy.
      • Meats: Finely shredded or pureed chicken, turkey, or fish.
    4. Offer Meals Regularly: Start with 2-3 meals a day, and add nutritious snacks over time.
    5. Portion Progression: Begin with 1-2 teaspoons and gradually increase.
    6. Skip Sugars and Salts: Your baby’s kidneys aren’t ready, and early sugar habits aren’t ideal.
    7. Introduce Allergens Safely: Talk to your pediatrician before introducing potential allergens. Timing matters, but safety first.

    Section 3: Monitoring Weight Gain and When to Seek Help

    Your pediatrician will track weight, length, and head circumference at regular visits. Here’s what to watch for:

    Signs Things Are Going Well:

    • Regaining birth weight by 2 weeks.
    • Steady growth along a curve.
    • Plenty of wet and dirty diapers.
    • General alertness and contentment.

    Red Flags Worth Mentioning:

    • Not regaining birth weight by 2 weeks.
    • Less than 1 oz/day gain (0-3 months), or less than 0.67 oz/day (3-6 months).
    • Falling percentiles on growth charts.
    • Excessive sleepiness or fussiness.
    • Fewer diapers than expected.
    • Difficulty feeding, frequent spitting up, or signs of discomfort.

    In some cases, slow weight gain (or “failure to thrive”) can have underlying causes like digestive issues or latch problems. Your pediatrician can help figure out what’s going on and refer you to specialists if needed.

    Frequently Asked Questions (FAQ)

    Q1: How much weight should my newborn gain per week? Most newborns gain about 5-7 ounces (150-200 grams) per week in the first few months. Your pediatrician will keep an eye on this during well-baby visits.

    Q2: My baby seems to feed constantly but isn’t gaining much weight. What could be wrong? It could point to inefficient milk transfer (with breastfeeding) or incorrect formula preparation. Babies who take in too much foremilk might miss out on those calorie-rich final sips. Speak with a lactation consultant or pediatrician.

    Q3: When should I introduce solids to help with weight gain? Around 6 months—not before. Signs of readiness are key. Solids can support weight gain, but shouldn’t rush the transition.

    Q4: What high-calorie foods are good for weight gain? Think avocados, bananas, full-fat yogurt, pureed meats, lentils, and adding a bit of ghee or oil to meals. Introduce one new food at a time to monitor for reactions.

    Q5: Can stress affect my baby’s weight gain? Indirectly, yes. Stress in caregivers can affect routines or milk supply, especially in breastfeeding moms. But typically, feeding or medical issues are more directly responsible.

    Feeding your baby well is an ongoing process with lots of learning along the way. By tuning into your baby’s cues, choosing nutrient-rich foods, and working closely with your pediatrician, you’re laying the groundwork for healthy growth and development.

  • How to Introduce Toys to Encourage Motor Skills

    How to Introduce Toys to Encourage Motor Skills

    Motor skills are the foundational abilities that allow children to move and interact with their environment. These skills are crucial for a child’s overall development, impacting everything from daily self-care to academic performance and social interaction. When we talk about motor skills, we categorize them into two main types:

    • Gross Motor Skills: These involve the large muscle groups in the body and are responsible for movements like crawling, walking, running, jumping, balancing, and throwing. Developing gross motor skills helps children gain strength, coordination, and agility, allowing them to explore their surroundings and participate in physical play.
    • Fine Motor Skills: These involve the smaller muscles, primarily in the hands and fingers, and are essential for precise movements. Examples include grasping, holding, drawing, writing, buttoning clothes, and manipulating small objects. Fine motor development is critical for tasks requiring hand-eye coordination and dexterity.

    Both types of motor skills develop progressively from birth, with each milestone building upon the previous one. Providing the right toys and encouragement plays a significant role in helping children practice and master these essential movements.

    A Brief History of Educational Toys: The concept of using toys for educational purposes isn’t new. Historically, toys like dolls and miniature weapons served to teach societal roles. In the 18th and 19th centuries, figures like John Locke advocated for educational play, leading to innovations like Locke’s Blocks (alphabet blocks) and jigsaw puzzles (initially “dissected maps” for geography). The 20th century saw the rise of construction sets like LEGO and Montessori manipulatives, further solidifying the role of toys in fostering development. Today, this tradition continues with a vast array of toys designed to enhance specific motor skills.

    How to Introduce Toys to Encourage Motor Skills: A Step-by-Step Guide

    Introducing toys effectively means choosing the right ones and creating an environment that encourages engagement and exploration.

    Step 1: Understand Developmental Stages and Choose Age-Appropriate Toys

    The key to successful motor skill development through play is ensuring the toys match your child’s current developmental stage and challenge them appropriately without causing frustration.

    • For Infants (0-12 months) – Focus on Early Gross & Fine Motor Skills:
      • Gross Motor: Look for toys that encourage tummy time, reaching, rolling, pushing up, sitting, crawling, and pulling to stand.
        • Examples: Play mats with hanging toys (for reaching/batting), soft balls (for rolling/pushing), tummy time mirrors, activity gyms, baby walkers (stationary or push-along for early walkers), play tunnels (for crawling).
      • Fine Motor: Focus on grasping, holding, bringing objects to the mouth, and transferring objects between hands.
        • Examples: Rattles, soft textured blocks, safe teethers, fabric books, activity cubes with simple buttons/levers, stacking rings with large pieces.
    • For Toddlers (1-3 years) – Building on Mobility and Hand Dexterity:
      • Gross Motor: Toys that promote walking, running, climbing, pushing, pulling, and balancing.
        • Examples: Push-and-pull toys (wagons, animal pull-toys), ride-on toys (scooters, trikes), soft climbing structures (foam blocks, small slides), balls of various sizes (for kicking, throwing, catching), tunnels.
      • Fine Motor: Toys that encourage stacking, nesting, inserting, turning, scribbling, and simple manipulation.
        • Examples: Large building blocks (Duplo, Mega Bloks), shape sorters, pegboards with large pegs, chunky puzzles with knobs, pop-up toys, Play-Doh (with supervision), large crayons.
    • For Preschoolers (3-5 years) – Refining Coordination and Precision:
      • Gross Motor: Toys that encourage more complex movements like hopping, skipping, jumping, climbing, and advanced throwing/catching.
        • Examples: Bicycles with training wheels, jump ropes, balance beams, outdoor play equipment (swings, climbing frames), sports balls (soccer, basketball), obstacle course components.
      • Fine Motor: Toys that foster drawing, cutting, threading, buttoning, zipping, and intricate building.
        • Examples: Smaller building blocks (LEGO bricks), lacing beads, child-safe scissors and paper, art supplies (paints, markers), puzzles with more pieces, pattern blocks, dressing dolls with fasteners.

    Step 2: Create an Engaging and Safe Play Environment

    The physical space where your child plays is just as important as the toys themselves.

    • Clear the Area: Ensure there’s enough clear space for gross motor activities like crawling, walking, running, and climbing without obstructions. For fine motor play, provide a comfortable, well-lit surface.
    • Accessibility: Place toys within easy reach of your child. For infants, place toys slightly out of reach during tummy time to encourage stretching and reaching.
    • Safety First: Always supervise play, especially with smaller parts that could be choking hazards for children under three. Check toys regularly for wear and tear.
    • Rotate Toys: Don’t put out all toys at once. Rotate them every few weeks to keep things fresh and exciting, maintaining your child’s interest and encouraging them to explore different motor skills.

    Step 3: Demonstrate and Play Together

    Children learn best through observation and imitation. Your active participation is invaluable.

    • Model the Action: Show your child how to use a toy. For example, demonstrate how to stack blocks, roll a ball, or insert shapes into a sorter.
    • Engage in Parallel Play: Play alongside your child, doing similar activities but allowing them their own exploration.
    • Provide Verbal Encouragement: Use simple, positive language to praise their efforts, even if they don’t succeed immediately. “You’re trying so hard to stack that block!” or “Great job pushing the car!”
    • Narrate Actions: Describe what you’re doing and what they’re doing. “I’m rolling the ball to you!” or “You’re picking up that small bead.” This connects the physical action to language.

    Step 4: Offer Open-Ended Play Opportunities

    Toys that can be used in multiple ways are excellent for fostering creativity and allowing children to challenge their motor skills organically.

    • Limit Electronic Toys: While some electronic toys have educational value, prioritize toys that require physical manipulation rather than just pressing buttons.
    • Embrace Simple Toys: Blocks, scarves, empty boxes, and sensory bins (e.g., with rice, beans, or water and cups) offer endless possibilities for motor skill practice.
    • Encourage Problem-Solving: Let your child figure out how to use a toy or overcome a challenge. Resist the urge to jump in immediately. For instance, if a child is struggling to fit a shape, let them try different angles before offering a hint.

    Step 5: Follow Your Child’s Lead and Be Patient

    Every child develops at their own pace. Respect their individual interests and abilities.

    • Observe: Pay attention to which toys and activities your child gravitates towards. This indicates their current interests and developmental readiness.
    • Don’t Force It: If a child isn’t interested in a particular toy or activity, don’t force it. Reintroduce it another time or try a different approach. Play should always be enjoyable.
    • Celebrate Small Victories: Acknowledge and celebrate every new motor skill milestone, no matter how small. The joy of accomplishment is a powerful motivator.
    • Integrate Play into Daily Routines: Simple activities like helping to put toys away, dressing themselves, or helping in the kitchen (stirring, pouring under supervision) also build motor skills.

    Frequently Asked Questions (FAQ)

    Q1: What are the two main types of motor skills?

    The two main types of motor skills are gross motor skills, which involve large muscle movements (like walking, running, jumping), and fine motor skills, which involve small muscle movements (like grasping, writing, buttoning).

    Q2: How can I tell if a toy is appropriate for my child’s motor skill development?

    A toy is appropriate if it challenges your child slightly, encourages active engagement (rather than passive observation), and is safe for their age group (e.g., no choking hazards for young children). Consider if it promotes reaching, grasping, pushing, pulling, balancing, or manipulating small objects.

    Q3: My child seems uninterested in the motor skill toys I buy. What should I do?

    First, ensure the toys are truly age-appropriate. Second, try demonstrating how to use the toy yourself and play alongside them. Rotate toys to maintain novelty. Sometimes, simpler, open-ended items like scarves, cardboard boxes, or even household items (under supervision) can be more engaging than complex toys.

    Q4: Can screen time affect motor skill development?

    Excessive screen time can potentially hinder motor skill development because it often involves passive consumption rather than active physical engagement. While some educational apps exist, hands-on play is crucial for developing both gross and fine motor skills. Balance is key.

    Q5: Are there any specific toys that are universally good for motor skills across different ages?

    Yes, some classic toys adapt well. Blocks (large for toddlers, smaller for preschoolers) are excellent for both fine motor (grasping, stacking) and gross motor (reaching, moving around to build). Balls are fantastic for gross motor skills at almost any age. Puzzles (chunky knob puzzles for toddlers, jigsaw for older children) develop fine motor skills and problem-solving.

    Q6: When should I be concerned about my child’s motor skill development?

    While every child develops at their own pace, if you notice significant delays in reaching motor milestones (e.g., not sitting by 9 months, not walking by 18 months, consistent difficulty with fine motor tasks expected for their age), or if they seem unusually clumsy or uncoordinated, it’s advisable to consult with your pediatrician. They can assess development and recommend appropriate interventions if needed.

  • How to Help Baby Sleep for Better Health

    How to Help Baby Sleep for Better Health

    Optimizing a baby’s sleep for better health is a critical aspect of early childhood development. Proper sleep supports a baby’s physical growth, cognitive development, and emotional well-being. Conversely, insufficient or poor-quality sleep can lead to developmental delays, irritability, and health issues. Understanding and implementing effective sleep strategies is essential for parents.

    How to Help Your Baby Sleep for Better Health

    Ensuring your baby gets enough quality sleep is one of the most impactful things you can do for their overall health and development. From boosting their immune system to supporting brain growth, sleep plays a vital role. This guide provides a step-by-step approach to establishing healthy sleep habits for your little one.

    Sleep is a naturally recurring state of mind and body, characterized by altered consciousness, relatively inhibited sensory activity, reduced muscle activity, and inhibition of nearly all voluntary muscles during rapid eye movement (REM) sleep. For infants, sleep is crucial as it’s during these periods that much of their physical and mental development occurs.

    The Importance of Baby Sleep for Health

    Historically, the understanding of infant sleep has evolved. Early 20th-century parenting advice often emphasized strict schedules, while modern research highlights the importance of responsive parenting and understanding a baby’s individual cues.

    For a baby, sleep is not just about rest; it’s a period of intense activity for their developing body and mind.

    • Brain Development: During sleep, a baby’s brain processes information, strengthens neural connections, and consolidates memories. This is crucial for cognitive functions like learning and language acquisition.
    • Physical Growth: The majority of growth hormone is released during deep sleep, making adequate rest vital for a baby’s physical development.
    • Immune System: Sleep helps bolster a baby’s immune system, making them more resilient to illnesses.
    • Emotional Regulation: Well-rested babies are typically happier, less fussy, and better able to regulate their emotions. Chronic sleep deprivation can lead to irritability and behavioral challenges.

    Step-by-Step Guide to Helping Your Baby Sleep Better

    Helping your baby sleep well involves a combination of creating a conducive environment, establishing routines, and understanding their unique sleep patterns.

    Step 1: Understand Your Baby’s Sleep Needs

    A crucial first step is to recognize that a baby’s sleep needs change as they grow. What works for a newborn won’t necessarily work for a six-month-old.

    • Newborns (0-3 months): Typically sleep 14-17 hours a day, often in short bursts. Their sleep is less structured, with no clear distinction between day and night. Newborn sleep is characterized by frequent feedings and short wake windows.
    • Infants (4-11 months): Sleep 12-15 hours, usually consolidating into longer stretches at night with 2-3 naps during the day. This is often when sleep training can begin if desired.
    • Toddlers (1-2 years): Need 11-14 hours of sleep, typically with one afternoon nap.

    Understanding these averages helps set realistic expectations and prevents unnecessary worry.

    Step 2: Establish a Consistent Bedtime Routine

    A bedtime routine signals to your baby that it’s time to wind down and prepare for sleep. Consistency is key, even if the routine is short.

    • Timing: Aim for a consistent bedtime each night, ideally between 6:00 PM and 8:00 PM for most babies and toddlers.
    • Activities: Include calming activities such as:
      • A warm bath: Helps relax muscles and lower body temperature, signaling sleep.
      • Gentle massage: Soothes and promotes bonding.
      • Reading a book: Establishes a quiet, comforting ritual.
      • Singing a lullaby: The familiar sound can be very calming.
      • Dimming the lights: Reduces stimulation and encourages melatonin production, the sleep hormone.

    Avoid overly stimulating activities close to bedtime, such as vigorous play or screen time.

    Step 3: Create an Optimal Sleep Environment

    The environment where your baby sleeps significantly impacts their ability to fall asleep and stay asleep.

    • Darkness: Make the room as dark as possible to promote melatonin production. Use blackout curtains or blinds.
    • Quiet: Minimize noise. White noise machines can be helpful to block out household sounds and create a consistent, calming background hum.
    • Temperature: Keep the room cool, between 68-72°F (20-22°C). Overheating is a risk factor for SIDS and can make sleep difficult.
    • Safety: Always place your baby on their back to sleep on a firm, flat surface in a crib or bassinet. Avoid loose bedding, bumpers, pillows, and soft toys in the sleep area to prevent sudden infant death syndrome (SIDS). The American Academy of Pediatrics (AAP) strongly recommends safe sleep practices to reduce the risk of SIDS.

    Step 4: Teach Independent Sleep Skills (If Desired)

    Around 4-6 months, many babies are ready to learn to fall asleep independently. This doesn’t mean leaving them to cry for hours, but rather giving them the opportunity to self-soothe. Self-soothing is the ability of a baby to calm themselves down and fall asleep without external help.

    • Drowsy, But Awake: Place your baby in their crib when they are drowsy but still awake. This helps them associate their crib with falling asleep, rather than being transferred already asleep.
    • Pause Before Intervening: When your baby stirs or fusses, wait a few minutes before rushing in. Sometimes, they can resettle themselves. This is often referred to as the Ferber method” or “graduated extinction,” which involves progressively longer periods of checking on the baby without immediately comforting them fully. Other methods include “chair method” or “pick up/put down.”
    • Consistency: Whatever method you choose, consistency is paramount. Inconsistent responses can confuse your baby.

    Step 5: Address Naps Effectively

    Naps are just as important as nighttime sleep for a baby’s overall health and development.

    • Regular Schedule: Establish a consistent nap schedule based on your baby’s age and sleep cues.
    • Location: Ideally, naps should occur in the same place as nighttime sleep to reinforce the association with rest.
    • Watch for Cues: Look for signs of tiredness like rubbing eyes, yawning, or becoming fussy. Don’t wait until your baby is overtired, as this can make it harder for them to fall asleep. Overtiredness often leads to difficulty settling and shorter sleep durations.

    Step 6: Manage Night Feedings and Wakings

    As babies grow, the need for night feedings decreases.

    • Gradual Reduction: For babies over 6 months, discuss with your pediatrician if and how to gradually reduce night feedings.
    • Quick Checks: For night wakings, assess if your baby genuinely needs something (feeding, diaper change) or if they are simply stirring. If they are just stirring, a quick check and reassuring pat might be enough without fully engaging them. Keep lights low and interactions minimal during night wakings.

    Step 7: Be Patient and Flexible

    Every baby is different. What works for one may not work for another.

    • Growth Spurts and Milestones: Sleep can be disrupted by growth spurts, teething, developmental leaps (like learning to crawl or walk), or illness. Be prepared for temporary setbacks.
    • Parental Intuition: Trust your instincts. You know your baby best.
    • Seek Professional Help: If you have persistent concerns about your baby’s sleep, consult with your pediatrician or a certified sleep consultant. They can offer personalized advice and rule out underlying medical issues.

    Common Challenges and Solutions

    • Sleep Regressions: Periods where a baby who previously slept well suddenly starts waking frequently. These are common around 4 months, 8-10 months, and 18 months. Maintain consistency in your routine and know that they are usually temporary.
    • Teething: Can cause discomfort and disrupt sleep. Offer pain relief approved by your pediatrician before bedtime.
    • Separation Anxiety: Common in older infants and toddlers, where they become distressed when a parent leaves. A comforting routine and reassurance can help.

    FAQ: Helping Your Baby Sleep for Better Health

    Here are some common questions parents ask about baby sleep:

    Q1: How much sleep does my baby really need?

    The amount of sleep a baby needs varies by age. Newborns need 14-17 hours, infants (4-11 months) need 12-15 hours, and toddlers (1-2 years) need 11-14 hours. These are general guidelines, and individual needs may vary.

    Q2: Is sleep training harmful for my baby?

    When done safely and responsively, sleep training is generally not harmful. Many methods exist, from gentle approaches to those involving more independent sleep. The goal is to teach babies to fall asleep independently, which can lead to better sleep for the whole family. Always consult with your pediatrician before starting any sleep training method.

    Q3: What are the signs my baby is ready for sleep?

    Look for cues like yawning, rubbing eyes, pulling on ears, becoming fussy, staring blankly, or losing interest in play. Catching these signs early helps prevent overtiredness, which can make it harder for your baby to fall asleep.

    Q4: Can screen time affect my baby’s sleep?

    Yes, screen time (from TVs, tablets, phones) can negatively affect a baby’s sleep. The blue light emitted by screens can suppress melatonin production, making it harder to fall asleep. It’s best to avoid screen time for infants and toddlers, especially close to bedtime.

    Q5: What is the ideal room temperature for a baby’s sleep?

    The ideal room temperature for a baby’s sleep is generally between 68-72°F (20-22°C). Dressing your baby in appropriate sleepwear for the temperature is also important to prevent overheating or getting too cold.

    Q6: What is a “dream feed” and is it helpful?

    A dream feed is a feeding given to a baby while they are still asleep, typically a few hours after they have gone to bed. The idea is to “top them up” so they can sleep for a longer stretch. Some parents find it helpful, while others find it disrupts their baby’s sleep more. It’s a personal choice and often depends on the baby’s age and feeding needs.

    Q7: How do I handle sleep regressions?

    Sleep regressions are temporary periods where a baby who was sleeping well starts waking frequently. The best way to handle them is to stick to your consistent bedtime routine, maintain healthy sleep habits, and offer comfort and reassurance without introducing new sleep crutches. They usually pass within a few weeks.

  • How to Cut 2 Year or 3 year Old Baby Hair

    How to Cut 2 Year or 3 year Old Baby Hair

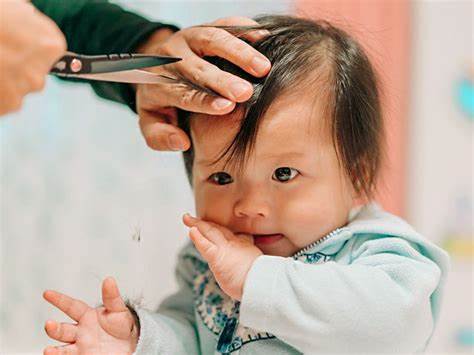
    Cutting a 2-year-old or 3-year-old baby’s hair can be both an exciting milestone and a daunting task for parents. While it marks a transition from babyhood to toddlerhood, it often involves a squirming, unpredictable little one. Many cultures around the world have traditions associated with a child’s first haircut. In Hinduism, for instance, the mundan ceremony (often performed in the first or third year) involves shaving the child’s head to symbolize purification and a fresh start. Similarly, some Orthodox Jewish traditions wait until a boy turns three for his first haircut, called an upsherin, marking the beginning of formal education. Regardless of cultural significance, the practical aspect remains: how do you get those wiggles to stop long enough for a decent trim?

    It’s also worth noting that a baby’s hair texture can change significantly during their early years. Many infants are born with fine, soft hair (vellus hair or lanugo) that often gives way to a coarser, more permanent texture (terminal hair) around the toddler years. This change in texture, combined with rapid growth, often necessitates a haircut.

    This guide will provide you with a comprehensive, step-by-step approach to cutting your toddler’s hair at home, focusing on safety, comfort, and achieving a decent look.

    Preparation is Key: Setting the Stage for Success

    The secret to a successful toddler haircut lies in thorough preparation. A well-prepared environment and a happy child will make the process much smoother.

    • Choose the Right Time: Select a time when your child is well-rested, fed, and in a good mood. Avoid nap times, meal times, or when they are tired or irritable. Morning after breakfast is often a good window.
    • Gather Your Supplies: Having everything within arm’s reach prevents you from having to leave your child unattended, even for a second.
      • Sharp Hair-Cutting Scissors: Do not use regular household scissors. Dedicated barber’s scissors are sharper and will give a cleaner cut, preventing split ends and pulling. You can find these at pharmacies, beauty supply stores, or online.
      • Fine-Tooth Comb: Essential for sectioning and holding hair.
      • Spray Bottle with Water: To dampen the hair for easier cutting.
      • Towels or Hairdressing Cape: To catch clippings and keep hair off your child’s clothes. A towel secured with a clip or even a button-up shirt that can be easily removed is ideal.
      • Booster Seat or High Chair: A stable, comfortable seating option at an appropriate height. A high chair can be great for containment.
      • Distractions! This is paramount.
        • Favorite toys, books.
        • Tablet or phone with a favorite cartoon or game (place it strategically so their head is in a good position).
        • Special snack (e.g., a lollipop, a small bowl of cereal).
        • A mirror, so they can see what you’re doing (some kids are mesmerized).
        • Another adult (if possible) to distract or help hold.
      • Small Bag or Envelope: To save a lock of hair if you wish to keep it as a memento.
      • Vacuum Cleaner or Broom: For easy cleanup afterwards.
    • Create a Positive Atmosphere: Talk to your child about what’s going to happen in a cheerful, reassuring tone. Make it sound like a fun activity. Let them touch the comb (not the scissors!). Praise them frequently for sitting still.

    Step-by-Step Guide: Cutting with Scissors

    For most toddlers, especially for the first few haircuts, using scissors is often preferred for more control and less intimidation than clippers.

    1. Position Your Child:
      • Seat your child comfortably and securely in a booster seat or high chair.
      • Drape the towel or cape around their shoulders, ensuring it’s not too tight around their neck.
      • Engage their chosen distraction immediately. A TV or tablet placed slightly above eye level can encourage them to keep their head still and straight.
    2. Dampen the Hair:
      • Lightly mist your child’s hair with the spray bottle. Hair is easier to cut when damp, but not soaking wet, as it tends to clump. Be mindful that wet hair appears longer than dry hair, so cut conservatively.
    3. Start with the Back (if possible):
      • Many parents find it easiest to start with the back, as it’s less visible to the child and allows them to get used to the sensation.
      • Using your comb, take a small horizontal section of hair at the nape of the neck.
      • Hold the section between your index and middle fingers, pulling it gently away from the head. Your fingers act as a buffer and a guide for length.
      • Cut straight across below your fingers. Start by taking off less than you think you need; you can always cut more later.
      • Continue working your way up the back, taking small horizontal sections. Use the previously cut section as a guide for length to ensure an even cut.
    4. Move to the Sides:
      • Once the back is done, move to one side. Take a small vertical section of hair near the ear.
      • Comb the hair straight down.
      • Use your fingers to hold the hair, shielding the ear with your hand as much as possible.
      • Cut vertically or at a slight angle for a softer, blended look, rather than a blunt line.
      • Repeat for the other side.
    5. Tackle the Top and Front (Bangs):
      • This is often the trickiest part due to visibility and the child’s potential squirming.
      • For the top, take small horizontal sections, comb straight up, and trim off the desired length. Use the previous section as a guide.
      • For bangs, decide on the desired length before cutting. Remember, bangs tend to spring up when dry.
      • Take a small section of hair in the front. Comb it straight down.
      • Hold the hair between your fingers, then cut straight across or with a slight angle for a softer fringe.
      • Pro Tip: For a less blunt look, try point cutting: hold the scissors vertically and snip into the ends. This creates a softer edge.
      • Be extra cautious around the eyes.
    6. Blending and Finishing Touches:
      • Once the main cutting is done, gently comb all the hair down.
      • Look for any uneven spots or stray hairs. Trim these carefully.
      • For a blended look, you can try “cutting up” into the hair ends with your scissors held vertically, rather than horizontally.
      • Don’t aim for perfection. A slight unevenness is natural for a home haircut on a toddler!

    Using Clippers (for Shorter Styles)

    If you prefer a shorter, more uniform cut, clippers can be faster, but they can also be noisier and more intimidating for some children.

    1. Preparation is the same. Ensure your child is calm and distracted.
    2. Choose the Right Guard: Clippers come with different guard sizes (e.g., #1, #2, #3, etc.) that determine the length of the cut. Start with a longer guard than you think you need (e.g., a #3 or #4) – you can always go shorter.
    3. Start at the Back/Sides:
      • Gently place the clippers against the child’s head at the nape of the neck.
      • Move the clippers slowly and steadily upwards, against the direction of hair growth.
      • Go over the same area multiple times to ensure an even cut.
      • Work around the sides, moving upwards.
    4. Blending (if cutting top with scissors): If you’re doing a longer top with clippered sides, use a slightly longer guard for the upper sides, then blend the transition zone.
    5. Finish the Top (with scissors): It’s generally not recommended to use clippers on the very top or front of a toddler’s head for longer styles, as it’s harder to control and blend. Use scissors as described above.

    Safety Tips for Cutting Baby Hair

    • Always Use Sharp Scissors/Clippers: Dull tools pull hair and can be more dangerous.
    • Constant Supervision: Never leave sharp tools or your child unattended.
    • Keep Fingers Between Scissors and Scalp: When cutting with scissors, your fingers should always be between the hair you’re cutting and your child’s head.
    • Small Sections: Work with small sections of hair to maintain control.
    • Protect Ears: Use your free hand to gently fold or shield the ears when cutting around them.
    • Take Breaks: If your child becomes agitated or restless, take a break. Don’t push it. Resume when they are calm again.
    • Patience and Positive Reinforcement: Your demeanor will influence your child. Stay calm, positive, and praise them for their cooperation, no matter how small.
    • Manage Expectations: Your goal is a functional, neat haircut, not a salon-perfect style. Embrace the “home haircut” charm.

    Key Entities:

    • 2-year-old/3-year-old baby: Refers to toddlers in this specific age range, known for their developing independence and potential restlessness.
    • Hair-cutting scissors: Specialized sharp scissors designed for cutting hair, offering a cleaner cut than household scissors.
    • Clippers: Electric hair-cutting tools, often used with guards to achieve uniform short lengths.
    • RAM (Random Access Memory): (Self-correction based on previous response. This entity is irrelevant to the current topic and should not be included.)
    • Vellus hair: Fine, soft, often unpigmented hair present on babies, which typically sheds and is replaced by terminal hair.
    • Terminal hair: The coarser, more pigmented hair that grows after vellus hair is shed, making up the adult hair.
    • Mundan ceremony: A Hindu tradition where a baby‘s head is shaved, often in the first or third year, symbolizing purification.
    • Upsherin: An Orthodox Jewish ceremony, usually at a boy’s third birthday, marking his first haircut and the beginning of formal Jewish education.

    FAQ Section

    Q1: How often should I cut my 2 or 3-year-old’s hair?

    The frequency depends entirely on how fast their hair grows and the desired style. Some toddlers might need a trim every 2-3 months, while others with slower-growing hair might go 6 months or longer between cuts. Look for hair falling into their eyes or looking unruly.

    Q2: My toddler screams and won’t sit still for a haircut. What should I do?

    This is very common! Ensure you’ve chosen the right time (not tired or hungry), use maximum distraction (tablet, special snack), and have another adult help if possible. If they are truly distressed, stop and try again another day. Sometimes, a short, frequent trim is better than one long, stressful session. Consider doing it while they’re sleeping if you’re comfortable and confident with the scissors.

    Q3: Can I use regular household scissors to cut my baby’s hair?

    It is highly not recommended. Household scissors are typically not sharp enough for hair and can pull, snag, or damage the hair, leading to split ends. Investing in a good pair of sharp, hair-cutting scissors will make the process safer and result in a much cleaner cut.

    Q4: Will cutting my baby’s hair make it grow back thicker?

    This is a common myth. Cutting hair does not affect the hair follicles under the scalp, which are responsible for hair growth. Therefore, cutting hair does not make it grow back thicker, faster, or different in texture. Any perceived change in thickness is usually due to the hair’s natural maturation process from vellus to terminal hair.

    Q5: What if I make a mistake and the cut is uneven?

    Don’t panic! Hair grows back. For toddlers, small imperfections are usually not very noticeable. Focus on making it neat enough to keep hair out of their eyes and looking tidy. You can always trim more later, or if it’s significantly uneven, consider taking them to a professional children’s hairstylist for a fix-up.

  • How to Trim Baby Nails Without Hurting Them

    How to Trim Baby Nails Without Hurting Them

    Trimming a baby’s tiny, sharp nails can feel like a daunting task for new parents. Those little talons can cause scratches on their delicate skin or even on yours. The good news is, with the right tools, technique, and a bit of patience, it’s a perfectly manageable chore that becomes easier with practice. This guide will walk you through various methods to ensure a safe and tear-free nail trimming experience.

    Why Trimming Baby Nails is Important

    Baby nails grow surprisingly fast and can be incredibly sharp. Because babies lack fine motor control, they often scratch their faces, eyes, and even other people. Keeping their nails short and smooth prevents these accidental injuries and helps maintain good hygiene.

    Essential Tools for Trimming Baby Nails

    Choosing the right tool is the first step to a successful trim. There are several options, each with its pros and cons.

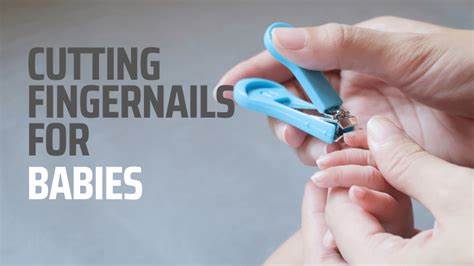
    1. Baby Nail Clippers:
      • Description: These are smaller versions of adult clippers, often with a curved cutting edge and a safety guard to prevent cutting too deeply.
      • Pros: Quick and efficient once you get the hang of them.
      • Cons: Can be intimidating due to their sharpness; requires steady hands.
      • Best for: Slightly older babies or when you need a quick trim.
    2. Baby Nail Scissors:
      • Description: Small scissors with rounded, blunt tips designed specifically for babies.
      • Pros: Offer more control and visibility than clippers; less intimidating for some parents.
      • Cons: Can still be tricky if the baby wiggles a lot; takes more time per nail.
      • Best for: Newborns and young infants with very soft nails.
    3. Baby Nail File (Emery Board or Electric Nail File):
      • Description: Fine-grit emery boards or battery-operated electric nail files (often with multiple filing pads of varying grits).
      • Pros: The safest option for newborns as there’s no risk of cutting skin; smooths sharp edges effectively. Electric files are particularly gentle and quiet.
      • Cons: Can be time-consuming; may not be sufficient for significantly long nails; emery boards wear out quickly.
      • Best for: Newborns, very young infants, or for smoothing rough edges after clipping/cutting.

    When to Trim Baby Nails: Timing is Everything

    Choosing the right moment can significantly reduce stress for both you and your baby.

    • During Sleep: This is often the preferred method for many parents. When your baby is in a deep sleep, their hands are relaxed, and they are less likely to wiggle. This provides a calm and still environment for trimming.
    • After a Bath: Baby’s nails are softer and more pliable after a warm bath, making them easier to trim and less likely to split.
    • During Feeding: If your baby is calm and content while feeding (especially bottle-feeding), you might find them distracted enough to get a few nails done. Be mindful of their position to avoid accidents.
    • When Distracted: For older, more active babies, a favorite show, toy, or even a different caregiver distracting them can help.

    Step-by-Step Guide: How to Trim Baby Finger Nails

    Finger nails tend to grow faster and are sharper than toenails, requiring more frequent attention. Aim to trim them about once a week.

    1. Gather Your Supplies: Have your chosen tool (clippers, scissors, or file), a bright light, and optionally a mild antiseptic wipe or cotton ball handy in case of a tiny nick (though with proper technique, this is rare).
    2. Choose Your Moment: Select a time when your baby is calm, sleepy, or otherwise distracted.
    3. Position Your Baby:
      • Sleeping Baby: Gently hold their hand.
      • Awake Baby: You might need a second person to help gently hold their hand still. If alone, try the “hug hold” where you tuck your baby’s arm under your armpit while you hold their hand, or cradle them in your arm.
    4. Isolate the Finger: Gently hold the baby’s finger you are about to trim.
    5. Press Down the Finger Pad: This is the most crucial step! Using your thumb and forefinger, gently push the fleshy part of the fingertip down and away from the nail. This creates a clear separation between the nail and the skin underneath, significantly reducing the risk of a nick.
    6. Trim the Nail (Method specific):
      • With Clippers: Place the clippers directly over the nail, avoiding the quick (the pink part underneath the nail). Make a single, quick snip straight across, following the natural curve of the nail. Avoid cutting them too short.
      • With Scissors: Position the rounded tips of the scissors under the nail, again, pushing the finger pad down. Make small, controlled snips, following the curve.
      • With a File (Emery Board or Electric): Gently file the nail in one direction or small, smooth motions, shaping it. For electric files, use the appropriate grit and apply light pressure until the nail is smooth and short enough. This method is excellent for rounding off any sharp corners left by clippers or scissors.
    7. Smooth Rough Edges: Regardless of the method used, always finish by gently filing any sharp or jagged edges with a baby nail file. This prevents new scratches.
    8. Repeat for Each Finger: Take your time, and move to the next finger when both you and the baby are ready. Don’t feel pressured to do all nails in one sitting.

    Step-by-Step Guide: How to Trim Baby Toe Nails

    Baby toenails grow slower and are less sharp than fingernails, so they generally require less frequent trimming (perhaps once or twice a month).

    1. Prepare as for Finger Nails: Gather tools and choose a calm moment.
    2. Position the Foot: Gently hold your baby’s foot.
    3. Press Down the Toe Pad: Similar to fingernails, gently push the fleshy part of the toe pad down and away from the nail.
    4. Trim Straight Across: For toenails, it’s generally recommended to trim straight across rather than curving the nail. This helps prevent ingrown toenails. Be careful not to cut too short.
    5. Smooth Edges: Use a file to smooth any sharp edges.

    What to Do If You Accidentally Nick Your Baby

    Despite all precautions, sometimes a tiny nick can happen. Don’t panic; it’s a common occurrence for parents.

    • Apply Gentle Pressure: Immediately apply gentle, clean pressure to the wound with a clean cloth or sterile gauze for a few minutes until the bleeding stops.
    • Cleanse: Once bleeding stops, gently clean the area with mild soap and water or a mild antiseptic wipe.
    • Do NOT Use Bandages: Avoid using bandages or plasters on baby fingers or toes, as they pose a choking hazard if they come loose.
    • Observe: Keep an eye on the area for any signs of redness, swelling, or pus, which could indicate infection. If you notice these, or if the bleeding doesn’t stop, contact your pediatrician.

    Pro Tips from Experienced Parents

    • Warmth and Comfort: Ensure your baby is warm and comfortable before you start. A fussy baby will make the task much harder.
    • Good Lighting: Always trim in a well-lit area so you can clearly see the nail and the quick.
    • One Nail at a Time: If your baby is particularly squirmy, try trimming just one or two nails at a time over several sessions. Slow and steady wins the race.
    • Make it a Routine: Incorporate nail trimming into your baby’s regular routine, perhaps after bath time, so they become accustomed to it.
    • Praise and Comfort: Talk to your baby gently throughout the process. Offer praise, cuddles, or a pacifier afterward.
    • Consider Teamwork: If you have a partner or another caregiver, one person can gently hold and distract the baby while the other trims the nails. This makes the process much easier.
    • Electric File for Beginners: If you’re particularly nervous, start with an electric baby nail file. They are virtually impossible to cause injury with and are excellent for building confidence.

    Trimming baby nails is a rite of passage for parents. While it might seem intimidating at first, with the right approach and a little practice, you’ll become a pro at keeping those tiny nails neat and tidy, ensuring your baby stays safe and scratch-free.

  • How to Relieve Gas in Baby Stomach

    How to Relieve Gas in Baby Stomach

    Seeing your baby squirm, cry, and fuss due to tummy discomfort can be heartbreaking for any parent. Gas is a very common issue in infants, whose digestive systems are still developing. While it’s a normal part of their early life, there are many gentle and effective ways to help relieve gas in a baby’s stomach and bring them comfort. This comprehensive guide covers various techniques, from prevention to immediate relief.

    Why Do Babies Get Gassy?

    Babies often get gassy for several reasons, including:

    • Swallowing Air: This is the most common cause, happening during feeding (breast or bottle), crying, or even pacifier use.
    • Immature Digestive System: A baby’s digestive tract is still learning to process food and expel gas efficiently. Enzymes that break down certain sugars might not be fully developed.
    • Diet: For breastfed babies, certain foods in the mother’s diet can sometimes contribute to gas. For formula-fed babies, the type of formula or how it’s prepared can play a role.
    • Overfeeding: A baby who eats too much too quickly can take in more air and have difficulty digesting.
    • Crying: Prolonged crying causes babies to swallow a lot of air.

    Signs Your Baby Has Gas

    Recognizing the signs of gas will help you act quickly to provide relief:

    • Fussiness and Crying: Especially after feeding.
    • Arching Back: Your baby may arch their back in discomfort.
    • Pulling Legs Up to Chest: This is a common sign of tummy pain.
    • Red Face: Straining to pass gas.
    • Distended or Hard Tummy: While not always visible, a firm belly can indicate gas.
    • Frequent Spit-Up: Can sometimes accompany gas issues.
    • Difficulty Sleeping: Discomfort can interrupt sleep.
    • Passing Gas (Farting) or Burping: While these are relief, they can also be signs of trapped gas leading up to the release.

    Immediate Relief Techniques

    When your baby is clearly uncomfortable with gas, these methods can provide quick relief.

    1. The Power of Burping

    Burping is your first line of defense against swallowed air. Aim to burp your baby during and after feedings.

    • Over-the-Shoulder Burp:
      1. Hold your baby upright with their head resting on your shoulder.
      2. Support their bottom with one hand.
      3. Gently pat or rub their back with the other hand. Ensure their airway isn’t blocked.
    • Sitting-Up Burp:
      1. Sit your baby on your lap, facing away from you.
      2. Support their chin and chest with one hand, leaning them slightly forward.
      3. Gently pat or rub their back with your free hand.
    • Across-the-Lap Burp:
      1. Lay your baby face down across your lap.
      2. Support their head slightly higher than their chest.
      3. Gently rub or pat their back.

    Tip: Don’t give up after a few pats. Sometimes it takes a minute or two for the burp to come out. If no burp comes after 5-10 minutes, try a different position.

    1. Tummy Massage

    A gentle tummy massage can help move trapped gas through your baby’s intestines.

    1. Lay your baby on their back.
    2. Warm your hands slightly.
    3. Apply gentle, circular motions clockwise around their belly button (following the natural path of digestion).
    4. Try the “I Love U” massage:
      • Trace an “I” down the baby’s left side (their left).
      • Trace an “L” upside down (across the top then down the left side).
      • Trace a “U” upside down (starting from the bottom right, up, across the top, and down the left side).
    5. You can also try walking your fingers gently from their chest down towards their belly button.
    1. Leg Exercises (“Bicycle Kicks”)

    This simple exercise can physically help push gas out.

    1. Lay your baby on their back.
    2. Gently hold their ankles or lower legs.
    3. Move their legs in a bicycling motion, pushing their knees up towards their chest and then extending them.
    4. You can also try pushing both knees gently up to their chest and holding for a few seconds before releasing. This compresses the abdomen and can help release gas.
    1. Tummy Time

    While supervised tummy time is important for development, it can also help with gas relief.

    • Lay your baby on their stomach across your lap or on a firm surface for a few minutes. The gentle pressure on their abdomen can help expel gas. Always supervise closely.
    1. Warm Bath

    A warm bath can help relax your baby’s muscles, including their abdominal muscles, which might provide comfort and facilitate gas release.

    • Ensure the water is a comfortable, safe temperature.
    • Gently swish the water around their tummy.
    1. Over-the-Counter Gas Drops

    Consult your pediatrician before using any medication. Simethicone gas drops (like Mylicon or Little Remedies Gas Relief Drops) work by breaking down large gas bubbles into smaller ones, making them easier to pass.

    • Follow the dosage instructions carefully on the packaging or as advised by your doctor.
    • These drops are generally considered safe and not absorbed into the baby’s system. They work directly in the digestive tract.
    1. Gripe Water

    Gripe water is an herbal remedy containing ingredients like ginger, fennel, chamomile, or dill. Its effectiveness is debated, and ingredients can vary, so always check with your pediatrician before using it.

    • Some parents swear by it, while others find it ineffective.
    • Look for alcohol-free and sugar-free varieties.

    Preventive Measures

    Preventing gas from building up in the first place is always better than treating it.

    1. Optimize Feeding Techniques
    • Proper Latch (Breastfeeding): Ensure your baby has a deep and proper latch to minimize swallowing air. Listen for gulping sounds, not clicking or smacking.
    • Bottle-Feeding Tips:
      • Slow-Flow Nipple: Use a nipple with a slow flow to prevent your baby from drinking too quickly and swallowing air.
      • Bottle Angle: Keep the bottle tilted so that the nipple is always full of milk, not air.
      • Burp Frequently: Burp your baby every few ounces for bottle-fed babies, and when switching breasts for breastfed babies.
      • Avoid Shaking Formula: Shaking formula vigorously can create air bubbles. Swirl it gently instead.
    • Feed in Upright Position: Try to feed your baby in a more upright position to help gravity keep air down and milk flowing smoothly.
    • Avoid Overfeeding: Feed your baby when they show hunger cues, not necessarily on a strict schedule that might lead to overfeeding.
    1. Pacifier Use

    While pacifiers can be soothing, prolonged or vigorous sucking on a pacifier can sometimes lead to increased air swallowing. Observe if this coincides with gas issues.

    1. Consider Mother’s Diet (for Breastfed Babies)

    While research is mixed, some mothers find that certain foods they eat can cause gas in their breastfed babies. Common culprits include:

    • Dairy products
    • Caffeine
    • Cruciferous vegetables (broccoli, cauliflower, cabbage)
    • Beans
    • Spicy foods

    If you suspect a food in your diet is causing gas, try eliminating it for a week or two to see if your baby’s symptoms improve, then reintroduce it to confirm. Always discuss significant dietary changes with your doctor.

    1. Formula Choice (for Formula-Fed Babies)

    If your baby is formula-fed and experiencing persistent gas, consult your pediatrician. They might suggest:

    • Hypoallergenic formula: If a dairy allergy is suspected.
    • Sensitive formula: Designed for sensitive tummies, often with reduced lactose.
    • Partially hydrolyzed formula: Where proteins are pre-broken down.

    Do not switch formulas without consulting your pediatrician.

    When to Call the Doctor

    While baby gas is usually harmless, there are times when it warrants a call to your pediatrician:

    • Persistent Crying: If your baby is inconsolable for prolonged periods, especially if it’s accompanied by other symptoms.
    • Poor Feeding: If gas is preventing your baby from feeding adequately.
    • Fever: If gas is accompanied by a fever.
    • Vomiting (especially projectile vomiting): This is a red flag.
    • Diarrhea or Bloody Stools: Can indicate a more serious digestive issue.
    • Hard or Swollen Abdomen: If their tummy feels unusually hard and distended beyond what gas might cause.
    • Lack of Wet/Dirty Diapers: Signs of dehydration or other issues.
    • Failure to Thrive: If your baby isn’t gaining weight appropriately.

    Understanding and addressing gas in your baby is a common parental challenge. By employing these gentle techniques and preventive measures, you can significantly help relieve gas in your baby’s stomach and bring comfort to your little one, fostering a happier, healthier baby and a less stressed parent. Remember, consistency is key, and if you have any concerns, always consult your pediatrician.

  • how to choose the safest crib for baby

    how to choose the safest crib for baby

    Choosing the safest crib for your baby is one of the most critical decisions you’ll make when preparing for their arrival. A safe sleeping environment is paramount for preventing Sudden Infant Death Syndrome (SIDS) and other accidents. This guide will walk you through the essential factors to consider, ensuring you select a crib that provides maximum safety and peace of mind.

    Understanding Crib Safety Standards

    The first and most crucial step in choosing a safe crib is understanding and adhering to current safety standards. In the United States, the Consumer Product Safety Commission (CPSC) sets strict federal safety standards for all cribs manufactured and sold. These regulations are designed to prevent injuries and deaths associated with cribs.

    Key CPSC Safety Standards to Look For:

    • No Drop-Side Rails: Drop-side cribs were banned in 2011 due to serious safety risks. Even if a used crib looks intact, avoid it if it has a drop-side.
    • Slat Spacing: Slats should be no more than 2 3/8 inches apart. If a soda can fits through the slats, they’re too wide.
    • Firm Mattress Fit: The crib mattress should fit snugly with no more than a two-finger gap around the edges.
    • No Corner Posts or Decorative Cutouts: These can catch clothing or entrap limbs, posing strangulation or injury hazards.
    • Sturdy Construction: Check for solid assembly with no loose hardware, splinters, or peeling finishes.
    • Non-Toxic Materials: Look for certifications like GREENGUARD Gold to ensure low chemical emissions.

    How to Select a New Crib

    Buying new helps ensure you’re getting a crib that complies with all current safety standards.

    1. Check for JPMA Certification: This voluntary seal indicates the crib meets or exceeds rigorous safety benchmarks.
    2. Double-Check Slats and Mattress Fit: Bring a tape measure or even a soda can to test slat spacing in-store.
    3. Inspect the Build: Watch for defects like splinters, misaligned parts, or poorly fastened hardware.
    4. Adjustable Mattress Heights: This feature is useful as your baby grows. The lowest setting helps prevent escapes.
    5. Firm Mattress Only: The surface should spring back quickly when pressed. Avoid anything plush or overly soft.

    What to Avoid When Choosing a Crib

    • Used Cribs with Drop-Side Rails: These are not safe under any condition.
    • Missing or Damaged Parts: Any structural defect is a dealbreaker.
    • Old Paint: Avoid cribs painted before 1978 due to the risk of lead exposure.
    • Add-Ons Like Bumpers and Positioners: These are not safe for infants, no matter how cute or well-reviewed they are.
    • Low-Hanging Mobiles: These can be strangulation hazards. Remove them once the baby can push up.

    Setting Up the Crib for Safe Sleep

    1. Follow Assembly Instructions: Precision matters. Improper assembly can compromise safety.
    2. Always Back to Sleep: Babies should always be placed on their backs for sleep.
    3. Bare is Best: Only a firm mattress and fitted sheet should be in the crib.
    4. Room Share, Don’t Bed Share: Keep your baby nearby, but in their own sleep space.
    5. Strategic Placement:
      • Away from windows and cords
      • Not near vents or heaters
      • Ensure all nearby electronics or lamps are secure

    Regularly Check for Recalls

    Even the best cribs can occasionally be recalled.

    • Visit the CPSC Website: Regularly check www.cpsc.gov for the latest recall info.
    • Register Your Crib: Complete the registration card to get direct updates if your crib is recalled.

    By prioritizing these safety practices, you’ll be taking a proactive step in creating a secure, restful space for your baby to grow and thrive.

  • How to Ensure Baby Brain Development

    How to Ensure Baby Brain Development

    The period from conception to a child’s third birthday is a time of incredible brain development. A baby’s brain grows faster during this period than at any other point in life, forming trillions of connections (synapses) that lay the foundation for all future learning, behavior, and health. In fact, by the age of three, a child’s brain will have reached approximately 80% of its adult size. This rapid growth is driven by a complex interplay of genetics, nutrition, environment, and experiences.

    Understanding how to support this critical process is vital for parents and caregivers. The concept of “early brain development” gained significant public attention in the late 20th century, spurred by advancements in neuroscience and imaging techniques that allowed researchers to observe the brain’s activity in infants. Organizations like the Center on the Developing Child at Harvard University have extensively researched and highlighted the profound impact of early experiences on brain architecture. It’s not about “making a baby smarter” in an artificial way, but about providing the optimal conditions for the brain to develop to its fullest potential, ensuring a strong foundation for cognitive, emotional, and social skills.

    This guide will provide a comprehensive, step-by-step approach to ensuring your baby’s brain development, focusing on actionable strategies you can implement daily.

    Step 1: Prioritize Optimal Nutrition (From Conception to Toddlerhood)

    Nutrition is the fuel for brain growth. What a baby eats, and what a mother eats during pregnancy and breastfeeding, directly impacts brain development.

    • During Pregnancy:
      • Folic Acid: Crucial for neural tube development in early pregnancy. Found in leafy greens, fortified cereals, and supplements.
      • Omega-3 Fatty Acids (DHA): Essential for brain and eye development. Found in fatty fish (salmon, sardines), fortified eggs, and algal oil supplements.
      • Iron: Prevents maternal anemia, which can impact fetal brain development.
      • Iodine: Critical for thyroid hormone production, which is vital for brain development.
    • For Infants (0-6 months):
      • Breast Milk or Formula: This is the sole source of nutrition for the first 6 months. Breast milk is considered the ideal food, containing a perfect balance of nutrients, antibodies, and beneficial compounds (including DHA) that support brain growth and overall health. If breastfeeding isn’t possible, choose an iron-fortified infant formula.
    • For Infants (6+ months) and Toddlers:
      • Introduction of Solids: Once solids are introduced (around 6 months, observing readiness signs), prioritize nutrient-dense foods.
        • Iron-fortified cereals and pureed meats: Essential for replenishing iron stores crucial for cognitive function.
        • Healthy Fats: Avocado, fatty fish, olive oil.
        • Fruits and Vegetables: Provide vitamins, minerals, and antioxidants for overall health and brain protection.
        • Eggs: A rich source of choline, vital for memory and brain development.
      • Avoid Processed Foods: Limit foods high in sugar, unhealthy fats, and excessive salt.

    Step 2: Engage in Responsive and Nurturing Interactions

    A baby’s brain develops through experiences, and responsive interaction with caregivers is paramount. This builds healthy attachment and stimulates neural pathways.

    • Talk, Read, and Sing to Your Baby:
      • Talk: Narrate your day, describe objects, ask questions (even if they can’t answer). This exposes them to language patterns and builds vocabulary.
      • Read: Start reading from birth. Point to pictures, use different voices, and let them touch board books. This fosters early literacy skills and a love for books.
      • Sing: Singing songs, especially those with actions, stimulates language, rhythm, and memory.
    • Respond to Your Baby’s Cues:
      • Pay attention to their babbles, gestures, and facial expressions. Respond promptly and appropriately. This teaches them that their actions have an effect and builds trust and security. This “serve and return” interaction is fundamental to brain development.
    • Eye Contact and Facial Expressions: Engage with your baby face-to-face. Make eye contact, smile, and use exaggerated facial expressions. Babies learn about emotions and social cues through these interactions.
    • Cuddle and Comfort: Physical touch and comfort are crucial for emotional development and stress regulation, which directly impacts brain architecture. A secure attachment fosters a sense of safety, allowing the brain to focus on learning rather than survival.

    Step 3: Provide a Stimulating Yet Not Overwhelming Environment

    A rich environment offers opportunities for exploration and learning, but too much stimulation can be counterproductive.

    • Sensory Play:
      • Touch: Offer toys with different textures (soft, bumpy, crinkly). Let them safely explore various surfaces.
      • Sound: Introduce different sounds (music, rattles, nature sounds). Be mindful of volume; protect their sensitive hearing.
      • Sight: Show them high-contrast black and white images for newborns, then colorful objects. Change their surroundings occasionally (e.g., different rooms, safe outdoor spaces).
      • Movement: Gently rock, bounce, or swing your baby. Tummy time is essential for developing motor skills and strengthening neck muscles, which supports visual tracking.
    • Exploration and Discovery:
      • As they grow, provide safe spaces for them to crawl, cruise, and walk. Let them explore objects with their hands and mouths (ensuring safety).
      • Offer Age-Appropriate Toys: Simple toys that encourage interaction, problem-solving, and imagination are best (e.g., blocks, stacking cups, shape sorters). Avoid toys that do everything for the child.
    • Limit Screen Time: The AAP recommends avoiding screen media for children younger than 18-24 months, with the exception of video-chatting. Passive screen time displaces active play and human interaction, which are far more beneficial for brain development. If screens are used for older infants, it should be limited, interactive, and with a caregiver present.

    Step 4: Ensure Adequate Sleep for Brain Consolidation

    Sleep is not just rest; it’s a critical period for brain development and memory consolidation. During sleep, the brain processes information learned during waking hours.

    • Establish a Consistent Sleep Routine: A predictable bedtime routine (bath, story, lullaby) helps signal to the baby that it’s time to sleep.
    • Create a Safe Sleep Environment: Ensure a firm mattress, no loose bedding, and a comfortable room temperature. Follow Safe Sleep recommendations (e.g., back to sleep) to reduce the risk of SIDS.
    • Understand Sleep Needs: Newborns sleep a lot (14-17 hours), gradually decreasing as they grow. Be responsive to their sleep cues (yawning, rubbing eyes, fussiness).
    • Allow for Naps: Naps are crucial for consolidating learning and preventing overtiredness.

    Step 5: Prioritize a Low-Stress, Secure, and Safe Environment

    Chronic stress can negatively impact brain development, particularly areas related to emotion regulation and learning.

    • Reduce Caregiver Stress: Babies are highly sensitive to their caregivers’ emotions. Managing your own stress (e.g., seeking support, practicing self-care) creates a calmer environment for your baby.
    • Consistent Caregiving: Predictable routines and consistent responses from caregivers build a sense of security, which allows the baby’s brain to focus on learning rather than stress responses.
    • Safe Physical Environment: Child-proof your home as your baby becomes mobile. This allows them to explore freely without constant “no’s,” fostering independence and curiosity while ensuring physical safety.
    • Protect from Harmful Substances: Ensure your baby is not exposed to second-hand smoke, lead (e.g., from old paint), or other environmental toxins, which can impair brain development.
    • Regular Pediatric Check-ups: Ensure your baby receives all recommended vaccinations and regular health check-ups. These prevent illnesses that could hinder development and allow pediatricians to monitor growth and milestones.

    Step 6: Be Patient and Observe Individual Development

    Every baby is unique, and development happens at different paces.

    • Celebrate Milestones: Acknowledge and celebrate your baby’s achievements, but avoid comparing them to other children.
    • Trust Your Instincts: As a parent, you know your baby best. If you have concerns about their development, don’t hesitate to consult your pediatrician. Early intervention can make a significant difference if developmental delays are present.
    • Follow Your Baby’s Lead: Observe your baby’s interests and cues. If they are engaged with an activity, continue it. If they lose interest or show signs of being overwhelmed, change activities or allow for quiet time.

    Conclusion

    Ensuring your baby’s brain development is one of the most profound and impactful roles a parent can undertake. It’s not about expensive toys or specialized programs, but about consistent, loving, and responsive care within a safe and stimulating environment. By focusing on optimal nutrition, engaging in rich interactions, providing diverse sensory experiences, prioritizing adequate sleep, maintaining a low-stress environment, and being patient with individual development, you are providing the strongest possible foundation for your child’s lifelong learning, well-being, and success.

    FAQ

    Q1: What are the most important things for a baby’s brain development?

    The most important factors for a baby’s brain development are optimal nutrition (especially DHA, iron, and choline), responsive and loving interactions with caregivers (talking, reading, singing, responding to cues), a stimulating yet safe environment for exploration, adequate sleep, and a low-stress, secure attachment with primary caregivers.

    Q2: Does reading to my newborn really help their brain development?

    Yes, absolutely! Reading to your newborn, even if they don’t understand the words, is incredibly beneficial. It exposes them to language sounds, rhythms, and patterns, builds vocabulary over time, fosters early literacy skills, and strengthens the emotional bond between you and your baby, all of which are crucial for brain development.

    Q3: How much screen time is safe for a baby’s brain development?

    The American Academy of Pediatrics (AAP) recommends avoiding screen media (TV, tablets, smartphones) for children younger than 18 to 24 months, with the exception of video-chatting with family. Excessive screen time can displace vital activities like interactive play and social interaction, which are essential for healthy brain development.

    Q4: What specific nutrients are crucial for a baby’s brain?

    Key nutrients for baby’s brain development include Omega-3 fatty acids (especially DHA) found in breast milk, formula, and fatty fish; Iron, vital for cognitive function; and Choline, found in eggs and other foods, which supports memory and brain development. Folic acid and iodine are also critical during pregnancy.

    Q5: How does stress affect a baby’s brain development?

    Chronic stress or adverse experiences in early life can have a detrimental impact on a baby’s developing brain. Prolonged exposure to stress hormones can negatively affect the formation of neural connections, particularly in areas related to emotion regulation, memory, and learning. A secure, predictable, and low-stress environment is crucial for healthy brain architecture.

  • How to Introduce Solid Food to Baby Safely

    How to Introduce Solid Food to Baby Safely

    Introducing solid food to your baby is a significant milestone, marking a new phase in their development and nutritional journey. For the first four to six months of life, breast milk or formula provides all the necessary nutrients for a baby’s growth. However, as babies grow, their nutritional needs expand beyond liquids, and solid foods become crucial for providing additional calories, iron, and other essential vitamins and minerals that their growing bodies require.

    The timing of this introduction has evolved over time. Historically, some cultures introduced solids much earlier, even within the first few weeks or months. However, extensive research by organizations like the American Academy of Pediatrics (AAP), the World Health Organization (WHO), and other health authorities now recommends waiting until around 6 months of age. This recommendation is based on scientific evidence indicating that babies’ digestive systems and motor skills are typically mature enough at this age to handle solid foods safely and effectively, reducing risks like choking and allergies. Premature introduction can also displace important breast milk or formula intake.

    This comprehensive guide will walk you through the process of introducing solid food to your baby safely, covering readiness signs, choosing first foods, feeding methods, and crucial safety considerations.

    Step 1: Recognize Your Baby’s Readiness Signs (Not Just Age)

    While 6 months is a general guideline, a baby’s individual developmental readiness is paramount. Look for these key signs, as they indicate your baby can safely handle and benefit from solids:

    • Good Head and Neck Control: Your baby can hold their head up steadily and unassisted. This is crucial for safe swallowing.
    • Sitting Up with Support: Your baby can sit upright in a high chair or on your lap, indicating core strength.
    • Loss of Tongue-Thrust Reflex: When you put a spoon near your baby’s mouth, they no longer automatically push it out with their tongue. This reflex prevents choking in newborns but needs to diminish for successful solid feeding.
    • Shows Interest in Food: Your baby watches you eat, leans forward, opens their mouth, or tries to grab food from your plate. They might even mimic chewing motions.
    • Increased Hunger: Your baby seems unsatisfied after their usual milk feeds, wanting more breast milk or formula than usual.

    Crucial Point: Do not start solids before 4 months, even if some of these signs are present, as their digestive system may not be mature enough, and it can increase the risk of allergies or choking.

    Step 2: Choose Safe First Foods

    The type of food you offer first matters. Focus on single-ingredient, easily digestible, and iron-fortified options.

    • Iron-Fortified Infant Cereal: Traditionally, iron-fortified single-grain infant cereals (like rice or oat) mixed with breast milk or formula were the go-to first food. They are a good source of iron, which babies need as their iron stores from birth begin to deplete around 6 months.
    • Pureed Fruits: Options like pureed bananas, avocados, pears, peaches, or cooked apples are good choices. Ensure they are smooth and free of lumps.
    • Pureed Vegetables: Introduce pureed cooked vegetables such as sweet potatoes, carrots, green beans, peas, or butternut squash.
    • Pureed Meats: Once comfortable with cereals, fruits, and vegetables, introduce pureed meats (chicken, turkey, beef, lamb) for additional iron and protein.
    • Introducing Allergenic Foods: The latest guidelines (including from the AAP) recommend introducing common allergenic foods (such as peanut products, eggs, cow’s milk products, soy, wheat, tree nuts, fish, and shellfish) early and regularly once other solids have been successfully introduced. This approach may help reduce the risk of developing food allergies.
      • How to introduce allergens safely:
        • Introduce one new allergenic food at a time.
        • Offer a small amount (e.g., a tiny dab of smooth peanut butter mixed into breast milk/formula or puree).
        • Wait 2-3 days before introducing another new food (whether allergenic or not) to observe for any allergic reactions.
        • If no reaction occurs, continue offering the allergenic food regularly (e.g., 2-3 times a week) to maintain tolerance.
        • Always be prepared for an allergic reaction and know the signs (hives, swelling, difficulty breathing, vomiting, diarrhea). Consult your pediatrician before introducing highly allergenic foods, especially if your baby has severe eczema or a known food allergy.

    Step 3: Prepare and Offer Food Safely

    Preparation and presentation are key to a safe feeding experience.

    • Texture Matters:
      • Initial Stage (6-8 months): Start with thin, smooth purees or very soft, mashed foods. The consistency should be runny enough to be easily swallowed. Gradually thicken the consistency as your baby gets used to it.
      • Later Stage (8-10 months): Move to thicker purees, mashed foods, and soft, finely chopped finger foods. Your baby will develop chewing abilities.
      • Toddlerhood (10-12+ months): Offer a wider variety of textures, including soft, well-cooked pieces of food.
    • Temperature: Food should be lukewarm, not hot. Always test the temperature on your wrist before offering it to your baby.
    • Serving Size: Start with very small amounts – just 1-2 teaspoons per feeding. Gradually increase the amount as your baby shows interest. Remember, breast milk or formula remains their primary source of nutrition at this stage.
    • Feeding Tools: Use a soft-tipped baby spoon to avoid injuring delicate gums.
    • High Chair Safety: Always place your baby in an upright position in a high chair with a safety harness that is properly secured. This helps prevent choking. Never feed a baby while they are reclined or lying down.
    • Timing: Choose a time when your baby is well-rested and not overly hungry or tired. After a milk feeding (breast milk or formula) is often ideal, as they won’t be ravenous, but not so full that they refuse food.
    • Positive Atmosphere: Make mealtimes a calm and positive experience. Avoid distractions.
    • Be Patient: Your baby might make a mess, refuse food, or only eat a tiny amount. This is normal. It’s about exploration and learning, not necessarily eating large quantities right away.
    • Don’t Force Feed: If your baby turns away, shakes their head, or clamps their mouth shut, respect their cues and end the feeding.
    • Introduce One New Food at a Time: Introduce a single new food every 3-5 days. This allows you to identify any potential allergic reactions or sensitivities to a specific food.

    Step 4: Choose a Feeding Method

    There are generally two popular approaches to introducing solids: traditional spoon-feeding purees and Baby-Led Weaning (BLW).

    • Traditional Spoon-Feeding:
      • Method: You spoon-feed your baby pureed or mashed foods.
      • Pros: Easy to track intake, less mess initially, can be reassuring for parents concerned about choking.
      • Cons: Less emphasis on self-feeding skills, can be perceived as passive for the baby.
    • Baby-Led Weaning (BLW):
      • Method: The baby self-feeds appropriately sized, soft finger foods from the start. No purees are used.
      • Pros: Encourages self-feeding, fine motor skills development, oral motor skill development, exposure to various textures.
      • Cons: Can be messier, requires careful attention to food size and texture to prevent choking, may be harder to track exact intake.
      • Key for BLW:
        • Ensure your baby meets ALL readiness signs, especially sitting unassisted and the diminishing tongue-thrust reflex.
        • Offer foods in stick shapes (like thick fries) or spears that your baby can easily grasp with their whole hand (initially, the palmar grasp).
        • Foods must be soft enough to be easily mashed between your fingers (e.g., steamed carrots, ripe avocado, well-cooked pasta, soft fruit slices).
        • NEVER offer small, hard, round, or sticky foods that pose a choking hazard.
    • Combination Approach: Many parents opt for a mix of both spoon-feeding purees and offering soft finger foods as their baby develops. This provides the benefits of both methods.

    Step 5: Prioritize Choking Prevention

    This is the most critical safety aspect when introducing solid food.

    • Supervision: Always supervise your baby intently while they are eating. Never leave them unattended.
    • Sitting Position: Ensure your baby is always sitting upright in a high chair.
    • Choking Hazard Avoidance (CRITICAL): Absolutely avoid these foods until your child is much older and has well-developed chewing and swallowing skills (typically around 4 years old):
      • Whole grapes, cherry tomatoes (cut them into quarters or smaller pieces)
      • Whole hot dogs (cut lengthwise into thin strips, then into small pieces)
      • Hard candies, chewing gum, marshmallows
      • Nuts and seeds (whole, including popcorn)
      • Large chunks of meat or cheese
      • Sticky foods like large globs of peanut butter (spread thinly on toast or mixed into other foods)
      • Hard, raw vegetables (e.g., raw carrots, apples – grate or steam them until soft)
    • Properly Prepared Food: Ensure all food is cut into appropriate, safe sizes and textures. For younger babies, this means pureed, mashed, or very soft finger foods. For older babies, soft, small, manageable pieces.
    • Learn Baby CPR and Choking First Aid: It is highly recommended that parents and caregivers take a certified infant CPR and choking first aid course. Knowing what to do in an emergency can save a life.

    Step 6: Watch for Allergic Reactions

    As mentioned in Step 2, carefully observe your baby for any signs of an allergic reaction after introducing new foods.

    • Symptoms of an Allergic Reaction:
      • Skin: Hives (red, itchy bumps), rash, swelling (face, lips, tongue, throat).
      • Respiratory: Wheezing, difficulty breathing, coughing, nasal congestion.
      • Digestive: Vomiting, diarrhea, stomach cramps.
      • Behavioral: Sudden fussiness, lethargy.
    • Action Plan:
      • Mild Reaction: Stop feeding the food immediately. Contact your pediatrician for advice.
      • Severe Reaction (Anaphylaxis): Difficulty breathing, sudden widespread hives, swelling of the tongue/throat, severe vomiting. Call emergency services immediately.
    • Record Keeping: Consider keeping a simple log of new foods introduced, the date, and any reactions observed. This can be helpful for your pediatrician.

    Conclusion

    Introducing solid food to your baby is a rewarding journey that requires patience, observation, and a strong emphasis on safety. By carefully watching for developmental readiness signs, selecting appropriate first foods, employing safe preparation and feeding techniques, and being vigilant about choking hazards and allergic reactions, you can ensure a positive and healthy transition to solids for your little one. Remember to consult your pediatrician for personalized advice and to address any concerns specific to your baby’s health and development.

    FAQ

    Q1: At what age should I start introducing solid food to my baby?

    Most health organizations, including the American Academy of Pediatrics (AAP) and the World Health Organization (WHO), recommend introducing solid food around 6 months of age. This is when babies typically show developmental readiness signs like good head control and interest in food. It’s crucial not to start before 4 months.

    Q2: What are the best first foods for a baby?

    Good first foods include iron-fortified single-grain infant cereals (like rice or oat), pureed fruits (e.g., bananas, avocados, pears), and pureed vegetables (e.g., sweet potatoes, carrots, peas). The key is to start with single-ingredient, smooth, easily digestible options.

    Q3: How do I know if my baby is ready for solid food?

    Look for signs of readiness, not just age. These include: good head and neck control, being able to sit up with support, the loss of the tongue-thrust reflex (they don’t push the spoon out), and showing interest in food by watching you eat or reaching for food.

    Q4: How should I introduce allergenic foods like peanuts to my baby?

    Current guidelines recommend introducing common allergenic foods (e.g., peanut products, eggs, dairy, wheat) early and regularly once other solids have been established. Introduce them one at a time, in small amounts, and wait 2-3 days before introducing another new food to observe for reactions. Always consult your pediatrician, especially if your baby has a history of eczema or allergies.

    Q5: What foods should I absolutely avoid giving my baby due to choking hazards?

    You must always supervise your baby while eating and avoid common choking hazards. These include whole grapes, cherry tomatoes, whole hot dogs, hard candies, nuts, popcorn, large chunks of meat or cheese, and sticky foods like large globs of peanut butter. Cut foods into appropriate, small, soft pieces. Learning baby CPR is also highly recommended.