Blog

  • How to Trim Baby Nails Without Hurting Them

    How to Trim Baby Nails Without Hurting Them

    Trimming a baby’s tiny, sharp nails can feel like a daunting task for new parents. Those little talons can cause scratches on their delicate skin or even on yours. The good news is, with the right tools, technique, and a bit of patience, it’s a perfectly manageable chore that becomes easier with practice. This guide will walk you through various methods to ensure a safe and tear-free nail trimming experience.

    Why Trimming Baby Nails is Important

    Baby nails grow surprisingly fast and can be incredibly sharp. Because babies lack fine motor control, they often scratch their faces, eyes, and even other people. Keeping their nails short and smooth prevents these accidental injuries and helps maintain good hygiene.

    Essential Tools for Trimming Baby Nails

    Choosing the right tool is the first step to a successful trim. There are several options, each with its pros and cons.

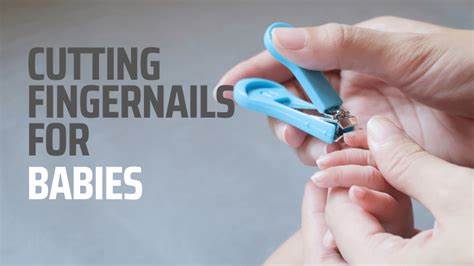
    1. Baby Nail Clippers:
      • Description: These are smaller versions of adult clippers, often with a curved cutting edge and a safety guard to prevent cutting too deeply.
      • Pros: Quick and efficient once you get the hang of them.
      • Cons: Can be intimidating due to their sharpness; requires steady hands.
      • Best for: Slightly older babies or when you need a quick trim.
    2. Baby Nail Scissors:
      • Description: Small scissors with rounded, blunt tips designed specifically for babies.
      • Pros: Offer more control and visibility than clippers; less intimidating for some parents.
      • Cons: Can still be tricky if the baby wiggles a lot; takes more time per nail.
      • Best for: Newborns and young infants with very soft nails.
    3. Baby Nail File (Emery Board or Electric Nail File):
      • Description: Fine-grit emery boards or battery-operated electric nail files (often with multiple filing pads of varying grits).
      • Pros: The safest option for newborns as there’s no risk of cutting skin; smooths sharp edges effectively. Electric files are particularly gentle and quiet.
      • Cons: Can be time-consuming; may not be sufficient for significantly long nails; emery boards wear out quickly.
      • Best for: Newborns, very young infants, or for smoothing rough edges after clipping/cutting.

    When to Trim Baby Nails: Timing is Everything

    Choosing the right moment can significantly reduce stress for both you and your baby.

    • During Sleep: This is often the preferred method for many parents. When your baby is in a deep sleep, their hands are relaxed, and they are less likely to wiggle. This provides a calm and still environment for trimming.
    • After a Bath: Baby’s nails are softer and more pliable after a warm bath, making them easier to trim and less likely to split.
    • During Feeding: If your baby is calm and content while feeding (especially bottle-feeding), you might find them distracted enough to get a few nails done. Be mindful of their position to avoid accidents.
    • When Distracted: For older, more active babies, a favorite show, toy, or even a different caregiver distracting them can help.

    Step-by-Step Guide: How to Trim Baby Finger Nails

    Finger nails tend to grow faster and are sharper than toenails, requiring more frequent attention. Aim to trim them about once a week.

    1. Gather Your Supplies: Have your chosen tool (clippers, scissors, or file), a bright light, and optionally a mild antiseptic wipe or cotton ball handy in case of a tiny nick (though with proper technique, this is rare).
    2. Choose Your Moment: Select a time when your baby is calm, sleepy, or otherwise distracted.
    3. Position Your Baby:
      • Sleeping Baby: Gently hold their hand.
      • Awake Baby: You might need a second person to help gently hold their hand still. If alone, try the “hug hold” where you tuck your baby’s arm under your armpit while you hold their hand, or cradle them in your arm.
    4. Isolate the Finger: Gently hold the baby’s finger you are about to trim.
    5. Press Down the Finger Pad: This is the most crucial step! Using your thumb and forefinger, gently push the fleshy part of the fingertip down and away from the nail. This creates a clear separation between the nail and the skin underneath, significantly reducing the risk of a nick.
    6. Trim the Nail (Method specific):
      • With Clippers: Place the clippers directly over the nail, avoiding the quick (the pink part underneath the nail). Make a single, quick snip straight across, following the natural curve of the nail. Avoid cutting them too short.
      • With Scissors: Position the rounded tips of the scissors under the nail, again, pushing the finger pad down. Make small, controlled snips, following the curve.
      • With a File (Emery Board or Electric): Gently file the nail in one direction or small, smooth motions, shaping it. For electric files, use the appropriate grit and apply light pressure until the nail is smooth and short enough. This method is excellent for rounding off any sharp corners left by clippers or scissors.
    7. Smooth Rough Edges: Regardless of the method used, always finish by gently filing any sharp or jagged edges with a baby nail file. This prevents new scratches.
    8. Repeat for Each Finger: Take your time, and move to the next finger when both you and the baby are ready. Don’t feel pressured to do all nails in one sitting.

    Step-by-Step Guide: How to Trim Baby Toe Nails

    Baby toenails grow slower and are less sharp than fingernails, so they generally require less frequent trimming (perhaps once or twice a month).

    1. Prepare as for Finger Nails: Gather tools and choose a calm moment.
    2. Position the Foot: Gently hold your baby’s foot.
    3. Press Down the Toe Pad: Similar to fingernails, gently push the fleshy part of the toe pad down and away from the nail.
    4. Trim Straight Across: For toenails, it’s generally recommended to trim straight across rather than curving the nail. This helps prevent ingrown toenails. Be careful not to cut too short.
    5. Smooth Edges: Use a file to smooth any sharp edges.

    What to Do If You Accidentally Nick Your Baby

    Despite all precautions, sometimes a tiny nick can happen. Don’t panic; it’s a common occurrence for parents.

    • Apply Gentle Pressure: Immediately apply gentle, clean pressure to the wound with a clean cloth or sterile gauze for a few minutes until the bleeding stops.
    • Cleanse: Once bleeding stops, gently clean the area with mild soap and water or a mild antiseptic wipe.
    • Do NOT Use Bandages: Avoid using bandages or plasters on baby fingers or toes, as they pose a choking hazard if they come loose.
    • Observe: Keep an eye on the area for any signs of redness, swelling, or pus, which could indicate infection. If you notice these, or if the bleeding doesn’t stop, contact your pediatrician.

    Pro Tips from Experienced Parents

    • Warmth and Comfort: Ensure your baby is warm and comfortable before you start. A fussy baby will make the task much harder.
    • Good Lighting: Always trim in a well-lit area so you can clearly see the nail and the quick.
    • One Nail at a Time: If your baby is particularly squirmy, try trimming just one or two nails at a time over several sessions. Slow and steady wins the race.
    • Make it a Routine: Incorporate nail trimming into your baby’s regular routine, perhaps after bath time, so they become accustomed to it.
    • Praise and Comfort: Talk to your baby gently throughout the process. Offer praise, cuddles, or a pacifier afterward.
    • Consider Teamwork: If you have a partner or another caregiver, one person can gently hold and distract the baby while the other trims the nails. This makes the process much easier.
    • Electric File for Beginners: If you’re particularly nervous, start with an electric baby nail file. They are virtually impossible to cause injury with and are excellent for building confidence.

    Trimming baby nails is a rite of passage for parents. While it might seem intimidating at first, with the right approach and a little practice, you’ll become a pro at keeping those tiny nails neat and tidy, ensuring your baby stays safe and scratch-free.

  • How to Relieve Gas in Baby Stomach

    How to Relieve Gas in Baby Stomach

    Seeing your baby squirm, cry, and fuss due to tummy discomfort can be heartbreaking for any parent. Gas is a very common issue in infants, whose digestive systems are still developing. While it’s a normal part of their early life, there are many gentle and effective ways to help relieve gas in a baby’s stomach and bring them comfort. This comprehensive guide covers various techniques, from prevention to immediate relief.

    Why Do Babies Get Gassy?

    Babies often get gassy for several reasons, including:

    • Swallowing Air: This is the most common cause, happening during feeding (breast or bottle), crying, or even pacifier use.
    • Immature Digestive System: A baby’s digestive tract is still learning to process food and expel gas efficiently. Enzymes that break down certain sugars might not be fully developed.
    • Diet: For breastfed babies, certain foods in the mother’s diet can sometimes contribute to gas. For formula-fed babies, the type of formula or how it’s prepared can play a role.
    • Overfeeding: A baby who eats too much too quickly can take in more air and have difficulty digesting.
    • Crying: Prolonged crying causes babies to swallow a lot of air.

    Signs Your Baby Has Gas

    Recognizing the signs of gas will help you act quickly to provide relief:

    • Fussiness and Crying: Especially after feeding.
    • Arching Back: Your baby may arch their back in discomfort.
    • Pulling Legs Up to Chest: This is a common sign of tummy pain.
    • Red Face: Straining to pass gas.
    • Distended or Hard Tummy: While not always visible, a firm belly can indicate gas.
    • Frequent Spit-Up: Can sometimes accompany gas issues.
    • Difficulty Sleeping: Discomfort can interrupt sleep.
    • Passing Gas (Farting) or Burping: While these are relief, they can also be signs of trapped gas leading up to the release.

    Immediate Relief Techniques

    When your baby is clearly uncomfortable with gas, these methods can provide quick relief.

    1. The Power of Burping

    Burping is your first line of defense against swallowed air. Aim to burp your baby during and after feedings.

    • Over-the-Shoulder Burp:
      1. Hold your baby upright with their head resting on your shoulder.
      2. Support their bottom with one hand.
      3. Gently pat or rub their back with the other hand. Ensure their airway isn’t blocked.
    • Sitting-Up Burp:
      1. Sit your baby on your lap, facing away from you.
      2. Support their chin and chest with one hand, leaning them slightly forward.
      3. Gently pat or rub their back with your free hand.
    • Across-the-Lap Burp:
      1. Lay your baby face down across your lap.
      2. Support their head slightly higher than their chest.
      3. Gently rub or pat their back.

    Tip: Don’t give up after a few pats. Sometimes it takes a minute or two for the burp to come out. If no burp comes after 5-10 minutes, try a different position.

    1. Tummy Massage

    A gentle tummy massage can help move trapped gas through your baby’s intestines.

    1. Lay your baby on their back.
    2. Warm your hands slightly.
    3. Apply gentle, circular motions clockwise around their belly button (following the natural path of digestion).
    4. Try the “I Love U” massage:
      • Trace an “I” down the baby’s left side (their left).
      • Trace an “L” upside down (across the top then down the left side).
      • Trace a “U” upside down (starting from the bottom right, up, across the top, and down the left side).
    5. You can also try walking your fingers gently from their chest down towards their belly button.
    1. Leg Exercises (“Bicycle Kicks”)

    This simple exercise can physically help push gas out.

    1. Lay your baby on their back.
    2. Gently hold their ankles or lower legs.
    3. Move their legs in a bicycling motion, pushing their knees up towards their chest and then extending them.
    4. You can also try pushing both knees gently up to their chest and holding for a few seconds before releasing. This compresses the abdomen and can help release gas.
    1. Tummy Time

    While supervised tummy time is important for development, it can also help with gas relief.

    • Lay your baby on their stomach across your lap or on a firm surface for a few minutes. The gentle pressure on their abdomen can help expel gas. Always supervise closely.
    1. Warm Bath

    A warm bath can help relax your baby’s muscles, including their abdominal muscles, which might provide comfort and facilitate gas release.

    • Ensure the water is a comfortable, safe temperature.
    • Gently swish the water around their tummy.
    1. Over-the-Counter Gas Drops

    Consult your pediatrician before using any medication. Simethicone gas drops (like Mylicon or Little Remedies Gas Relief Drops) work by breaking down large gas bubbles into smaller ones, making them easier to pass.

    • Follow the dosage instructions carefully on the packaging or as advised by your doctor.
    • These drops are generally considered safe and not absorbed into the baby’s system. They work directly in the digestive tract.
    1. Gripe Water

    Gripe water is an herbal remedy containing ingredients like ginger, fennel, chamomile, or dill. Its effectiveness is debated, and ingredients can vary, so always check with your pediatrician before using it.

    • Some parents swear by it, while others find it ineffective.
    • Look for alcohol-free and sugar-free varieties.

    Preventive Measures

    Preventing gas from building up in the first place is always better than treating it.

    1. Optimize Feeding Techniques
    • Proper Latch (Breastfeeding): Ensure your baby has a deep and proper latch to minimize swallowing air. Listen for gulping sounds, not clicking or smacking.
    • Bottle-Feeding Tips:
      • Slow-Flow Nipple: Use a nipple with a slow flow to prevent your baby from drinking too quickly and swallowing air.
      • Bottle Angle: Keep the bottle tilted so that the nipple is always full of milk, not air.
      • Burp Frequently: Burp your baby every few ounces for bottle-fed babies, and when switching breasts for breastfed babies.
      • Avoid Shaking Formula: Shaking formula vigorously can create air bubbles. Swirl it gently instead.
    • Feed in Upright Position: Try to feed your baby in a more upright position to help gravity keep air down and milk flowing smoothly.
    • Avoid Overfeeding: Feed your baby when they show hunger cues, not necessarily on a strict schedule that might lead to overfeeding.
    1. Pacifier Use

    While pacifiers can be soothing, prolonged or vigorous sucking on a pacifier can sometimes lead to increased air swallowing. Observe if this coincides with gas issues.

    1. Consider Mother’s Diet (for Breastfed Babies)

    While research is mixed, some mothers find that certain foods they eat can cause gas in their breastfed babies. Common culprits include:

    • Dairy products
    • Caffeine
    • Cruciferous vegetables (broccoli, cauliflower, cabbage)
    • Beans
    • Spicy foods

    If you suspect a food in your diet is causing gas, try eliminating it for a week or two to see if your baby’s symptoms improve, then reintroduce it to confirm. Always discuss significant dietary changes with your doctor.

    1. Formula Choice (for Formula-Fed Babies)

    If your baby is formula-fed and experiencing persistent gas, consult your pediatrician. They might suggest:

    • Hypoallergenic formula: If a dairy allergy is suspected.
    • Sensitive formula: Designed for sensitive tummies, often with reduced lactose.
    • Partially hydrolyzed formula: Where proteins are pre-broken down.

    Do not switch formulas without consulting your pediatrician.

    When to Call the Doctor

    While baby gas is usually harmless, there are times when it warrants a call to your pediatrician:

    • Persistent Crying: If your baby is inconsolable for prolonged periods, especially if it’s accompanied by other symptoms.
    • Poor Feeding: If gas is preventing your baby from feeding adequately.
    • Fever: If gas is accompanied by a fever.
    • Vomiting (especially projectile vomiting): This is a red flag.
    • Diarrhea or Bloody Stools: Can indicate a more serious digestive issue.
    • Hard or Swollen Abdomen: If their tummy feels unusually hard and distended beyond what gas might cause.
    • Lack of Wet/Dirty Diapers: Signs of dehydration or other issues.
    • Failure to Thrive: If your baby isn’t gaining weight appropriately.

    Understanding and addressing gas in your baby is a common parental challenge. By employing these gentle techniques and preventive measures, you can significantly help relieve gas in your baby’s stomach and bring comfort to your little one, fostering a happier, healthier baby and a less stressed parent. Remember, consistency is key, and if you have any concerns, always consult your pediatrician.

  • How to keep Baby Health in Check

    How to keep Baby Health in Check

    Bringing a new baby home is an exciting time, but it also comes with the significant responsibility of ensuring their well-being. Keeping your baby’s health in check involves a combination of routine care, keen observation, and timely medical attention. This comprehensive guide will walk you through essential steps to monitor and maintain your baby’s health from infancy through their first year.

    Understanding Your Baby’s Baseline Health

    Every baby is unique, but understanding general developmental milestones and health indicators will help you identify when something might be amiss. A healthy baby typically:

    • Feeds well and gains weight consistently.
    • Has regular wet and soiled diapers.
    • Is alert during wake times and sleeps for appropriate durations.
    • Responds to sounds and sights.
    • Reaches developmental milestones like smiling, cooing, and holding their head up.
    1. Regular Well-Baby Visits and Vaccinations

    One of the most crucial steps in keeping your baby healthy is adhering to their pediatrician’s schedule for well-baby check-ups and vaccinations.

    • Schedule Routine Check-ups:
      • Typically, these start a few days after birth and continue at 1, 2, 4, 6, 9, and 12 months, though the exact schedule may vary.
      • During these visits, the pediatrician will:
        • Measure your baby’s growth (weight, height, head circumference).
        • Perform a physical examination.
        • Assess developmental milestones.
        • Discuss feeding, sleep, and behavioral patterns.
        • Address any concerns you may have.
    • Stay Up-to-Date on Vaccinations:
      • Vaccinations are vital for protecting your baby from serious, preventable diseases.
      • Follow the recommended immunization schedule provided by your pediatrician. They protect against illnesses like measles, mumps, rubella, polio, diphtheria, tetanus, whooping cough, and more.
      • Keep an immunization record for your baby.
    1. Monitor Feeding and Diaper Output

    These are primary indicators of your baby’s nutritional intake and hydration.

    • Track Feeding:
      • Whether breastfeeding or formula-feeding, monitor how often and how much your baby eats.
      • Newborns feed frequently (8-12 times in 24 hours for breastfed babies). As they grow, feeding patterns will become more predictable.
      • Ensure your baby is latching well (if breastfeeding) or taking adequate amounts of formula.
      • Signs of good feeding include audible swallowing, contentedness after feeding, and consistent weight gain.
    • Count Wet and Soiled Diapers:
      • This is a direct measure of hydration and digestive health.
      • Wet diapers: A newborn should have at least 1 wet diaper for each day of life until they are 5-6 days old, after which they should have 6-8 or more wet diapers daily.
      • Soiled diapers: Stool frequency and consistency vary. Breastfed babies often have frequent, seedy, mustard-yellow stools. Formula-fed babies typically have fewer, firmer, tan-colored stools. Any sudden changes in frequency or consistency, especially hard, pellet-like stools or very watery, explosive ones, warrant a call to the pediatrician.
    1. Observe Sleep Patterns and Behavior

    Sleep is crucial for growth and development, and changes in behavior can signal health issues.

    • Understand Sleep Needs:
      • Newborns sleep a lot (14-17 hours daily), often in short bursts. As they grow, sleep periods lengthen, and they sleep less overall.
      • Ensure your baby is placed on their back to sleep on a firm, flat surface to reduce the risk of SIDS.
      • Create a safe sleep environment free of loose bedding, bumpers, and toys.
    • Monitor Behavior Changes:
      • You know your baby best. Pay attention to subtle shifts.
      • Irritability or excessive crying: While babies cry, inconsolable crying or a sudden increase in fussiness could indicate discomfort, hunger, or illness.
      • Lethargy: A baby who is unusually sleepy, difficult to rouse, or uninterested in feeding or interacting could be unwell.
      • Changes in activity: A decrease in normal movements or responsiveness.
      • Unusual sounds: Wheezing, grunting, or persistent coughing.
    1. Check for Signs of Illness

    Knowing what to look for can help you decide when to seek medical advice.

    • Fever:
      • A fever in an infant, especially under 3 months, is a serious concern.
      • Always use a rectal thermometer for the most accurate reading in infants.
      • Call your pediatrician immediately if your baby (under 3 months) has a rectal temperature of 100.4°F (38°C) or higher.
      • For older infants, consult your doctor based on their symptoms and the degree of fever.
    • Changes in Breathing:
      • Rapid breathing, labored breathing (flaring nostrils, retractions—skin pulling in between ribs or at the neck), or wheezing are red flags.
      • Listen for unusual sounds or difficulty breathing.
    • Vomiting and Diarrhea:
      • Occasional spit-up is normal. Projectile vomiting or persistent vomiting, especially with signs of dehydration (fewer wet diapers, sunken soft spot, no tears when crying, dry mouth), requires medical attention.
      • Frequent, watery stools (diarrhea) can quickly lead to dehydration in infants.
    • Skin Changes:
      • Rashes are common, but look for widespread rashes, blisters, or a rash accompanied by fever.
      • Jaundice (yellowing of the skin and eyes) is common in newborns, but persistent or worsening jaundice needs evaluation.
    • Appetite Changes:
      • A sudden refusal to feed or a significant decrease in feeding can be a sign of illness.
    1. Practice Good Hygiene and Safe Practices

    Prevention is a key part of baby health care.

    • Frequent Handwashing:
      • Wash your hands thoroughly with soap and water (or use an alcohol-based hand sanitizer) before handling your baby, especially before feeding or changing diapers.
      • Ask visitors to do the same.
    • Keep Environment Clean:
      • Regularly clean and sanitize surfaces your baby touches.
      • Wash baby’s clothes, bedding, and toys regularly.
    • Prevent Exposure to Illness:
      • Avoid taking a newborn into crowded places, especially during cold and flu season.
      • Limit visitors who are sick or have been around sick individuals.
      • Encourage family members to get their flu shot and Tdap vaccine (whooping cough) to protect the baby.
    • Safe Food Preparation:
      • Sterilize bottles and feeding equipment, especially for newborns.
      • Prepare formula according to instructions and use safe water.
    • Safe Handling and Environment:
      • Always support your baby’s head and neck.
      • Never leave your baby unattended on a raised surface.
      • Childproof your home as your baby becomes more mobile.
    1. Trust Your Parental Instincts

    As a parent, you spend the most time with your baby and are often the first to notice if something is off.

    • Don’t Hesitate to Call Your Pediatrician:
      • If you are ever concerned about your baby’s health, even if you can’t pinpoint the exact issue, it’s always better to call your pediatrician. They are there to help and answer your questions.
      • Keep your pediatrician’s contact information readily available.
      • Know the location of the nearest emergency room or urgent care clinic.

    By consistently applying these practices—from regular check-ups and vaccinations to diligent observation and proactive hygiene—you can effectively keep your baby’s health in check and provide them with the best possible start in life.

  • how to choose the safest crib for baby

    how to choose the safest crib for baby

    Choosing the safest crib for your baby is one of the most critical decisions you’ll make when preparing for their arrival. A safe sleeping environment is paramount for preventing Sudden Infant Death Syndrome (SIDS) and other accidents. This guide will walk you through the essential factors to consider, ensuring you select a crib that provides maximum safety and peace of mind.

    Understanding Crib Safety Standards

    The first and most crucial step in choosing a safe crib is understanding and adhering to current safety standards. In the United States, the Consumer Product Safety Commission (CPSC) sets strict federal safety standards for all cribs manufactured and sold. These regulations are designed to prevent injuries and deaths associated with cribs.

    Key CPSC Safety Standards to Look For:

    • No Drop-Side Rails: Drop-side cribs were banned in 2011 due to serious safety risks. Even if a used crib looks intact, avoid it if it has a drop-side.
    • Slat Spacing: Slats should be no more than 2 3/8 inches apart. If a soda can fits through the slats, they’re too wide.
    • Firm Mattress Fit: The crib mattress should fit snugly with no more than a two-finger gap around the edges.
    • No Corner Posts or Decorative Cutouts: These can catch clothing or entrap limbs, posing strangulation or injury hazards.
    • Sturdy Construction: Check for solid assembly with no loose hardware, splinters, or peeling finishes.
    • Non-Toxic Materials: Look for certifications like GREENGUARD Gold to ensure low chemical emissions.

    How to Select a New Crib

    Buying new helps ensure you’re getting a crib that complies with all current safety standards.

    1. Check for JPMA Certification: This voluntary seal indicates the crib meets or exceeds rigorous safety benchmarks.
    2. Double-Check Slats and Mattress Fit: Bring a tape measure or even a soda can to test slat spacing in-store.
    3. Inspect the Build: Watch for defects like splinters, misaligned parts, or poorly fastened hardware.
    4. Adjustable Mattress Heights: This feature is useful as your baby grows. The lowest setting helps prevent escapes.
    5. Firm Mattress Only: The surface should spring back quickly when pressed. Avoid anything plush or overly soft.

    What to Avoid When Choosing a Crib

    • Used Cribs with Drop-Side Rails: These are not safe under any condition.
    • Missing or Damaged Parts: Any structural defect is a dealbreaker.
    • Old Paint: Avoid cribs painted before 1978 due to the risk of lead exposure.
    • Add-Ons Like Bumpers and Positioners: These are not safe for infants, no matter how cute or well-reviewed they are.
    • Low-Hanging Mobiles: These can be strangulation hazards. Remove them once the baby can push up.

    Setting Up the Crib for Safe Sleep

    1. Follow Assembly Instructions: Precision matters. Improper assembly can compromise safety.
    2. Always Back to Sleep: Babies should always be placed on their backs for sleep.
    3. Bare is Best: Only a firm mattress and fitted sheet should be in the crib.
    4. Room Share, Don’t Bed Share: Keep your baby nearby, but in their own sleep space.
    5. Strategic Placement:
      • Away from windows and cords
      • Not near vents or heaters
      • Ensure all nearby electronics or lamps are secure

    Regularly Check for Recalls

    Even the best cribs can occasionally be recalled.

    • Visit the CPSC Website: Regularly check www.cpsc.gov for the latest recall info.
    • Register Your Crib: Complete the registration card to get direct updates if your crib is recalled.

    By prioritizing these safety practices, you’ll be taking a proactive step in creating a secure, restful space for your baby to grow and thrive.

  • How to Ensure Baby Brain Development

    How to Ensure Baby Brain Development

    The period from conception to a child’s third birthday is a time of incredible brain development. A baby’s brain grows faster during this period than at any other point in life, forming trillions of connections (synapses) that lay the foundation for all future learning, behavior, and health. In fact, by the age of three, a child’s brain will have reached approximately 80% of its adult size. This rapid growth is driven by a complex interplay of genetics, nutrition, environment, and experiences.

    Understanding how to support this critical process is vital for parents and caregivers. The concept of “early brain development” gained significant public attention in the late 20th century, spurred by advancements in neuroscience and imaging techniques that allowed researchers to observe the brain’s activity in infants. Organizations like the Center on the Developing Child at Harvard University have extensively researched and highlighted the profound impact of early experiences on brain architecture. It’s not about “making a baby smarter” in an artificial way, but about providing the optimal conditions for the brain to develop to its fullest potential, ensuring a strong foundation for cognitive, emotional, and social skills.

    This guide will provide a comprehensive, step-by-step approach to ensuring your baby’s brain development, focusing on actionable strategies you can implement daily.

    Step 1: Prioritize Optimal Nutrition (From Conception to Toddlerhood)

    Nutrition is the fuel for brain growth. What a baby eats, and what a mother eats during pregnancy and breastfeeding, directly impacts brain development.

    • During Pregnancy:
      • Folic Acid: Crucial for neural tube development in early pregnancy. Found in leafy greens, fortified cereals, and supplements.
      • Omega-3 Fatty Acids (DHA): Essential for brain and eye development. Found in fatty fish (salmon, sardines), fortified eggs, and algal oil supplements.
      • Iron: Prevents maternal anemia, which can impact fetal brain development.
      • Iodine: Critical for thyroid hormone production, which is vital for brain development.
    • For Infants (0-6 months):
      • Breast Milk or Formula: This is the sole source of nutrition for the first 6 months. Breast milk is considered the ideal food, containing a perfect balance of nutrients, antibodies, and beneficial compounds (including DHA) that support brain growth and overall health. If breastfeeding isn’t possible, choose an iron-fortified infant formula.
    • For Infants (6+ months) and Toddlers:
      • Introduction of Solids: Once solids are introduced (around 6 months, observing readiness signs), prioritize nutrient-dense foods.
        • Iron-fortified cereals and pureed meats: Essential for replenishing iron stores crucial for cognitive function.
        • Healthy Fats: Avocado, fatty fish, olive oil.
        • Fruits and Vegetables: Provide vitamins, minerals, and antioxidants for overall health and brain protection.
        • Eggs: A rich source of choline, vital for memory and brain development.
      • Avoid Processed Foods: Limit foods high in sugar, unhealthy fats, and excessive salt.

    Step 2: Engage in Responsive and Nurturing Interactions

    A baby’s brain develops through experiences, and responsive interaction with caregivers is paramount. This builds healthy attachment and stimulates neural pathways.

    • Talk, Read, and Sing to Your Baby:
      • Talk: Narrate your day, describe objects, ask questions (even if they can’t answer). This exposes them to language patterns and builds vocabulary.
      • Read: Start reading from birth. Point to pictures, use different voices, and let them touch board books. This fosters early literacy skills and a love for books.
      • Sing: Singing songs, especially those with actions, stimulates language, rhythm, and memory.
    • Respond to Your Baby’s Cues:
      • Pay attention to their babbles, gestures, and facial expressions. Respond promptly and appropriately. This teaches them that their actions have an effect and builds trust and security. This “serve and return” interaction is fundamental to brain development.
    • Eye Contact and Facial Expressions: Engage with your baby face-to-face. Make eye contact, smile, and use exaggerated facial expressions. Babies learn about emotions and social cues through these interactions.
    • Cuddle and Comfort: Physical touch and comfort are crucial for emotional development and stress regulation, which directly impacts brain architecture. A secure attachment fosters a sense of safety, allowing the brain to focus on learning rather than survival.

    Step 3: Provide a Stimulating Yet Not Overwhelming Environment

    A rich environment offers opportunities for exploration and learning, but too much stimulation can be counterproductive.

    • Sensory Play:
      • Touch: Offer toys with different textures (soft, bumpy, crinkly). Let them safely explore various surfaces.
      • Sound: Introduce different sounds (music, rattles, nature sounds). Be mindful of volume; protect their sensitive hearing.
      • Sight: Show them high-contrast black and white images for newborns, then colorful objects. Change their surroundings occasionally (e.g., different rooms, safe outdoor spaces).
      • Movement: Gently rock, bounce, or swing your baby. Tummy time is essential for developing motor skills and strengthening neck muscles, which supports visual tracking.
    • Exploration and Discovery:
      • As they grow, provide safe spaces for them to crawl, cruise, and walk. Let them explore objects with their hands and mouths (ensuring safety).
      • Offer Age-Appropriate Toys: Simple toys that encourage interaction, problem-solving, and imagination are best (e.g., blocks, stacking cups, shape sorters). Avoid toys that do everything for the child.
    • Limit Screen Time: The AAP recommends avoiding screen media for children younger than 18-24 months, with the exception of video-chatting. Passive screen time displaces active play and human interaction, which are far more beneficial for brain development. If screens are used for older infants, it should be limited, interactive, and with a caregiver present.

    Step 4: Ensure Adequate Sleep for Brain Consolidation

    Sleep is not just rest; it’s a critical period for brain development and memory consolidation. During sleep, the brain processes information learned during waking hours.

    • Establish a Consistent Sleep Routine: A predictable bedtime routine (bath, story, lullaby) helps signal to the baby that it’s time to sleep.
    • Create a Safe Sleep Environment: Ensure a firm mattress, no loose bedding, and a comfortable room temperature. Follow Safe Sleep recommendations (e.g., back to sleep) to reduce the risk of SIDS.
    • Understand Sleep Needs: Newborns sleep a lot (14-17 hours), gradually decreasing as they grow. Be responsive to their sleep cues (yawning, rubbing eyes, fussiness).
    • Allow for Naps: Naps are crucial for consolidating learning and preventing overtiredness.

    Step 5: Prioritize a Low-Stress, Secure, and Safe Environment

    Chronic stress can negatively impact brain development, particularly areas related to emotion regulation and learning.

    • Reduce Caregiver Stress: Babies are highly sensitive to their caregivers’ emotions. Managing your own stress (e.g., seeking support, practicing self-care) creates a calmer environment for your baby.
    • Consistent Caregiving: Predictable routines and consistent responses from caregivers build a sense of security, which allows the baby’s brain to focus on learning rather than stress responses.
    • Safe Physical Environment: Child-proof your home as your baby becomes mobile. This allows them to explore freely without constant “no’s,” fostering independence and curiosity while ensuring physical safety.
    • Protect from Harmful Substances: Ensure your baby is not exposed to second-hand smoke, lead (e.g., from old paint), or other environmental toxins, which can impair brain development.
    • Regular Pediatric Check-ups: Ensure your baby receives all recommended vaccinations and regular health check-ups. These prevent illnesses that could hinder development and allow pediatricians to monitor growth and milestones.

    Step 6: Be Patient and Observe Individual Development

    Every baby is unique, and development happens at different paces.

    • Celebrate Milestones: Acknowledge and celebrate your baby’s achievements, but avoid comparing them to other children.
    • Trust Your Instincts: As a parent, you know your baby best. If you have concerns about their development, don’t hesitate to consult your pediatrician. Early intervention can make a significant difference if developmental delays are present.
    • Follow Your Baby’s Lead: Observe your baby’s interests and cues. If they are engaged with an activity, continue it. If they lose interest or show signs of being overwhelmed, change activities or allow for quiet time.

    Conclusion

    Ensuring your baby’s brain development is one of the most profound and impactful roles a parent can undertake. It’s not about expensive toys or specialized programs, but about consistent, loving, and responsive care within a safe and stimulating environment. By focusing on optimal nutrition, engaging in rich interactions, providing diverse sensory experiences, prioritizing adequate sleep, maintaining a low-stress environment, and being patient with individual development, you are providing the strongest possible foundation for your child’s lifelong learning, well-being, and success.

    FAQ

    Q1: What are the most important things for a baby’s brain development?

    The most important factors for a baby’s brain development are optimal nutrition (especially DHA, iron, and choline), responsive and loving interactions with caregivers (talking, reading, singing, responding to cues), a stimulating yet safe environment for exploration, adequate sleep, and a low-stress, secure attachment with primary caregivers.

    Q2: Does reading to my newborn really help their brain development?

    Yes, absolutely! Reading to your newborn, even if they don’t understand the words, is incredibly beneficial. It exposes them to language sounds, rhythms, and patterns, builds vocabulary over time, fosters early literacy skills, and strengthens the emotional bond between you and your baby, all of which are crucial for brain development.

    Q3: How much screen time is safe for a baby’s brain development?

    The American Academy of Pediatrics (AAP) recommends avoiding screen media (TV, tablets, smartphones) for children younger than 18 to 24 months, with the exception of video-chatting with family. Excessive screen time can displace vital activities like interactive play and social interaction, which are essential for healthy brain development.

    Q4: What specific nutrients are crucial for a baby’s brain?

    Key nutrients for baby’s brain development include Omega-3 fatty acids (especially DHA) found in breast milk, formula, and fatty fish; Iron, vital for cognitive function; and Choline, found in eggs and other foods, which supports memory and brain development. Folic acid and iodine are also critical during pregnancy.

    Q5: How does stress affect a baby’s brain development?

    Chronic stress or adverse experiences in early life can have a detrimental impact on a baby’s developing brain. Prolonged exposure to stress hormones can negatively affect the formation of neural connections, particularly in areas related to emotion regulation, memory, and learning. A secure, predictable, and low-stress environment is crucial for healthy brain architecture.

  • How to Introduce Solid Food to Baby Safely

    How to Introduce Solid Food to Baby Safely

    Introducing solid food to your baby is a significant milestone, marking a new phase in their development and nutritional journey. For the first four to six months of life, breast milk or formula provides all the necessary nutrients for a baby’s growth. However, as babies grow, their nutritional needs expand beyond liquids, and solid foods become crucial for providing additional calories, iron, and other essential vitamins and minerals that their growing bodies require.

    The timing of this introduction has evolved over time. Historically, some cultures introduced solids much earlier, even within the first few weeks or months. However, extensive research by organizations like the American Academy of Pediatrics (AAP), the World Health Organization (WHO), and other health authorities now recommends waiting until around 6 months of age. This recommendation is based on scientific evidence indicating that babies’ digestive systems and motor skills are typically mature enough at this age to handle solid foods safely and effectively, reducing risks like choking and allergies. Premature introduction can also displace important breast milk or formula intake.

    This comprehensive guide will walk you through the process of introducing solid food to your baby safely, covering readiness signs, choosing first foods, feeding methods, and crucial safety considerations.

    Step 1: Recognize Your Baby’s Readiness Signs (Not Just Age)

    While 6 months is a general guideline, a baby’s individual developmental readiness is paramount. Look for these key signs, as they indicate your baby can safely handle and benefit from solids:

    • Good Head and Neck Control: Your baby can hold their head up steadily and unassisted. This is crucial for safe swallowing.
    • Sitting Up with Support: Your baby can sit upright in a high chair or on your lap, indicating core strength.
    • Loss of Tongue-Thrust Reflex: When you put a spoon near your baby’s mouth, they no longer automatically push it out with their tongue. This reflex prevents choking in newborns but needs to diminish for successful solid feeding.
    • Shows Interest in Food: Your baby watches you eat, leans forward, opens their mouth, or tries to grab food from your plate. They might even mimic chewing motions.
    • Increased Hunger: Your baby seems unsatisfied after their usual milk feeds, wanting more breast milk or formula than usual.

    Crucial Point: Do not start solids before 4 months, even if some of these signs are present, as their digestive system may not be mature enough, and it can increase the risk of allergies or choking.

    Step 2: Choose Safe First Foods

    The type of food you offer first matters. Focus on single-ingredient, easily digestible, and iron-fortified options.

    • Iron-Fortified Infant Cereal: Traditionally, iron-fortified single-grain infant cereals (like rice or oat) mixed with breast milk or formula were the go-to first food. They are a good source of iron, which babies need as their iron stores from birth begin to deplete around 6 months.
    • Pureed Fruits: Options like pureed bananas, avocados, pears, peaches, or cooked apples are good choices. Ensure they are smooth and free of lumps.
    • Pureed Vegetables: Introduce pureed cooked vegetables such as sweet potatoes, carrots, green beans, peas, or butternut squash.
    • Pureed Meats: Once comfortable with cereals, fruits, and vegetables, introduce pureed meats (chicken, turkey, beef, lamb) for additional iron and protein.
    • Introducing Allergenic Foods: The latest guidelines (including from the AAP) recommend introducing common allergenic foods (such as peanut products, eggs, cow’s milk products, soy, wheat, tree nuts, fish, and shellfish) early and regularly once other solids have been successfully introduced. This approach may help reduce the risk of developing food allergies.
      • How to introduce allergens safely:
        • Introduce one new allergenic food at a time.
        • Offer a small amount (e.g., a tiny dab of smooth peanut butter mixed into breast milk/formula or puree).
        • Wait 2-3 days before introducing another new food (whether allergenic or not) to observe for any allergic reactions.
        • If no reaction occurs, continue offering the allergenic food regularly (e.g., 2-3 times a week) to maintain tolerance.
        • Always be prepared for an allergic reaction and know the signs (hives, swelling, difficulty breathing, vomiting, diarrhea). Consult your pediatrician before introducing highly allergenic foods, especially if your baby has severe eczema or a known food allergy.

    Step 3: Prepare and Offer Food Safely

    Preparation and presentation are key to a safe feeding experience.

    • Texture Matters:
      • Initial Stage (6-8 months): Start with thin, smooth purees or very soft, mashed foods. The consistency should be runny enough to be easily swallowed. Gradually thicken the consistency as your baby gets used to it.
      • Later Stage (8-10 months): Move to thicker purees, mashed foods, and soft, finely chopped finger foods. Your baby will develop chewing abilities.
      • Toddlerhood (10-12+ months): Offer a wider variety of textures, including soft, well-cooked pieces of food.
    • Temperature: Food should be lukewarm, not hot. Always test the temperature on your wrist before offering it to your baby.
    • Serving Size: Start with very small amounts – just 1-2 teaspoons per feeding. Gradually increase the amount as your baby shows interest. Remember, breast milk or formula remains their primary source of nutrition at this stage.
    • Feeding Tools: Use a soft-tipped baby spoon to avoid injuring delicate gums.
    • High Chair Safety: Always place your baby in an upright position in a high chair with a safety harness that is properly secured. This helps prevent choking. Never feed a baby while they are reclined or lying down.
    • Timing: Choose a time when your baby is well-rested and not overly hungry or tired. After a milk feeding (breast milk or formula) is often ideal, as they won’t be ravenous, but not so full that they refuse food.
    • Positive Atmosphere: Make mealtimes a calm and positive experience. Avoid distractions.
    • Be Patient: Your baby might make a mess, refuse food, or only eat a tiny amount. This is normal. It’s about exploration and learning, not necessarily eating large quantities right away.
    • Don’t Force Feed: If your baby turns away, shakes their head, or clamps their mouth shut, respect their cues and end the feeding.
    • Introduce One New Food at a Time: Introduce a single new food every 3-5 days. This allows you to identify any potential allergic reactions or sensitivities to a specific food.

    Step 4: Choose a Feeding Method

    There are generally two popular approaches to introducing solids: traditional spoon-feeding purees and Baby-Led Weaning (BLW).

    • Traditional Spoon-Feeding:
      • Method: You spoon-feed your baby pureed or mashed foods.
      • Pros: Easy to track intake, less mess initially, can be reassuring for parents concerned about choking.
      • Cons: Less emphasis on self-feeding skills, can be perceived as passive for the baby.
    • Baby-Led Weaning (BLW):
      • Method: The baby self-feeds appropriately sized, soft finger foods from the start. No purees are used.
      • Pros: Encourages self-feeding, fine motor skills development, oral motor skill development, exposure to various textures.
      • Cons: Can be messier, requires careful attention to food size and texture to prevent choking, may be harder to track exact intake.
      • Key for BLW:
        • Ensure your baby meets ALL readiness signs, especially sitting unassisted and the diminishing tongue-thrust reflex.
        • Offer foods in stick shapes (like thick fries) or spears that your baby can easily grasp with their whole hand (initially, the palmar grasp).
        • Foods must be soft enough to be easily mashed between your fingers (e.g., steamed carrots, ripe avocado, well-cooked pasta, soft fruit slices).
        • NEVER offer small, hard, round, or sticky foods that pose a choking hazard.
    • Combination Approach: Many parents opt for a mix of both spoon-feeding purees and offering soft finger foods as their baby develops. This provides the benefits of both methods.

    Step 5: Prioritize Choking Prevention

    This is the most critical safety aspect when introducing solid food.

    • Supervision: Always supervise your baby intently while they are eating. Never leave them unattended.
    • Sitting Position: Ensure your baby is always sitting upright in a high chair.
    • Choking Hazard Avoidance (CRITICAL): Absolutely avoid these foods until your child is much older and has well-developed chewing and swallowing skills (typically around 4 years old):
      • Whole grapes, cherry tomatoes (cut them into quarters or smaller pieces)
      • Whole hot dogs (cut lengthwise into thin strips, then into small pieces)
      • Hard candies, chewing gum, marshmallows
      • Nuts and seeds (whole, including popcorn)
      • Large chunks of meat or cheese
      • Sticky foods like large globs of peanut butter (spread thinly on toast or mixed into other foods)
      • Hard, raw vegetables (e.g., raw carrots, apples – grate or steam them until soft)
    • Properly Prepared Food: Ensure all food is cut into appropriate, safe sizes and textures. For younger babies, this means pureed, mashed, or very soft finger foods. For older babies, soft, small, manageable pieces.
    • Learn Baby CPR and Choking First Aid: It is highly recommended that parents and caregivers take a certified infant CPR and choking first aid course. Knowing what to do in an emergency can save a life.

    Step 6: Watch for Allergic Reactions

    As mentioned in Step 2, carefully observe your baby for any signs of an allergic reaction after introducing new foods.

    • Symptoms of an Allergic Reaction:
      • Skin: Hives (red, itchy bumps), rash, swelling (face, lips, tongue, throat).
      • Respiratory: Wheezing, difficulty breathing, coughing, nasal congestion.
      • Digestive: Vomiting, diarrhea, stomach cramps.
      • Behavioral: Sudden fussiness, lethargy.
    • Action Plan:
      • Mild Reaction: Stop feeding the food immediately. Contact your pediatrician for advice.
      • Severe Reaction (Anaphylaxis): Difficulty breathing, sudden widespread hives, swelling of the tongue/throat, severe vomiting. Call emergency services immediately.
    • Record Keeping: Consider keeping a simple log of new foods introduced, the date, and any reactions observed. This can be helpful for your pediatrician.

    Conclusion

    Introducing solid food to your baby is a rewarding journey that requires patience, observation, and a strong emphasis on safety. By carefully watching for developmental readiness signs, selecting appropriate first foods, employing safe preparation and feeding techniques, and being vigilant about choking hazards and allergic reactions, you can ensure a positive and healthy transition to solids for your little one. Remember to consult your pediatrician for personalized advice and to address any concerns specific to your baby’s health and development.

    FAQ

    Q1: At what age should I start introducing solid food to my baby?

    Most health organizations, including the American Academy of Pediatrics (AAP) and the World Health Organization (WHO), recommend introducing solid food around 6 months of age. This is when babies typically show developmental readiness signs like good head control and interest in food. It’s crucial not to start before 4 months.

    Q2: What are the best first foods for a baby?

    Good first foods include iron-fortified single-grain infant cereals (like rice or oat), pureed fruits (e.g., bananas, avocados, pears), and pureed vegetables (e.g., sweet potatoes, carrots, peas). The key is to start with single-ingredient, smooth, easily digestible options.

    Q3: How do I know if my baby is ready for solid food?

    Look for signs of readiness, not just age. These include: good head and neck control, being able to sit up with support, the loss of the tongue-thrust reflex (they don’t push the spoon out), and showing interest in food by watching you eat or reaching for food.

    Q4: How should I introduce allergenic foods like peanuts to my baby?

    Current guidelines recommend introducing common allergenic foods (e.g., peanut products, eggs, dairy, wheat) early and regularly once other solids have been established. Introduce them one at a time, in small amounts, and wait 2-3 days before introducing another new food to observe for reactions. Always consult your pediatrician, especially if your baby has a history of eczema or allergies.

    Q5: What foods should I absolutely avoid giving my baby due to choking hazards?

    You must always supervise your baby while eating and avoid common choking hazards. These include whole grapes, cherry tomatoes, whole hot dogs, hard candies, nuts, popcorn, large chunks of meat or cheese, and sticky foods like large globs of peanut butter. Cut foods into appropriate, small, soft pieces. Learning baby CPR is also highly recommended.

  • How to Improve Handwriting for Kids

    How to Improve Handwriting for Kids

    Developing legible and fluent handwriting is a fundamental skill for children. While digital tools are prevalent, clear handwriting remains crucial for schoolwork, note-taking, and personal expression. Many parents and educators wonder how to best support kids struggling with their penmanship. It’s not just about neatness; good handwriting also impacts confidence, speed, and even academic performance.

    This comprehensive guide offers practical, step-by-step methods and strategies to help improve a child’s handwriting, addressing everything from foundational skills to consistent practice.

    Understanding the Foundations of Good Handwriting

    Before diving into specific writing drills, it’s important to understand that good handwriting relies on several underlying skills:

    • Fine Motor Skills: The ability to make small, precise movements with fingers and hands.
    • Hand-Eye Coordination: The ability to process visual information and use it to guide hand movements.
    • Core Strength and Posture: A strong core provides stability, allowing for better control of the arms and hands.
    • Pencil Grasp: How a child holds the writing tool.
    • Letter Formation: Knowing the correct strokes and sequences for each letter.
    • Spacing and Alignment: Placing letters and words correctly on the line.

    Addressing these foundational areas can significantly impact a child’s handwriting journey.

    How to Improve Handwriting for Kids: Step-by-Step Guide

    Here are practical steps to help your child develop clear and consistent handwriting.

    Step 1: Strengthen Fine Motor Skills

    Strong fine motor skills are the building blocks of good handwriting. Engage your child in activities that promote dexterity and hand strength.

    • Play with Dough/Clay: Kneading, rolling, and shaping clay strengthens hand muscles.
    • Building Blocks & LEGOs: Manipulating small pieces improves finger control.
    • Puzzles: Grasping and placing puzzle pieces refines pincer grasp.
    • Tearing Paper: Tearing paper into strips or shapes works finger muscles.
    • Using Tongs or Tweezers: Picking up small objects with tweezers (e.g., beads, cotton balls) enhances precision.
    • Cutting with Scissors: Practicing cutting along lines and shapes develops hand control.
    • Lacing Beads or Threading Pasta: This activity improves hand-eye coordination and fine motor control.

    Step 2: Ensure Proper Posture and Seating

    A stable foundation is key. Poor posture can lead to fatigue and awkward writing positions.

    • Feet Flat on the Floor: Ensure your child’s feet are flat on the floor or a footrest.
    • Table Height: The table should be about elbow height when your child is seated. Forearms should rest comfortably on the table.
    • Chair Support: A chair with good back support helps maintain an upright position.
    • Relaxed Shoulders: Remind your child to keep their shoulders relaxed, not hunched up.
    • Proper Paper Placement: The paper should be slightly slanted (angled towards the writing hand) to allow for a natural arm movement. For right-handers, slant the paper to the left; for left-handers, slant it to the right.

    Step 3: Master the Pencil Grasp

    The way a child holds a pencil significantly impacts comfort, control, and legibility. The tripod grasp (where the pencil is held by the thumb, index finger, and resting on the middle finger) is generally recommended.

    • Observe the Grasp: Watch how your child naturally holds the pencil.
    • Correcting the Grasp:
      • Pencil Grips: Use ergonomic pencil grips that guide fingers into the correct position. These are widely available.
      • Short Pencils: Sometimes, a shorter pencil can encourage a better grasp as it’s harder to hold too far up.
      • “Flip Trick”: Place the pencil on the table with the tip pointing towards your child. Have them pick it up with their writing fingers, then “flip” it into position.
      • Tissue Trick: Have the child hold a small tissue or cotton ball in their palm with their ring and pinky fingers. This encourages the other fingers to form the tripod grasp.
    • Avoid the “Fist” or “Hook” Grasp: These grasps limit finger movement and can cause hand fatigue.

    Step 4: Focus on Letter Formation

    Correct letter formation is fundamental for legibility and speed.

    • Model Correct Strokes: Demonstrate how to form each letter step-by-step. Use a top-to-bottom, left-to-right approach for most letters.
    • Use Lined Paper: Start with wide-ruled paper that has a baseline, midline, and sometimes a top line. This helps children understand letter height and placement.
    • Verbal Cues: Use consistent verbal cues as you demonstrate (e.g., “Start at the top, straight line down,” “Big curve to the left”).
    • Tracing: Begin with tracing activities for individual letters and then words.
    • Dot-to-Dot Letters: Provide outlines of letters with dots for children to connect.
    • Air Tracing: Have children “write” letters in the air, focusing on the correct movement.
    • Letter Families: Group letters with similar starting strokes (e.g., c, a, d, g, q; l, i, t, u, j).
    • Practice Uppercase First: For younger children, start with uppercase letters as they generally involve simpler, straighter lines. Then move to lowercase.

    Step 5: Practice Spacing and Alignment

    Poor spacing and letters floating above or sinking below the line are common issues.

    • Finger Spaces: Teach your child to use a “finger space” (the width of their index finger) between words.
    • Visual Cues: Draw a small dot or a light vertical line to indicate where the next word should start.
    • Maintain Baseline: Emphasize that letters should “sit” on the baseline. Use fun analogies like “letters shouldn’t float like balloons or sink like anchors.”
    • Consistent Height: Work on keeping uppercase letters and tall lowercase letters (b, d, f, h, k, l, t) consistent in height, and smaller lowercase letters (a, c, e, i, m, n, o, r, s, u, v, w, x, z) consistent with each other.
    • Descenders: Teach about descenders (g, j, p, q, y) that go below the baseline.

    Step 6: Engage in Regular, Short Practice Sessions

    Consistency is more important than long, tedious sessions.

    • Short Bursts: Aim for 10-15 minute daily practice sessions rather than one long, overwhelming session once a week.
    • Make it Fun: Incorporate games, colorful pens, or writing about topics your child enjoys.
    • Variety of Tools: Don’t just stick to pencils. Let them write with crayons, markers, chalk, or even paint. This can make practice feel less like a chore.
    • Handwriting Workbooks: Invest in age-appropriate handwriting workbooks that provide structured practice.
    • Daily Writing: Encourage daily writing, whether it’s a journal, a short story, a letter to a friend, or even a grocery list.
    • Positive Reinforcement: Focus on progress, not perfection. Praise effort and improvement. Highlight specific letters or words that look great.

    Step 7: Address Common Handwriting Challenges

    Some specific issues require targeted approaches.

    • Speed vs. Neatness: If your child rushes, emphasize slowing down. If they are too slow, gently encourage them to find a comfortable pace while maintaining legibility.
    • Reversals (b/d, p/q): Continue practicing letter formation, use multi-sensory approaches (tracing in sand, forming with playdough), and provide visual reminders. This is common in early stages and often resolves with practice.
    • Uneven Pressure: If your child presses too hard (hand cramps, rips paper) or too lightly (faint letters), experiment with different pencil types (e.g., softer lead pencils for light pressure, firmer lead for heavy pressure) or pencil grips that encourage a lighter touch.

    Step 8: Seek Professional Guidance if Needed

    While these steps can significantly help, some children may have underlying issues.

    • Occupational Therapy (OT): If your child consistently struggles with fine motor skills, hand strength, or coordination despite consistent effort, an occupational therapist can provide specialized assessments and interventions.
    • Learning Specialists: If handwriting difficulties are part of a broader learning challenge, a learning specialist or educational psychologist might be able to offer additional support.

    Improving handwriting is a journey, not a race. With consistent practice, patience, and a positive approach, you can significantly help your child develop clear, confident, and functional handwriting skills.

  • How to Play with a Baby to Boost Brain Development

    How to Play with a Baby to Boost Brain Development

    As a parent, you are your baby’s first and most important teacher. Every interaction, from a simple smile to a gentle touch, helps build their brain. The most powerful way to support this incredible growth is through play. Playing with your baby isn’t just about fun; it’s a fundamental way to build neural connections and lay the foundation for future learning.

    But knowing how to play at each stage can feel overwhelming. This guide will show you exactly how to play with a baby to boost their brain development, with simple, effective activities tailored to their age. Think of these as the building blocks for a curious and healthy mind. I remember wondering if I was “doing enough” with my own little one, but soon realized that the simplest games often have the biggest impact.

    The Core Principle: Serve and Return

    Before we dive into specific activities, understand this one concept: serve and return. Your baby “serves” by babbling, pointing, or making a facial expression. You “return the serve” by responding in a meaningful way—making eye contact, talking back, or naming what they see. This back-and-forth interaction is the cornerstone of healthy brain development. It builds crucial circuits for communication and social skills.

    How to Play: An Age-by-Age Guide

    Here’s how you can effectively play with your baby during their transformative first year.

    Step 1: Engaging Your Newborn (0-3 Months)

    During this early stage, your baby’s world is a swirl of new sensations. Your goal is to provide gentle stimulation that helps them begin to process sights, sounds, and touches.

    • Make Face-to-Face Contact: A newborn’s optimal focal distance is about 8-12 inches—the distance from your arms to your face. Hold your baby close and let them study your features. Smile, stick out your tongue, and raise your eyebrows. This imitation is the earliest form of problem-solving and social learning.
    • Talk, Sing, and Read: Use a gentle, sing-song voice. Narrate your day (“Now we are changing your diaper!”). It doesn’t matter what you say; the rhythm and tone of your voice stimulate the auditory pathways in their brain. Reading from a simple, high-contrast book introduces them to language patterns.
    • Introduce High-Contrast Images: A baby’s vision is still developing. They are most captivated by black, white, and red patterns. Show them high-contrast flashcards or books. This encourages visual tracking and focus.
    • Gentle Touch and Movement: Gently clap your baby’s hands together or bicycle their legs while singing a song. Let them feel different textures, like a soft blanket or a smooth toy. This sensory play is crucial for building their understanding of the world.

    Step 2: Exploring with Your Growing Baby (3-6 Months)

    Your baby is now becoming more aware and interactive. They are starting to understand cause and effect and have better control over their bodies.

    • Master Tummy Time: Tummy time is a powerhouse for development. It strengthens their neck, shoulder, and back muscles, which are essential for sitting up, crawling, and eventually walking.
      • How to do it: Place a blanket on the floor and lay your baby on their stomach for a few minutes at a time, several times a day. Get down on the floor with them. Place a baby-safe mirror or an engaging toy just within their reach to encourage them to lift their head.
    • Introduce Simple Cause-and-Effect Toys: A rattle that makes noise when shaken or a toy that squeaks when squeezed is perfect at this age. This teaches them a fundamental cognitive skill: “If I do this, then that happens.”
    • Play Peek-a-Boo: This classic game is more than just a laugh. It teaches object permanence—the concept that things still exist even when they can’t be seen. This is a massive leap in abstract thinking.
    • Encourage Reaching and Grasping: Dangle an interesting toy just close enough for them to try and bat at or grab. This develops hand-eye coordination and fine motor skills.

    Step 3: Fostering Curiosity in Your Older Baby (6-12 Months)

    Your baby is now on the move or getting ready to be. They are expert explorers, and their brain is like a sponge, soaking up information about how objects relate to one another.

    • Build and Knock Down: Stacking soft blocks or simple rings and letting your baby knock them over is a lesson in gravity and cause and effect. It also hones their fine motor skills and spatial awareness.
    • Play Hide-and-Seek with Toys: Partially hide a favorite toy under a blanket and ask, “Where did it go?” Let them pull the blanket away to find it. This is a more advanced form of peek-a-boo that reinforces object permanence.
    • Read Board Books Together: Let your baby touch and turn the thick pages. Point to pictures and name them clearly (“Look, a big, red ball!”). This builds vocabulary and connects words to objects, a critical pre-reading skill.
    • Engage in “Back-and-Forth” Babbling: When your baby babbles (“ba-ba-ba”), babble the same sounds back to them. Then, wait for them to respond. This teaches them the rhythm of conversation and shows them that their voice has power.
    • Create a Safe “Yes” Space: As your baby starts to crawl or pull up, create a baby-proofed area where they can explore freely without you having to say “no” constantly. This fosters independence, curiosity, and confidence—all essential for brain development.

    Remember, the goal of play is not to create a “super baby.” It’s about connecting with your child and providing warm, responsive interactions that make them feel safe and loved. That feeling of security is the fertile ground from which all learning grows.

  • How to Install a Baby Car Seat Correctly

    How to Install a Baby Car Seat Correctly

    Installing a baby car seat correctly is one of those things every parent knows is important, but it can feel a bit daunting. The truth is, a properly installed car seat drastically lowers the risk of injury if you’re ever in a crash. Yet, surprisingly, studies show that a large number of car seats are installed incorrectly, which makes having clear guidance all the more essential.

    Why Correct Installation Really Matters

    The forces involved in a crash are intense — way more than we often imagine. If a car seat isn’t installed properly, it might not protect your child as it should. There’s a real risk the child could be ejected or get seriously hurt by hitting parts inside the car. Even a small mistake in installation can reduce how well the seat works, so it’s worth paying close attention.

    Different Types of Baby Car Seats

    Before you dive into installation, it helps to know what kind of car seat you’re dealing with:

    • Infant Car Seats: These are designed just for newborns and small babies. They’re always rear-facing and usually come with a base you leave in the car, making it easy to click the carrier in and out.
    • Convertible Car Seats: These versatile seats start rear-facing for infants and toddlers, then flip to forward-facing as your child grows.
    • All-in-One Car Seats: Kind of like convertible seats, but they can also turn into booster seats when your child is ready.
    • Booster Seats: For kids who have outgrown forward-facing seats. These raise your child so the car’s seat belt fits safely across their body.

    A quick but important note: Always double-check the height and weight limits on your seat’s label. Kids should stay rear-facing as long as possible — usually until they hit the seat’s max weight or height, which is often around age two or more.

    Getting Ready: General Steps Before Installation

    No matter which car seat you have, these prep steps are critical:

    1. Read the Manuals: Seriously, don’t skip this. Your car seat manual and your vehicle’s owner manual both have crucial instructions tailored to your exact models.
    2. Check for Recalls and Expiration: Car seats don’t last forever. They usually expire between 6 and 9 years from the manufacture date. Also, make sure your seat hasn’t been recalled.
    3. Pick the Safest Spot: Usually, the middle of the back seat is best—it’s the furthest from side impacts. But if you can’t get a secure install there, the side seats are acceptable. And never install a car seat in the front passenger seat if your car has active airbags.
    4. Park on Level Ground: This makes it easier to get the seat at the right angle and properly tightened.

    Installation Methods: LATCH vs. Seat Belt

    You have two main ways to install a car seat: the LATCH system or your vehicle’s seat belt. You generally want to use one or the other—not both—unless both manuals explicitly say otherwise (which is pretty rare).

    Method 1: Installing with the LATCH System

    LATCH stands for Lower Anchors and Tethers for Children. It’s designed to make installation easier and more secure without relying on seat belts.

    What’s involved?

    • Lower Anchors: Two metal bars hidden in the crease between your car seat’s backrest and bottom cushion.
    • Tether Anchor: A metal point usually at the back of the seat, rear deck, or floor/ceiling in vans and SUVs. The tether is for forward-facing seats only.

    Rear-Facing Installation with LATCH (Infant or Convertible Seats):

    1. Locate the lower anchors—they often have little symbols nearby.
    2. Attach your car seat’s lower connectors (hooks or clips) firmly until you hear a click. Give them a tug to make sure they’re locked.
    3. Adjust the recline angle. This is super important for your baby’s airway. Most infant seats have an adjustable foot or indicator. Use the built-in level (like a bubble or line) to check it. If allowed by your manual, you might use a rolled towel or pool noodle to help get the angle right.
    4. Tighten the straps. Press down firmly on the seat or base while pulling the LATCH straps tight to remove any slack.
    5. Perform the “inch test.” Grab the seat at the belt path and try to move it side to side and front to back. It shouldn’t move more than an inch. If it does, tighten those straps some more.

    Forward-Facing Installation with LATCH (Convertible or All-in-One Seats):

    1. Find both the lower anchors and the top tether anchor.
    2. Attach the lower connectors securely.
    3. Press down and tighten the lower straps.
    4. Attach and tighten the top tether strap over the back of the seat to the tether anchor, pulling it snug to reduce your child’s head movement in a crash.
    5. Do the inch test again to make sure it’s tight.

    Method 2: Installing with the Vehicle’s Seat Belt

    If your vehicle doesn’t have LATCH where you want to install the seat, or if your child or seat exceeds the LATCH weight limits, the seat belt method is the way to go.

    Rear-Facing Seat Belt Installation:

    1. Route the vehicle’s lap and shoulder belts through the rear-facing belt path on your car seat (usually marked in blue).
    2. Buckle the seat belt.
    3. Lock the seat belt. This is a critical step. Most modern seat belts have locking mechanisms for car seats:
      • Automatic Locking Retractor (ALR): Pull the shoulder belt all the way out until you hear clicks, then let it retract—this locks it tight.
      • Switchable Retractor: Some older cars require pulling the belt all the way out and then slowly feeding it back while holding tight.
      • Manual Locking Clip: Rare now, but some older setups use a metal clip to keep the belt tight.
      • Built-in Lock-off Devices: Many newer car seats have clamps that lock the belt automatically.
    4. Adjust the recline angle using the level indicator and, if allowed, a towel or pool noodle.
    5. Tighten by pressing down firmly on the seat while pulling the shoulder belt tight.
    6. Perform the inch test to confirm minimal movement.

    Forward-Facing Seat Belt Installation:

    1. Route the belt through the forward-facing belt path (usually marked in red).
    2. Buckle the seat belt.
    3. Lock the belt using the appropriate method.
    4. Tighten the belt firmly.
    5. Attach and tighten the top tether to the vehicle’s tether anchor.
    6. Do the inch test again.

    Securing Your Child in the Car Seat

    Once your seat is installed well, the next key step is making sure your child is buckled in properly:

    • Harness height: For rear-facing seats, straps should be at or just below the shoulders. For forward-facing, they should be at or just above.
    • Snug harness: Pull straps tight enough that you can’t pinch any slack at the collarbone. Straps should lie flat, no twists.
    • Chest clip: Position it at armpit level to keep straps in place.
    • Check the buckle: Make sure it’s not tucked under or uncomfortable.

    When to Get a Professional Check

    Even if you follow all the steps carefully, car seat installation can be tricky. If you’re ever unsure, or just want peace of mind, consider having a certified Child Passenger Safety Technician (CPST) inspect your installation.

    • You can find CPSTs through organizations like Safe Kids Worldwide (U.S.) or local safety groups.
    • Many fire stations, hospitals, or police departments hold free car seat check events.

    Getting your baby’s car seat installed right might seem like a lot of work, but it’s absolutely worth it. Following these steps—and referring back to your manuals—will help keep your little one as safe as possible on every ride.

  • How to Choose Age-Appropriate Toys for a Baby

    How to Choose Age-Appropriate Toys for a Baby

    Choosing toys for a baby can sometimes feel a bit overwhelming with all the options out there. But picking the right toys—those that match their age and development—matters a lot. The right toy isn’t just fun; it can help stimulate their senses and encourage important skills. This guide breaks down what to look for at different stages during a baby’s first year.

    1. Prioritize Safety Above All Else

    First and foremost, safety is key. Babies tend to explore by putting things in their mouths, so small parts can quickly become a choking hazard.

    • Choking Hazards: A simple rule is that if a part fits entirely inside a toilet paper roll, it’s too small for babies under three. Avoid toys with little detachable pieces like beads or buttons.
    • Sturdy Construction: Look for toys that are well-made, without sharp edges or parts that could easily break off.
    • Safe Materials: Choose toys made from non-toxic materials like BPA-free plastics, untreated wood, or organic fabrics. If a toy smells chemical-y, it’s better to skip it.
    • Cords and Strings: Avoid toys with cords or strings longer than 12 inches (about 30 cm) to reduce strangulation risks.
    • Battery Safety: If a toy uses batteries, make sure the compartment is screw-secured and can’t be easily opened.
    • Labels and Certifications: Always check the recommended age on packaging—they’re based on safety, not just skill level. Look for safety marks like ASTM F963 (U.S.) or EN71 (Europe).
    • Supervise: Even the safest toys need supervision. Never leave a baby alone during play.
    1. Understand Baby Developmental Stages

    Babies change fast. What’s right for a newborn won’t work for a 9-month-old, so match toys to their stage.

    0-3 Months: Newborn Exploration

    At this early stage, babies are mainly tuning into their senses.

    • High-contrast toys in black, white, or red catch their still-developing eyes.
    • Soft rattles or gentle musical toys stimulate hearing.
    • Mobiles (kept out of reach) help with visual tracking.
    • Unbreakable mirrors and textured mats make tummy time more interesting.
    • Lightweight, soft toys encourage grasping practice.

    3-6 Months: Reaching and Grasping

    Babies begin reaching out and exploring cause and effect.

    • Teething rings with different textures soothe sore gums.
    • Activity gyms and play mats offer hanging toys for batting and kicking.
    • Sensory balls invite rolling and holding.
    • Soft books with crinkly pages introduce early textures and sounds.
    • Linkable rings develop fine motor skills.
    • Simple rattles remain favorites.

    6-9 Months: Sitting, Crawling, Object Permanence

    Mobility grows and babies start realizing things exist even when out of sight.

    • Stacking cups or rings promote problem-solving.
    • Soft blocks are great for building and knocking down (which is all part of learning).
    • Cause-and-effect toys that light up or make noise fascinate.
    • O-balls are easy to grasp and roll.
    • Activity cubes invite exploration.
    • Soft rollers encourage movement and reach.

    9-12 Months: Cruising, Exploring, Problem-Solving

    Babies are pulling up, cruising around, and getting more curious.

    • Push and pull toys support walking skills.
    • Shape sorters teach hand-eye coordination.
    • Nesting toys develop spatial reasoning.
    • Board books with clear images support early language.
    • Toy phones or remotes let babies imitate grown-ups.
    • Large pegboards help with matching and fine motor control.
    1. Look for Engaging Features

    Beyond age and safety, what makes a toy captivating?

    • Sensory Stimulation: Toys that appeal to sight, sound, and touch—bright colors, varied textures, gentle sounds—tend to hold attention better.
    • Open-Ended Play: Toys like blocks or stacking cups that can be used in different ways encourage creativity as your baby grows.
    • Durability: Babies aren’t gentle. Pick toys that can handle chewing, dropping, and tugging.
    • Easy to Clean: Since toys will get dirty, look for ones you can wipe down or wash without hassle.
    • Purposeful Design: The best toys don’t just entertain; they support skill-building, whether that’s fine motor, gross motor, cognitive, or sensory development.
    1. Consider Practicality and Quantity

    More toys don’t always mean better play.

    • Less Is More: Too many toys can overwhelm and distract a baby. A few thoughtfully chosen, quality toys often do more good.
    • Rotation: Try rotating toys. Put some away and bring them back later to keep interest fresh without constantly buying new stuff.
    • Storage: Think about where you’ll keep the toys and how easy it is to tidy up afterward.
    • Versatility: Some toys grow with your baby, offering different ways to play at various stages—for example, soft blocks that can be chewed, stacked, or used imaginatively.

    By keeping safety front and center, understanding where your baby is developmentally, choosing engaging features, and thinking practically about quantity, you’ll pick toys that not only delight but help your baby grow. And remember, the best toy isn’t necessarily the most expensive—it’s the one that’s safe, stimulating, and loved.