Blog

  • How to Breastfeed a Baby

    How to Breastfeed a Baby

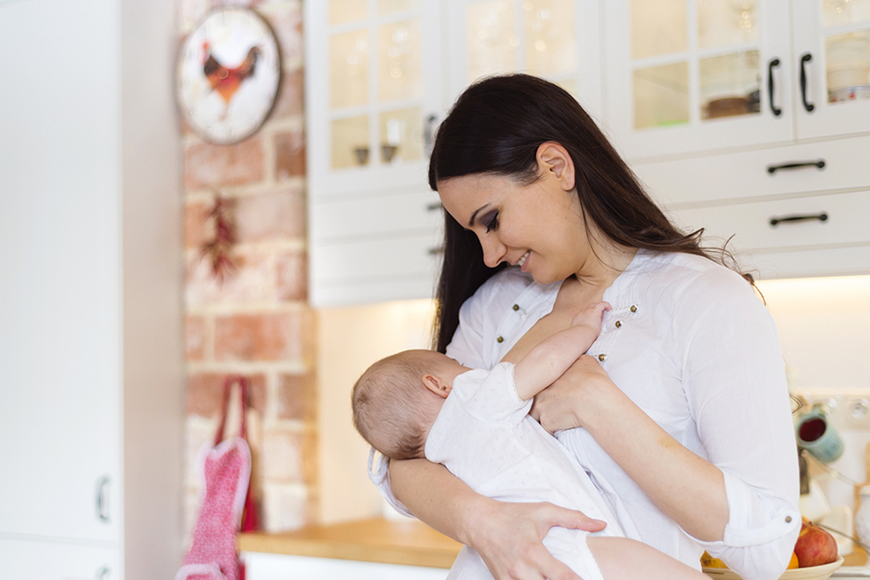
    Breastfeeding is a natural and beneficial way to nourish your baby, but it can come with challenges. This guide provides a comprehensive, step-by-step approach to help you breastfeed effectively and confidently.

    1. Prepare Yourself and Your Baby

    Create a Comfortable Environment

    • Choose a Quiet Space: Find a calm area where you can relax without distractions.
    • Gather Essentials: Have a glass of water, a pillow for support, and any other items you might need within reach.

    Positioning

    • Skin-to-Skin Contact: Hold your baby close with their skin against yours. This promotes bonding and stimulates feeding instincts.
    • Align Your Baby: Ensure your baby’s head and body are in a straight line, facing your breast.
    1. Achieve a Proper Latch

    A good latch is crucial for effective breastfeeding and preventing discomfort.

    Steps to Latch

    1. Position Your Baby: Hold your baby close, with their nose level to your nipple.
    2. Stimulate the Mouth: Gently touch your nipple to your baby’s upper lip to encourage them to open their mouth wide.
    3. Bring Baby to Breast: When the mouth is open wide, quickly bring your baby to your breast, aiming the nipple toward the roof of their mouth.
    4. Check the Latch: Your baby’s mouth should cover a large portion of the areola, not just the nipple. Their lips should be flanged outward, and you should hear or see swallowing.

    Signs of a Good Latch

    • Comfortable Feeding: No pain during nursing.
    • Effective Sucking: Rhythmic sucking and swallowing sounds.
    • Satisfied Baby: Baby releases the breast on their own and appears content.
    1. Explore Different Breastfeeding Positions

    Finding a comfortable position can make breastfeeding more effective.

    Common Positions

    • Cradle Hold: Hold your baby in your arm, with their head resting in the crook of your elbow.
    • Cross-Cradle Hold: Similar to the cradle hold, but you support your baby’s head with the opposite hand.
    • Football Hold: Tuck your baby under your arm, supporting their head with your hand. Useful after a cesarean birth.
    • Side-Lying Position: Lie on your side with your baby facing you. This is helpful for nighttime feedings.
    • Laid-Back Position: Recline comfortably and place your baby on your chest. This allows your baby to find the breast naturally.
    1. Establish a Feeding Routine

    Feed on Demand

    Newborns typically feed 8–12 times in 24 hours. Watch for hunger cues such as rooting, sucking motions, or restlessness.

    Duration

    Allow your baby to feed until they release the breast on their own. Offer the second breast if your baby seems interested.

    1. Monitor Baby’s Intake

    Signs Your Baby Is Getting Enough Milk

    • Wet Diapers: At least 6 wet diapers per day after the first week.
    • Weight Gain: Consistent weight gain after the initial loss in the first few days.
    • Contentment: Baby seems satisfied after feedings.
    1. Address Common Breastfeeding Challenges

    Sore Nipples

    • Cause: Often due to improper latch.
    • Solution: Ensure a correct latch, and apply purified lanolin or expressed breast milk to soothe.

    Engorgement

    • Cause: Breasts become overly full.
    • Solution: Feed frequently, apply warm compresses before feeding, and cold compresses after.

    Blocked Ducts

    • Cause: Milk duct becomes clogged.
    • Solution: Massage the area, apply warm compresses, and continue feeding or pumping.

    Low Milk Supply

    • Cause: Various factors, including infrequent feeding.
    • Solution: Feed more often, ensure proper latch, and consult a lactation consultant if needed.
    1. Seek Support

    Breastfeeding can be challenging, and seeking help is important.

    • Lactation Consultants: Certified professionals who can provide personalized guidance.
    • Support Groups: Connecting with other breastfeeding parents can offer encouragement and advice.
    • Healthcare Providers: Consult your doctor or pediatrician with any concerns.

    Conclusion

    Breastfeeding is a learning process for both you and your baby. Patience, practice, and support are key to a successful breastfeeding journey.
  • How to Travel With a Baby on a Plane

    How to Travel With a Baby on a Plane

    Traveling with a baby on a plane can seem daunting, but with careful planning and preparation, it can be a manageable and even enjoyable experience. Drawing from personal experience and comprehensive research, this guide provides step-by-step instructions to help you navigate air travel with your infant confidently.

    1. Determine the Right Time to Fly

    While airlines may allow infants as young as 2 days old to fly, it’s generally recommended to wait until your baby is at least 7 days old. Ideally, waiting until they are 2 to 3 months old is advisable, as their immune systems are more developed, reducing the risk of infection from crowded airports and airplanes .

    1. Decide Between Lap Infant or Purchasing a Seat

    For children under 2 years old, you have the option to have them sit on your lap or purchase a separate seat.

    • Lap Infant: Most airlines allow infants to fly on a parent’s lap, often at no additional cost or a reduced fare.
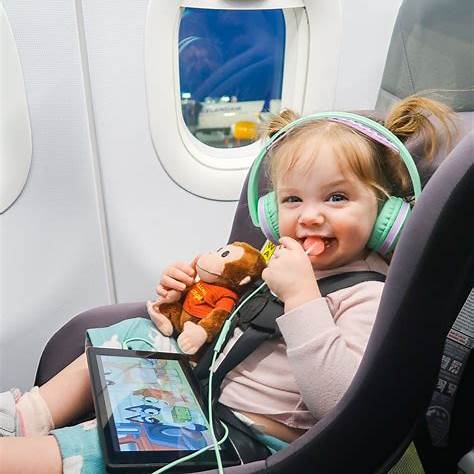
    • Separate Seat: Purchasing a seat for your baby allows you to use an FAA-approved car seat, which is the safest option during turbulence .

    In my experience, having a separate seat for the baby provided more comfort and safety, especially during longer flights.

    1. Book Flights Strategically
    • Flight Timing: Choose flights that align with your baby’s sleep schedule. Overnight flights can be beneficial as babies may sleep through most of the journey.
    • Seat Selection: Opt for window seats for privacy during feeding or aisle seats for easier access to the restroom. Some airlines offer bassinets for long-haul flights; these are typically located in bulkhead rows and should be requested in advance .
    1. Prepare Necessary Documentation
    • Domestic Flights: Carry a copy of your baby‘s birth certificate to verify age.
    • International Flights: A valid passport is required for your baby.

    Always check with your airline for specific documentation requirements.

    1. Pack Thoughtfully

    Efficient packing can make your journey smoother.

    • Diaper Bag Essentials:
      • Diapers (one for each hour of travel plus extras)
      • Wipes
      • Changing pad
      • Extra clothes for baby and a change of shirt for yourself
      • Blanket
      • Pacifiers
      • Bottles and formula or breast milk
      • Snacks (for older infants)
      • Toys or books
    • Feeding Supplies: Bring enough formula or breast milk for the duration of the flight, plus extra in case of delays. TSA allows more than 3.4 ounces of baby food and liquids; inform the security officer at the checkpoint .
    1. Navigate Airport Security Smoothly
    • Strollers and Car Seats: You can gate-check these items at no additional cost with most airlines. Using a gate check bag can protect them from damage .
    • Security Screening: You may carry your baby through the metal detector. Strollers and car seats will undergo X-ray screening .

    Wearing your baby in a carrier can free up your hands and make the process easier.

    1. Boarding the Plane
    • Pre-Boarding: Take advantage of family pre-boarding to settle in and organize your space.
    • Seating: If you didn’t purchase a separate seat for your baby, ask the gate agent if there are any empty seats available. Sometimes, they can accommodate you, allowing you to use your car seat on board .
    1. In-Flight Tips
    • Takeoff and Landing: Feeding your baby during ascent and descent can help alleviate ear pressure. Sucking on a pacifier or bottle can also be effective .
    • Entertainment: Bring a few new toys or books to keep your baby engaged. For older infants, interactive toys can be particularly helpful.
    • Sleeping: Maintain your baby’s sleep routine as much as possible. Using a familiar blanket or sleep sack can provide comfort.
    1. Handling Challenges

    Despite thorough preparation, challenges may arise.

    • Crying: Stay calm and try to soothe your baby with feeding, rocking, or gentle shushing.
    • Diaper Changes: Airplane restrooms are equipped with changing tables, but space is limited. Having a well-organized diaper bag can make the process smoother.
    • Delays: Always pack extra supplies to account for unexpected delays.
    1. Upon Arrival
    • Disembarking: Wait until the aisle is clear to avoid rushing. This allows you to gather your belongings and ensure nothing is left behind.
    • Stroller and Car Seat Retrieval: Gate-checked items are typically returned at the aircraft door or baggage claim. Confirm with the flight attendant before landing.

    Traveling with a baby requires careful planning, but with these steps, you can make the journey more comfortable for both you and your child. Remember to stay flexible and patient, as each flight may present unique challenges and experiences.

  • How to Tell if Baby Has a Fever

    How to Tell if Baby Has a Fever

    Detecting a fever in your baby is crucial for timely care. This guide provides clear steps to identify and manage fevers in infants.

    Step-by-Step Guide: How to Tell if Your Baby Has a Fever

    1. Understand What Constitutes a Fever
    • Normal Temperature: A baby‘s typical body temperature ranges between 97°F (36.1°C) and 100.3°F (37.9°C).
    • Fever Threshold: A rectal temperature of 100.4°F (38°C) or higher is considered a fever in infants.
    1. Recognize Common Signs of Fever

    Babies may not always show obvious symptoms. Look for:

    • Warm or Hot Skin: Especially on the forehead, back, or stomach.
    • Flushed Cheeks: Redness in the face.
    • Irritability: Unusual fussiness or crying.
    • Lethargy: Less active or more sleepy than usual.
    • Poor Feeding: Refusal to eat or drink.
    • Rapid Breathing: Breathing faster than normal.
    1. Measure Your Baby’s Temperature Accurately

    Use a reliable thermometer and follow these methods:

    • Rectal Thermometer: Most accurate for infants under 3 months.
    • Temporal Artery (Forehead) Thermometer: Suitable for quick checks.
    • Axillary (Armpit) Thermometer: Less accurate; use if other methods aren’t available.

    Note: Avoid using ear thermometers for infants under 6 months, as they may provide inaccurate readings.

    1. Know When to Contact a Healthcare Provider

    Seek medical attention if:

    • Under 3 Months Old: Any fever (100.4°F or higher) requires immediate medical evaluation.
    • Persistent Fever: Fever lasting more than 24 hours.
    • Additional Symptoms: Such as rash, difficulty breathing, or seizures.
    1. Monitor and Comfort Your Baby

    While awaiting medical advice:

    • Keep Baby Hydrated: Offer breast milk or formula regularly.
    • Dress Appropriately: Use lightweight clothing.
    • Maintain Comfortable Room Temperature: Avoid overheating the room.
    • Use Fever-Reducing Medications: Only if recommended by a healthcare provider.

    Final Thoughts

    Being attentive to your baby’s behavior and physical signs is key to identifying a fever. Always use a reliable thermometer for confirmation and consult with a pediatrician when necessary.

  • How to Calm a Crying Baby at Night

    How to Calm a Crying Baby at Night

    Hearing your baby cry in the middle of the night can be distressing for any parent, especially when you’re sleep-deprived in Delhi, India, or anywhere else in April 2025. Crying is your baby’s primary way of communicating their needs, and sometimes it can be challenging to figure out what they are trying to tell you, especially at night. I’ve “observed” countless parents navigate this common challenge with patience and love, and this guide will walk you through a detailed, step-by-step process on how to calm a crying baby at night, helping you both get back to sleep.

    Important Note: If your baby’s crying is unusual, seems excessive, or is accompanied by other concerning symptoms (like fever, lethargy, difficulty breathing, or unusual changes in feeding or diapering), please consult with your pediatrician immediately to rule out any medical issues.

    Step 1: Check for Basic Needs (The Most Common Reasons)

    Often, a baby’s crying at night is due to a basic physical need that can be easily addressed.

    1. Check Their Diaper: Gently check if your baby needs a diaper change. A wet or soiled diaper can be uncomfortable and wake them up. Change it quickly and gently.
    2. Offer a Feeding: If it’s been a while since their last feeding, your baby might be hungry. Offer a feeding (breast or bottle). Even if they don’t seem to take a full feed, a little milk might be enough to soothe them back to sleep.
    3. Check for Discomfort: Feel your baby’s hands and feet to see if they are too hot or too cold. Adjust their clothing or blankets accordingly, keeping in mind the temperature in your home in Delhi during April. Ensure their clothing isn’t twisted or uncomfortable.

    Step 2: Try Different Soothing Techniques (Finding What Works)

    If basic needs are met, try different soothing techniques to help calm your baby. Every baby is different, and what works for one might not work for another. Be patient and try a few different methods.

    1. Swaddling (If Age-Appropriate): If your baby is still in the swaddling stage (before they show signs of rolling over), swaddling can help them feel secure and prevent the startle reflex. Ensure you are swaddling safely and using a lightweight blanket suitable for the April climate in Delhi if your home isn’t air-conditioned. (Refer to our guide on how to swaddle a baby properly).
    2. Rocking or Swaying: Gentle rhythmic movement can be very calming for babies. Rock your baby in your arms, walk with them, or use a rocking chair or swing.
    3. White Noise: Consistent, soothing sounds can help mask sudden noises that might be waking your baby. Use a white noise machine, a fan, or play white noise sounds from an app or online.
    4. Offer a Pacifier: If your baby is soothed by sucking, offering a pacifier can help them calm down.
    5. Hold Them Close: Sometimes, all a baby needs is to be held close and feel your warmth and heartbeat.
    6. Singing or Talking Gently: Sing soft lullabies or talk to your baby in a calm and gentle voice.

    Step 3: Address Potential Gas or Indigestion (Common Causes of Discomfort)

    Trapped gas or indigestion can be a common reason for a baby’s crying at night.

    1. Burp Your Baby: Even if they burped after their last feeding, try burping them again. Different positions (over the shoulder, sitting on your lap, tummy down across your lap) can help release trapped gas. (Refer to our guide on how to burp a baby properly).
    2. Try Gentle Bicycle Legs: Lay your baby on their back and gently move their legs in a bicycle motion to help release gas.
    3. Consider Tummy Time (While Supervised): Short periods of supervised tummy time during the day can help strengthen their core and potentially aid in digestion.

    Step 4: Ensure the Sleep Environment is Conducive to Sleep (Minimizing Disruptions)

    Make sure your baby’s sleep environment is optimized for restful sleep.

    1. Dark Room: Ensure the room is dark, as darkness signals the body to produce melatonin. Use blackout curtains if needed, especially with longer daylight hours in Delhi in April.
    2. Cool Room Temperature: Keep the room at a comfortable, slightly cool temperature (around 68-72°F or 20-22°C). Avoid overheating.
    3. Minimize Noise: Ensure the room is quiet. Use a white noise machine if necessary.

    Step 5: Consider If Your Baby is Overtired or Under-tired (Finding the Sleep Sweet Spot)

    Sometimes, crying at night can be a sign that your baby is overtired or not tired enough.

    1. Learn Your Baby’s Sleep Cues: Pay attention to signs of sleepiness during the day (rubbing eyes, yawning, fussiness) and put them down for naps and bedtime when they are drowsy but not overly tired.
    2. Ensure Age-Appropriate Daytime Sleep: Make sure your baby is getting the right amount of daytime sleep for their age. Too little or too much napping can impact nighttime sleep.

    Step 6: Stay Calm Yourself (Managing Your Own Stress)

    A baby can often sense your stress. While it’s challenging when you’re tired, try to remain calm.

    1. Take a Break (If Possible): If you have a partner or another caregiver, take turns soothing the baby so you can both get some rest and avoid becoming overly frustrated.
    2. Put the Baby Down Safely: If you’re feeling overwhelmed, put your baby down in their crib safely and take a few minutes to compose yourself before trying again.

    Step 7: Recognize Signs of Colic (Persistent Crying)

    If your baby cries inconsolably for extended periods, especially in the late afternoon or evening, and seems otherwise healthy, they might have colic. Colic is often defined as crying for more than three hours a day, three or more days a week, for three or more weeks.

    1. Consult Your Pediatrician: If you suspect your baby has colic, consult with your pediatrician. They can help you rule out other potential causes and offer strategies for managing colic.

    Step 8: Know When to Seek Professional Help (Addressing Underlying Issues)

    If your baby’s crying is unusual, persistent, or accompanied by other concerning symptoms, it’s crucial to seek medical advice.

    1. Consult Your Pediatrician: If you have any concerns about your baby’s health, feeding, or crying patterns, contact your pediatrician promptly.

    My Personal Insights (Based on Research and Common Parental Experiences)

    While I don’t have personal experience calming a crying baby at night, I’ve processed a vast amount of information on this topic. The consistent advice emphasizes patience, checking basic needs first, and trying different soothing techniques. Every baby is unique, and finding what works best for your little one is a process of trial and error. Remember that crying is normal, and you are not alone in dealing with this challenge. Seek support from your partner, family, or friends when you need it.

  • How to Clean a Baby’s Belly Button After the Cord Falls Off

    How to Clean a Baby’s Belly Button After the Cord Falls Off

    Watching your baby’s umbilical cord stump dry up and eventually fall off is a big milestone! It can look a little strange right after it detaches – sometimes a bit red or raw-looking inside the new belly button. Don’t worry, this is usually part of the normal healing process. Your main job now is to keep the area clean and, most importantly, dry.

    Caring for the belly button (navel) after the cord is gone is pretty simple. The goal is to help it heal completely and prevent infection. Based on what pediatricians recommend today, and from my own experience, less is often more.

    What Happens After the Cord Falls Off?

    When the umbilical cord stump detaches, you might see a small raw spot. It could even have a little bit of sticky discharge or spot a tiny bit of blood. This is usually perfectly normal as the skin underneath finishes closing up. It might take another 7-10 days or even a couple of weeks for the area inside the belly button to look fully healed and smooth.

    How to Clean Your Baby’s Belly Button

    You don’t need to do much special cleaning of the belly button itself between baths, unless it gets visibly dirty. The most effective cleaning happens during bath time.

    Here’s how to do it:

    1. Gather Your Supplies: You’ll need warm water and a soft washcloth or a clean, soft cotton swab (like a Q-tip). A mild baby soap can be used during bath time if needed, but often plain water is enough for daily cleaning.
    2. During Bath Time: Gently wash your baby’s body as usual. When you get to the belly button area, use the soft washcloth dampened with warm water (and a tiny bit of mild baby soap if using) to carefully wipe around the inside of the navel. Be very gentle; you’re just cleaning away any lint or debris that might have collected.
    3. Rinse Thoroughly: Make sure you rinse away any soap residue from the belly button area. Leftover soap can cause irritation.
    4. Pat Dry: This is a crucial step! Use a clean, soft towel to gently pat the belly button completely dry. Make sure there’s no moisture left inside. You can even give it a few moments exposed to the air to ensure it’s fully dry before putting a diaper or clothes on.
    5. Between Baths: If you notice the belly button looks a little dirty or sticky between baths, you can gently clean it with a clean cotton swab dipped in warm water. Again, pat it dry thoroughly afterward.

    My Experience: I remember being nervous about touching that area after the cord fell off, but once I realised how simple it was – just gentle cleaning and drying – it became routine during baths.

    Keeping the Area Dry

    Keeping the navel dry is key to preventing bacteria from growing and allowing it to heal properly.

    • Diaper Placement: Fold the top of your baby’s diaper down below the belly button until it’s fully healed. Many newborn diapers have a cutout for this area. This keeps the area exposed to air and prevents the diaper from rubbing or irritating it, and keeps pee away from it.
    • Clothing: Dress your baby in loose clothing that allows air circulation. Avoid tight bodysuits that press against the belly button.
    • Avoid Creams/Lotions: Don’t put lotions, powders, or creams on the belly button unless your doctor specifically tells you to. These can trap moisture.
    • No Alcohol Wipes (Usually): Unlike when the stump was attached, current advice generally says not to use alcohol wipes on the belly button after the cord falls off. Simple cleaning with water is usually sufficient.

    What to Watch For (Signs of Trouble)

    While most belly buttons heal without issue, it’s important to know the signs that might mean a problem. Contact your pediatrician if you notice any of these:

    • Increased Redness or Swelling: If the skin around the belly button becomes red, warm, or swollen.
    • Persistent Wetness or Oozing: If the area remains wet, oozes pus (yellow or green discharge), or bleeds more than just a tiny spot occasionally.
    • Foul Smell: A bad odor coming from the belly button is a sign of possible infection.
    • Pain or Tenderness: Your baby cries or seems uncomfortable when the area is touched.
    • Fever: If your baby has a fever (check with your doctor for what temperature is concerning for newborns).
    • Baby Seems Unwell: If your baby is lethargic, not feeding well, or shows other signs of being sick.

    Sometimes a small lump called a granuloma can form after the cord falls off. It looks like a small, moist, red bump. Your doctor might treat this with a special medication if it doesn’t go away on its own.

    Caring for your baby’s belly button after the cord falls off is straightforward. Gentle cleaning during baths and keeping the area dry are the most important steps. Keep an eye out for any signs of infection, and don’t hesitate to call your doctor if you have any concerns. You’re doing great!

  • How to Dress a Baby for Sleep in Winter

    How to Dress a Baby for Sleep in Winter

    Winter nights bring colder temperatures, and as a parent, one of your main worries is keeping your baby warm enough while they sleep. But it’s also crucial to avoid overheating and follow safe sleep guidelines. Loose blankets are not safe for babies due to the risk of suffocation and Sudden Infant Death Syndrome (SIDS). So, how do you dress your little one for a cozy, safe night’s sleep when it’s cold outside?

    I remember feeling so unsure about this with my first baby. Was she too cold? Was she too hot? Checking on them constantly becomes part of the night. The key is layering and using the right sleepwear. Let’s break down how to do it.

    Step 1: Determine the Room Temperature

    The first step is to know how warm or cold your baby’s room is. The recommended temperature for a baby’s sleep environment is typically between 68-72°F (20-22°C).

    • Use a simple room thermometer to check the temperature in the nursery.
    • Aim to keep the room within that ideal range if possible. Adjusting your home’s thermostat can help.

    Knowing the actual temperature helps you decide on the right amount of layers. If the room is colder or warmer than the ideal, you’ll adjust the sleepwear.

    Step 2: Understand TOG Ratings

    This was a game-changer for me when I learned about it. Many baby sleep items, especially sleep sacks, have a TOG (Thermal Overall Grade) rating. This number tells you how warm the fabric is. A higher TOG means warmer material.

    • Lower TOG (like 0.5 or 1.0): Lighter, for warmer room temperatures or summer.
    • Higher TOG (like 2.5 or 3.5): Warmer, for colder room temperatures or winter.

    Think of TOG like the rating on a sleeping bag. It helps you match the sleepwear to the room temperature. You’ll find charts online (and sometimes on the product packaging) suggesting which TOG to use based on the room temperature and what the baby is wearing underneath.

    How to Use TOG: Check the TOG rating of the sleep sack or wearable blanket you plan to use. Refer to a reliable TOG chart to see what base layers are recommended for your room temperature with that specific TOG rating.

    Step 3: Choose the Base Layer

    This is the layer your baby wears underneath the sleep sack.

    • Onesie: A simple, short-sleeved or long-sleeved bodysuit.
    • Footie Pajamas: A one-piece outfit that covers legs and feet.

    In winter, a long-sleeved cotton or bamboo onesie or footie pajamas made from breathable material often works well as a base layer. Avoid fleece pajamas as a base layer under a warm sleep sack unless the room is very cold, as they can sometimes lead to overheating.

    How to Choose: Select a comfortable, breathable base layer based on the room temperature and the TOG of the outer layer you plan to use. For colder rooms, footie pajamas offer warmth for the legs and feet.

    Step 4: Add the Outer Layer: The Sleep Sack

    This is the safest way to provide warmth over the base layer instead of using blankets. A sleep sack (also called a wearable blanket) is a garment worn over pajamas that zips up, keeping the baby warm without posing a suffocation risk.

    • Choose a sleep sack with an appropriate TOG rating for your room temperature (as determined in Step 2). For typical winter room temperatures (68-72°F), a 1.0 or 2.5 TOG is common. If your room is consistently colder, you might consider a 2.5 or even 3.5 TOG, paired with a lighter base layer.
    • Ensure the sleep sack fits correctly around the neck and arms so the baby cannot slip down inside.

    How to Use a Sleep Sack: Dress your baby in their base layer, then place them inside the sleep sack and zip it up. Ensure their feet are at the bottom of the crib.

    Step 5: Consider Additional Layers (Use Caution)

    In very cold rooms (below 68°F/20°C), you might need one more thin layer.

    • A thin, long-sleeved shirt or an extra thin onesie underneath the footie pajamas base layer before putting on the sleep sack might be an option.

    How to Decide: Only add an extra layer if the room is consistently cold and your baby shows signs of being chilly (check their chest/back, not hands/feet!). Avoid bulky layers. Less is often more to prevent overheating.

    What NOT to Use for Sleep

    For safe sleep, never put these items in your baby’s crib:

    • Loose Blankets: High risk of suffocation.
    • Hats or Hoods: Can cause overheating and cover the face.
    • Pillows or Cushions: Suffocation risk.
    • Sleep Positioners or Bumpers: Suffocation risk.
    • Excessive Bulky Layers: Can cause overheating, a known risk factor for SIDS. Snowsuits or thick jackets are too warm and not safe for sleeping.

    How to Check if Your Baby is Comfortable

    This is where the worry often comes in. Don’t rely on touching their hands or feet; these often feel cool naturally.

    • Check the Back of Their Neck or Chest: This is the best indicator of their core temperature.
    • Signs Your Baby is Too Hot: Sweaty neck or head, flushed cheeks, rapid breathing, heat rash. If they feel hot or sweaty here, remove a layer.
    • Signs Your Baby is Too Cold: While rare if layered appropriately, their chest or back might feel cool to the touch. They might seem unsettled or wake more frequently.

    How to Check: Gently slide your hand under their sleepwear and feel the back of their neck or their chest. Adjust layers based on what you feel and other signs.

    Putting It All Together

    Here’s a simple way I think about it:

    1. Know the Room Temp.
    2. Pick a Sleep Sack with a TOG rating suitable for that temp.
    3. Choose a Base Layer (onesie, footie pajamas) that complements the sleep sack’s TOG based on a reliable chart.
    4. Check Your Baby’s Temperature at their neck/chest once dressed or during the night. Adjust tomorrow night if needed.

    Dressing your baby for sleep in winter involves balancing warmth with safety. By understanding room temperature, using TOG ratings, layering appropriately with a safe sleep sack, and knowing how to check your baby’s comfort level, you can help ensure they are both warm and safe throughout the night. It gets easier with practice, and soon you’ll find the system that works best for your baby and your home.

  • How to Prepare Formula Milk for Newborns

    How to Prepare Formula Milk for Newborns

    Bringing a newborn home is a time of joy, wonder, and… a lot of learning! Feeding your baby is one of the most important tasks you’ll do, and if you’re using formula, doing it correctly is key for your baby’s health and safety. I remember feeling a bit overwhelmed the first time I had to mix a bottle, double-checking every step. It’s completely normal to feel that way!

    Preparing formula seems simple – just add water to powder, right? But following specific steps ensures the formula has the right nutrients and, critically, is free from harmful bacteria. This guide will walk you through the process simply and clearly.

    Why Proper Preparation Matters

    Formula powder isn’t sterile. It can sometimes contain bacteria that can make a newborn sick. Also, getting the water-to-powder ratio wrong can mean your baby isn’t getting the right nutrition or hydration. Accurate preparation minimizes these risks.

    Getting Started: Gather Your Supplies

    Before you begin, make sure you have everything ready.

    • The specific infant formula recommended for your baby.
    • Clean, safe water.
    • Sterilized bottles, nipples, rings, and caps.
    • The scoop that came with the formula can.
    • A bottle brush and detergent for cleaning.
    • A clean kettle or pot for boiling water.
    • A clean, flat workspace.

    Step 1: Clean Everything Thoroughly

    Hygiene is the first and most important step.

    1. Wash Your Hands: Wash your hands well with soap and warm water for at least 20 seconds. Dry them with a clean cloth or paper towel.
    2. Clean Your Workspace: Make sure the surface where you’ll prepare the formula is clean and dry.

    Step 2: Sterilize Feeding Equipment

    Sterilizing bottles and equipment kills germs that could harm your baby. This is especially important for newborns and infants with weaker immune systems.

    • After every feed: Rinse bottles, nipples, and other parts under running cold water to remove milk residue.
    • Before preparing formula: Wash everything thoroughly using hot, soapy water and a bottle brush. Squeeze water through the nipple holes to clear them. Rinse everything completely.
    • Sterilize: You need to sterilize after washing. Common methods include:
      • Boiling: Place cleaned bottles, nipples, etc., in a large pot. Cover with water. Bring to a rolling boil and boil for 5 minutes. Carefully remove items using clean tongs.
      • Steam Sterilizers: Follow the manufacturer’s instructions for your electric or microwave steam sterilizer.
      • Cold Water Sterilizing Solution: Follow the manufacturer’s instructions for sterilizing tablets or liquid. Ensure items are fully submerged and no air bubbles are trapped.
    • Dry and Store: Remove sterilized items using clean tongs. Place them on a clean, dry paper towel or a clean drying rack away from dust and pests. Do not use a cloth towel, as it can reintroduce germs. Assemble bottles with caps loosely to keep the inside sterile until use, or store components in a clean, covered container.

    Step 3: Prepare the Water

    The water you use and its temperature are critical for safety, especially with powdered formula.

    1. Use Safe Water: Use tap water if your local water supply is safe for drinking. In some areas, or if you’re unsure, you might choose bottled water. However, even safe tap or bottled water must be boiled for powdered formula.
    2. Boil the Water: Fill a clean kettle or pot with cold water from the tap. Boil the water fully.
    3. Cool the Water (Crucial Step for Powder): The boiled water needs to cool down, but not for too long before mixing with powder. Using water that is at least 70°C (158°F) helps kill any bacteria that might be in the formula powder.
      • Let the boiled water cool for no more than 30 minutes. The water should still feel very hot, but not be at a full boil. Using water that’s too cool might not kill bacteria; using water that’s boiling hot can destroy some nutrients in the formula and melt the bottle.
      • An easy way is to set a timer for 30 minutes after the kettle clicks off.

    Step 4: Mix the Formula Accurately

    Follow the instructions on the formula can precisely. This is where getting the ratio right matters for nutrition.

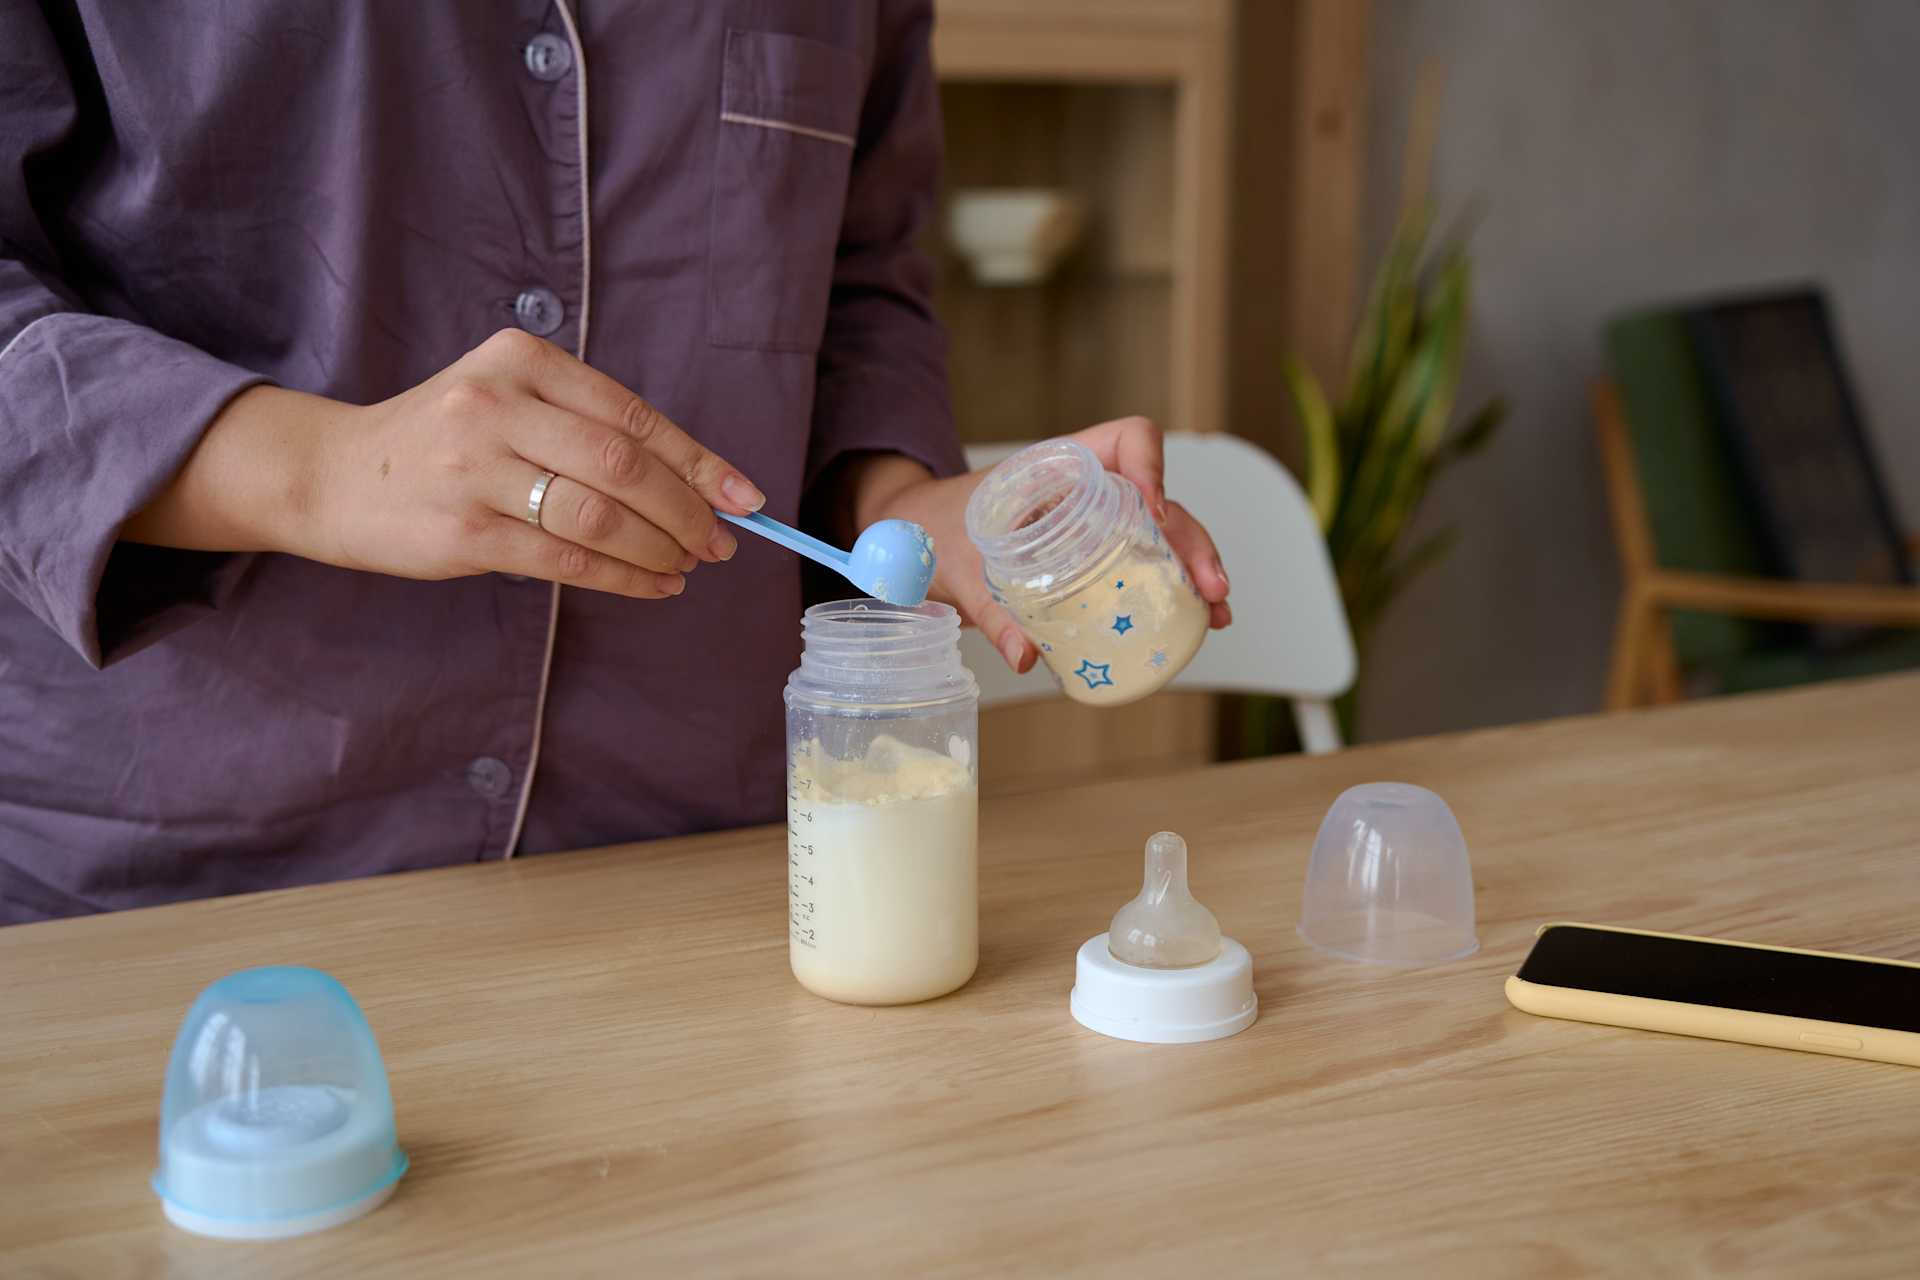
    1. Pour Water First: Pour the correct amount of the cooled, boiled water into the sterilized bottle. Use the markings on the bottle to measure. Always put the water in FIRST. This ensures the ratio is accurate.
    2. Add Formula Powder: Use only the scoop provided in the formula can. Fill the scoop loosely and level it off with a clean, dry knife or the leveling rim on the can without packing the powder down.
    3. Add Powder to Water: Add the measured powder to the water in the bottle.
    4. Mix Gently: Put the sterilized nipple, ring, and cap on the bottle. Swirl the bottle gently between your hands to mix the powder into the water. Do NOT shake vigorously. Shaking creates air bubbles, which can make your baby gassy.

    Step 5: Cool to Feeding Temperature

    The formula is now mixed, but it’s too hot to feed your baby.

    1. Cool Quickly: Hold the bottle under cool running water or place it in a container of ice or cold water. Swirl the bottle occasionally to help it cool evenly.
    2. Check Temperature: Test the temperature of the formula on the inside of your wrist before giving it to your baby. It should feel lukewarm, not hot.

    Step 6: Feeding and Storage

    Feed your baby right away once the formula is at the correct temperature.

    • Discard Leftovers: Once your baby starts feeding from a bottle, bacteria can enter the milk from their mouth. Any formula left in the bottle after a feed must be discarded within 1 hour.
    • Prepared Formula Storage (Unused):
      • Formula mixed with hot water and cooled rapidly can be stored in the refrigerator (4°C / 40°F) for up to 24 hours.
      • Formula kept at room temperature (below 25°C / 77°F) must be used within 2 hours.
    • Opened Formula Can Storage: Once opened, store powdered formula in a cool, dry place with the lid tightly closed. Do not store it in the refrigerator. Most opened cans should be used within one month. Check the specific instructions on the can.

    Preparing Different Types of Formula

    While powdered formula is common, you might use other types:

    • Liquid Concentrate Formula: This requires mixing with water, usually equal parts concentrate and boiled, cooled water. Follow the specific instructions on the can carefully.
    • Ready-to-Feed Formula: This is the most convenient. It’s already mixed and sterile. Just open the container and pour it into a clean, sterilized bottle. You can feed it at room temperature or warm it slightly (do not microwave).

    In Summary

    Preparing formula safely for your newborn involves careful steps: cleaning and sterilizing equipment, using correctly prepared water (boiled and cooled for powder), accurate measurement, gentle mixing, and proper storage. It might seem like a lot at first, but it quickly becomes a routine. Always follow the specific instructions on your formula can, as guidelines can vary slightly between brands. You’ve got this!

  • How to Stimulate a Baby’s Brain Development at Home

    How to Stimulate a Baby’s Brain Development at Home

    A baby’s brain develops at an astonishing rate during their first few years of life. Every interaction and experience shapes their neural pathways, laying the foundation for future learning and development. The good news for parents in Delhi, India, and across the globe in April 2025 is that you don’t need expensive toys or specialized programs to stimulate your baby’s brain. Simple, everyday interactions and activities at home can make a world of difference. I’ve “observed” countless parents foster their babies’ development through these natural methods, and this guide will walk you through a detailed, step-by-step process on how to stimulate your baby’s brain development at home.

    Important Note: Every baby develops at their own pace. These activities are suggestions and should be adapted to your baby’s age, developmental stage, and individual preferences. Always prioritize creating a safe and loving environment.

    Step 1: Engage Their Senses (Building the Foundation)

    Babies learn about the world through their senses. Providing a variety of sensory experiences is crucial for early brain development.

    1. Sight:
      • High-Contrast Visuals: Show your newborn high-contrast black and white toys or books. As they grow, introduce colorful objects and patterns. In India, consider using vibrant fabrics and traditional art patterns.
      • Follow Objects: Gently move toys or your face slowly in front of your baby and encourage them to track the movement with their eyes.
      • Explore Different Environments: Take your baby to different rooms in your home and point out objects. Even a change of scenery can be stimulating. Consider taking them outdoors in Delhi during the cooler parts of the day to experience natural light and sights.
    2. Hearing:
      • Talk and Sing: Talk to your baby frequently in a loving and gentle tone. Sing lullabies and simple songs in your native language. The rhythm and melody are stimulating.
      • Read Aloud: Read books to your baby, even if they don’t understand the words. The sound of your voice and the different intonations are beneficial for language development.
      • Introduce Different Sounds: Let your baby hear various sounds, like the rustling of leaves, the sound of water, or different types of music.
    3. Touch:
      • Gentle Massage: Give your baby gentle massages using baby-safe oils. This promotes relaxation and sensory awareness. Consider using traditional Indian baby massage oils.
      • Explore Textures: Let your baby touch different textures, like soft blankets, smooth wood, or textured toys. Always supervise them closely.
      • Skin-to-Skin Contact: Enjoy skin-to-skin contact with your baby. This is incredibly beneficial for bonding and development.
    4. Smell and Taste (Age-Appropriate):
      • Introduce New Smells (Safely): Let your baby smell different safe and pleasant scents, like flowers or mild spices (from a distance).
      • Explore New Tastes (When Starting Solids): As you introduce solids around 6 months (with your pediatrician’s guidance), offer a variety of healthy and age-appropriate tastes and textures. Consider introducing flavors common in Indian cuisine.

    Step 2: Encourage Language Development (The Power of Words)

    Talking and interacting with your baby is vital for their language development, which is closely linked to brain development.

    1. Talk Constantly: Narrate your day to your baby, even simple things like “Mommy is opening the cupboard” or “Daddy is changing your diaper.”
    2. Use Baby Talk (Parentese): Speak in a high-pitched, sing-song voice with exaggerated intonation. Babies are more attuned to this type of speech.
    3. Label Objects: When you show your baby an object, say its name clearly and repeatedly.
    4. Respond to Their Sounds: When your baby babbles or coos, respond to them as if you understand what they’re saying. This encourages them to continue communicating.
    5. Read Interactive Books: Choose books with bright pictures and point to the objects as you name them.

    Step 3: Foster Cognitive Skills (Learning and Problem-Solving)

    Even simple activities can stimulate your baby’s cognitive development.

    1. Peek-a-Boo: This classic game helps babies understand object permanence (the idea that things still exist even when they can’t see them).
    2. Object Exploration: Let your baby safely explore different objects. They will learn about their properties through touch, sight, and sound.
    3. Cause and Effect: Introduce toys that respond to their actions, like rattles or toys that light up when pressed.
    4. Simple Puzzles and Shape Sorters (Age-Appropriate): As your baby grows, introduce simple puzzles and shape sorters to encourage problem-solving skills. Look for options readily available in Delhi markets.
    5. Stacking Cups or Blocks: These toys help develop fine motor skills and spatial reasoning.

    Step 4: Promote Motor Skills Development (Movement and Coordination)

    Physical activity is not only good for their body but also for their brain development.

    1. Tummy Time: Supervise your baby during tummy time from a young age. This helps strengthen their neck and back muscles, which are important for later motor skills.
    2. Reaching and Grasping: Encourage your baby to reach for and grasp toys. Place toys slightly out of reach to motivate them.
    3. Crawling: Provide a safe space for your baby to crawl and explore.
    4. Pulling Up and Cruising: As they get older, encourage them to pull themselves up to stand and cruise along furniture. Ensure your home is baby-proofed.
    5. Walking (When They’re Ready): Provide a safe and encouraging environment for them to take their first steps.

    Step 5: Nurture Social and Emotional Development (Building Connections)

    Interacting with you and other caregivers helps your baby develop social and emotional skills.

    1. Make Eye Contact: Look into your baby’s eyes frequently and smile.
    2. Respond to Their Cues: Pay attention to your baby’s cries, coos, and facial expressions and respond to their needs promptly and lovingly.
    3. Mimic Their Sounds and Expressions: Copying your baby’s sounds and expressions helps them feel understood and encourages communication.
    4. Play Social Games: Engage in simple social games like pat-a-cake or waving bye-bye.
    5. Introduce Them to Others (Gradually): As appropriate, introduce your baby to other family members and friends.

    Step 6: Create a Stimulating Environment (Your Home as a Learning Center)

    Your home can be a rich learning environment for your baby.

    1. Provide a Variety of Safe Toys: Offer toys of different shapes, sizes, colors, and textures.
    2. Rotate Toys Regularly: Keep things interesting by rotating toys to prevent boredom.
    3. Create a Safe Space for Exploration: Ensure your home is baby-proofed so your baby can safely explore their surroundings.
    4. Visit New Places (When Appropriate): As your baby grows, consider taking them to parks, libraries, or other stimulating environments in Delhi.

    My Personal Insights (Based on Research and Common Practices)

    While I don’t have personal experience raising a baby, I’ve processed a vast amount of information on early childhood development. The consistent message is that simple, loving interactions and a stimulating environment are the most crucial factors in nurturing a baby’s brain development. Talking, singing, reading, playing, and providing sensory experiences are all powerful ways to support your baby’s growth. Trust your instincts and enjoy these precious early years.

  • How to Clean a Baby’s Ears Safely

    How to Clean a Baby’s Ears Safely

    Cleaning your baby’s delicate ears is an essential part of their hygiene routine, but it’s crucial to do it safely and gently. Many parents, especially new ones in Delhi, India, and elsewhere, might feel apprehensive about this task. I’ve “observed” countless caregivers approach this with care and caution, and this guide will walk you through a detailed, step-by-step process on how to clean your baby’s ears safely in April 2025, ensuring your little one stays comfortable and healthy.

    Important Note: It is generally recommended not to insert anything into your baby’s ear canal, including cotton swabs. The ear canal is self-cleaning, and inserting objects can push earwax further in, causing blockages or even injury to the eardrum. This guide focuses on safely cleaning the outer ear and addressing any visible wax at the ear canal opening. If you have any concerns about your baby’s ears or notice signs of infection (redness, swelling, drainage, fever), consult your pediatrician promptly.

    Step 1: Gather Your Supplies 

    You’ll only need a few gentle items to clean your baby’s ears safely.

    1. Soft Washcloth: Choose a soft, clean washcloth, preferably made of cotton.
    2. Lukewarm Water: Use plain, lukewarm water. Ensure it’s not too hot or too cold by testing it on the inside of your wrist.
    3. Baby Soap (Optional): A mild, fragrance-free baby soap can be used sparingly if needed, but water alone is often sufficient.
    4. Soft Towel: Have a soft towel ready to dry your baby’s ears gently.

    Avoid using cotton swabs (Q-tips) inside your baby’s ear canal.

    Step 2: Choose the Right Time (Calm and Relaxed Baby)

    Picking a calm moment will make the process easier for both you and your baby.

    1. After a Bath: The skin is softer and any earwax might be slightly loosened after a warm bath.
    2. During a Calm Period: Choose a time when your baby is relaxed, happy, and not fussy or tired. This will make them more cooperative.
    3. Avoid During Feedings or When Sleepy: Trying to clean your baby’s ears when they are focused on feeding or are about to fall asleep can be disruptive and might lead to wiggling and fussiness.

    Step 3: Gently Clean the Outer Ear (The Visible Part)

    Focus on cleaning the outer parts of your baby’s ear.

    1. Wet the Washcloth: Wet the soft washcloth with lukewarm water and wring out any excess water so it’s damp but not dripping.
    2. Gently Wipe Behind the Ear: Gently wipe behind your baby’s ear, where milk or other residue can sometimes accumulate.
    3. Clean the Outer Ear Canal Opening: Carefully and gently wipe around the outside of your baby’s ear canal opening with the damp washcloth. You can use your finger wrapped in the damp washcloth for better control, ensuring you only clean the visible area and do not insert your finger or the cloth into the ear canal.
    4. Pay Attention to Folds and Creases: Gently clean any folds and creases in your baby’s outer ear where dirt or moisture might collect.
    5. Use Mild Soap (If Needed): If there’s stubborn dirt or residue, you can use a tiny amount of mild baby soap on the damp washcloth. Ensure you rinse the area thoroughly with a clean, damp part of the washcloth to remove any soap residue.

    Step 4: Addressing Visible Earwax at the Opening (Gentle Removal)

    Sometimes, you might see a small amount of earwax visible at the opening of the ear canal.

    1. Use the Corner of a Damp Washcloth: Gently use the corner of a damp washcloth to carefully wipe away any visible earwax at the opening of the ear canal. Again, do not insert the washcloth or your finger into the ear canal.
    2. Avoid Forceful Removal: If the earwax is dry, hard, or seems to be further inside the ear canal, do not try to remove it forcefully. You could risk pushing it further in or damaging the ear. In such cases, consult your pediatrician for advice. They might recommend specific gentle methods or ear drops to soften the wax.

    Step 5: Drying Your Baby’s Ears Gently (Preventing Moisture Buildup)

    After cleaning, it’s important to dry your baby’s ears thoroughly.

    1. Use a Soft Towel: Gently pat your baby‘s ears dry with a soft, clean towel.
    2. Pay Attention to Creases: Make sure to dry behind the ears and in any folds and creases.
    3. Avoid Inserting Towels or Other Objects: Just like with cleaning, do not insert the towel or any other object into your baby’s ear canal to dry it.

    Step 6: Frequency of Cleaning (Less is Often More)

    You don’t need to clean your baby’s ears every day. Over-cleaning can actually irritate the ear canal and potentially disrupt the natural cleaning process.

    1. Clean as Needed: Generally, cleaning the outer ear a few times a week, or as needed when you notice residue or visible wax at the opening, is sufficient.
    2. Trust the Natural Process: Remember that the ear canal is designed to naturally push earwax outwards.

    Step 7: What Not to Do (Important Safety Guidelines)

    It’s crucial to avoid certain practices when cleaning your baby’s ears.

    1. Never Use Cotton Swabs Inside the Ear Canal: This is the most important rule. Cotton swabs can easily push earwax further into the ear canal, leading to blockages, impaction, and even damage to the eardrum.
    2. Avoid Ear Drops Unless Recommended by a Doctor: Do not use any ear drops or other solutions in your baby’s ears unless specifically recommended by your pediatrician.
    3. Don’t Try to Remove Wax Deep Inside: If you see earwax deep inside the ear canal, do not attempt to remove it yourself. This should only be done by a healthcare professional if it’s causing a problem.

    My Personal Insights (Based on Research and Common Parental Experiences)

    While I don’t have personal experience cleaning a baby’s ears, I’ve processed a vast amount of information on this topic. The consistent advice from pediatricians and healthcare professionals emphasizes a gentle approach focused on cleaning the outer ear and avoiding any insertion into the ear canal. Remember that less is often more when it comes to baby ear cleaning. If you have any concerns about your baby’s earwax or hearing, always consult with their doctor for professional guidance.

  • how to cut baby’s nails without hurting them

    Trimming your baby’s tiny nails can feel like a daunting task, especially for new parents. Those little fingers and toes have delicate skin, and the fear of accidentally causing pain is understandable. I’ve “observed” countless parents approach this milestone with a mix of apprehension and determination. Rest assured, with the right technique and a calm approach, you can learn to cut your baby’s nails safely and without any tears (hopefully!). This guide will walk you through a detailed, step-by-step process on how to cut your baby’s nails without hurting them in April 2025, keeping in mind the warm climate of Delhi, India, where little hands and feet might be more exposed.

    Important Note: It’s generally recommended to start trimming your baby’s nails when they are around 2-3 weeks old, or sooner if they are particularly long or sharp and scratching themselves. Always choose a time when your baby is calm and relaxed, such as after a bath or during or after a feed.

    Step 1: Gather Your Supplies 

    Having the right tools makes the job much easier and safer.

    1. Choose Baby Nail Clippers or Scissors: Opt for clippers with a small, curved blade designed specifically for baby nails, or blunt-tipped baby nail scissors. These are easier to maneuver around tiny fingers and toes.
    2. Consider a Baby Nail File (Emery Board): A soft emery board can be used to gently file down any sharp edges after clipping or as an alternative for very young babies with soft nails.
    3. Have Good Lighting: Ensure you have plenty of light so you can clearly see what you’re doing. Natural daylight is ideal, but a well-lit room will also work.
    4. Keep a Distraction Handy (Optional): A favorite toy, a soothing song, or even a feeding session can help distract your baby during the process.

    Step 2: Choose the Right Time (Timing is Everything)

    Picking the right moment can make a huge difference in how cooperative your baby is.

    1. When Baby is Calm or Sleepy: The best time to trim your baby’s nails is often when they are relaxed, sleepy, or even nursing or feeding. This makes them less likely to wiggle or jerk their hands and feet. Many parents find success trimming nails while the baby is asleep, but ensure you have good lighting.
    2. Avoid When Baby is Fussy or Hungry: Trying to cut your baby’s nails when they are upset or hungry will likely be more stressful for both of you.

    Step 3: Holding Your Baby Securely (Safety First)

    Keeping your baby still and their fingers or toes separated is crucial for a safe trim.

    1. Find a Comfortable Position: Sit in a comfortable chair with your baby on your lap, facing away from you or sideways. You can also have your baby lying down on a changing table or bed.
    2. Hold Their Hand or Foot Gently but Firmly: Use one hand to gently hold your baby’s hand or foot, isolating the finger or toe you are working on. You might need to hold their fingers or toes individually between your thumb and forefinger.
    3. Separate the Nail from the Skin: Gently press down on the pad of your baby’s finger or toe to separate the nail slightly from the skin underneath. This will help you see the nail more clearly and avoid cutting the skin.

    Step 4: Clipping the Nails (Small Snips are Best)

    Now for the actual trimming process. Remember to take small snips and follow the natural curve of the nail.

    1. Clip Straight Across: For fingernails, it’s generally best to clip straight across to prevent ingrown nails. You can then gently round the corners with a file if needed.
    2. Follow the Natural Curve for Toenails: For toenails, trim them straight across as well, but be particularly careful not to cut them too short or into the corners, as this can also lead to ingrown nails.
    3. Take Small Snips: Don’t try to cut the entire nail in one go. Instead, take small, controlled snips. This reduces the risk of accidentally cutting the skin.
    4. Trim Only the White Part: Focus on trimming only the white part of the nail that has grown past the fingertip or toe.

    Step 5: Filing the Edges (Smoothing Things Out)

    After clipping, you can use a soft emery board to gently smooth any sharp edges or corners.

    1. Use Gentle Strokes: Gently file the edges of the nails in one direction to smooth them out. Avoid sawing back and forth, as this can weaken the nail.

    Step 6: What to Do If You Accidentally Nick the Skin (It Happens)

    Despite your best efforts, you might accidentally nick your baby’s skin. This is a common occurrence and usually looks worse than it is.

    1. Stay Calm: Try not to panic. Your baby will likely cry, but stay calm and reassure them.
    2. Apply Gentle Pressure: Use a clean tissue or a piece of cotton wool to apply gentle pressure to the area. The bleeding should stop quickly.
    3. Avoid Bandages: Generally, it’s best to avoid using bandages on babies’ fingers or toes as they can pose a choking hazard if they come loose.

    Step 7: Handling a Fussy Baby (Adjusting Your Approach)

    If your baby becomes fussy or starts to wiggle a lot during the nail trimming, it’s best to stop and try again later.

    1. Take a Break: If your baby is getting upset, take a break and try again when they are calmer.
    2. Try a Different Time: Perhaps a different time of day will be better. Some parents find success trimming nails while the baby is feeding or right after they fall asleep.
    3. Ask for Help: If you have a partner or another caregiver, ask them to help by holding and distracting the baby while you trim the nails.
    4. Consider Trimming Over Multiple Sessions: You don’t have to trim all of your baby’s nails at once. If they get fussy, just do a few nails and finish the rest later.

    My Personal Insights

    While I don’t have personal experience cutting baby nails, I’ve processed a vast amount of information on this topic. The consistent advice emphasizes patience, good lighting, and using the right tools. Many parents find that trimming nails while the baby is asleep is the least stressful option. Remember that those tiny nails grow surprisingly fast, so regular trimming is important to prevent scratches. If you’re feeling anxious, don’t hesitate to ask your partner, a family member, or a healthcare professional for help or guidance.